
Blooming
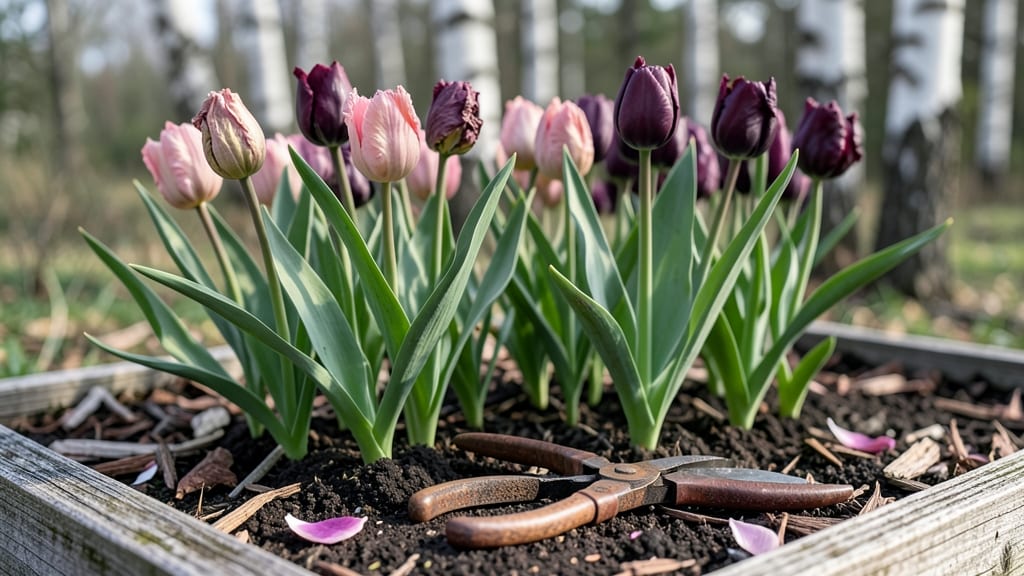
Proper tulip care after bloom isn’t just about cutting back—it’s letting those strappy leaves feed the bulb underground for 6-8 weeks after flowering, so your tulips return bigger and brighter next year. ✨ Most gardeners rush to clean up, but patience here means bigger, more reliable blooms for years.
Start by snipping off the faded blooms (deadheading) right after they wilt, but leave the foliage alone unless it turns yellow or brown. The leaves are solar panels, converting sunlight into energy stored in the bulb.
If you must trim, wait until they’re halfway brown—never sooner. This simple habit turns one-time flowers into perennial stars in your garden.
After the leaves die back naturally, give the soil a light feeding with 5-10-10 fertilizer or compost. A 2-inch layer of mulch in fall keeps bulbs cozy and moisture-retentive.
By next spring, you’ll have tulips so vigorous they’ll outshine last year’s display—and you’ll finally understand why so many gardeners swear by this trick.
Bonus tip: Plant daffodils nearby to deter squirrels and tulip-eating pests. The combination creates a low-maintenance, high-impact display that keeps coming back. No fancy tools or expensive soil mixes required—just time and a little restraint with those shears.
📚 In This Guide
- What you need
- Instructions
- Tips and common mistakes
- Wrapping up and next steps
What you need
- ● Pruning shears or sharp scissors – Clean and sharp to avoid damaging stems.
- ● Well-draining potting mix or garden soil – For repotting or enriching the soil (aim for loamy, slightly acidic soil, pH 6.0–7.0).
- ● Balanced, slow-release fertilizer (10-10-10 or similar) – 1–2 tbsp per plant for established bulbs.
- ● Compost or aged manure – 1 cup per plant to replenish nutrients.
- ● Mulch (straw, wood chips, or shredded leaves) – 2–3 inches thick to retain moisture and regulate temperature.
- ● Watering can with a fine rose nozzle – For gentle, deep watering (avoid soaking the bulbs).
- ● Garden gloves – Protect your hands from thorns and soil.
- ● Bulb fertilizer (high in phosphorus, like 5-10-10) – Boosts next year’s blooms.
- ● Epsom salt (magnesium sulfate) – 1 tbsp per gallon of water for yellowing leaves (magnesium deficiency).
- ● Fungicide (copper-based or neem oil) – If tulips show signs of botrytis blight or mold.
- ● Bulb storage container (mesh bag or cardboard box) – For digging and drying bulbs if you’re lifting them.
- ● pH testing kit – To check soil acidity before replanting bulbs.
Simple steps to keep your tulips thriving after the showy bloom
Here's how to transform your post-bloom tulips into next year's star performers with minimal effort.
✂️ Step 1: Deadhead Properly to Preserve Energy
Cut the flower stalk down to just above the first set of leaves using clean, sharp pruners. This prevents the plant from wasting energy on seed production while still allowing the leaves to photosynthesize. I always make the cut at a 45-degree angle—this small detail helps water run off instead of pooling at the stem base.
Never remove the entire stem down to the bulb. The leaves are working hard to store nutrients for next year's bloom, and you'll know they're doing their job when they turn a deep, vibrant green. If you notice any brown or yellow leaves at this stage, snip them off immediately—they're leeching energy from the healthy foliage.
💧 Step 2: Water Strategically During Leaf Maturation
Keep the soil consistently moist but never soggy for the next 6-8 weeks after blooming. This is when the leaves are converting sunlight into carbohydrates that get stored in the bulb for next spring. I check moisture by sticking my finger 1-2 inches deep—if it feels dry, that's your cue to water.
Overwatering now can rot the bulb before it's had a chance to store enough reserves. I've seen gardeners drown their tulips at this stage, thinking they needed more water. Instead, focus on deep, infrequent watering that encourages strong root development. A good rule of thumb: water when the top 1-2 inches of soil feel dry to the touch.
🌱 Step 3: Let Foliage Yellow Naturally Before Removal
Resist the urge to cut back the leaves until they've turned completely yellow and withered on their own. This process—called "leaf senescence"—takes about 8-10 weeks total after blooming. The yellowing leaves are the plant's last chance to transfer nutrients back into the bulb.
If you cut the foliage too soon, your tulips will bloom weakly or not at all next year. I mark the day each tulip blooms with a small stake so I can track when to start watching for yellowing. When about 50% of the leaves have turned yellow, I'll start checking weekly for complete withering.
☀️ Step 4: Provide Consistent Light for Bulb Strength
Tulips need 6+ hours of sunlight daily even after blooming to maintain strong bulb development. If your tulips are in a shadier spot, they'll still bloom but may produce smaller flowers and weaker foliage. I've noticed that tulips in partial shade often take longer to recover between bloom cycles.
If you're dealing with leggy growth or stems reaching toward the light, it's time to rotate the plants a quarter turn every few days. This ensures even growth and prevents the bulbs from developing unevenly. The goal is to keep the foliage upright and healthy-looking until it naturally yellows.
🪴 Step 5: Fertilize Lightly for Next Season's Growth
Apply a balanced, low-nitrogen fertilizer (like 10-10-10) about 4-6 weeks after blooming when the leaves are still green and active. This gives the bulbs a final nutrient boost before they enter dormancy. I use about ½ teaspoon per plant worked into the top inch of soil.
Avoid high-nitrogen fertilizers at this stage—they encourage leafy growth at the expense of bulb development. The key is to support the roots and bulb without stimulating new flower stalks. After fertilizing, water thoroughly to help the nutrients penetrate the soil.
Tips & tricks for perfect post-bloom tulip care
These simple yet game-changing tricks will help your tulips store enough energy for next year's spectacular show.
Pruning Precision: When deadheading in Step 1, use clean pruners to avoid damaging the stem. I've learned the hard way that dirty tools can introduce pathogens—sterilize your pruners with rubbing alcohol between cuts. The 45-degree angle isn't just for looks; it creates a larger surface area for water runoff, preventing fungal diseases that often attack tulips after blooming.
Moisture Monitoring: During the critical 6-8 week leaf maturation period in Step 2, I've found that morning watering works best. Watering in the morning gives the soil time to dry slightly during the day, reducing the risk of fungal issues. Use a moisture meter if you're unsure—aim for soil that feels like a damp sponge at the 1-2 inch depth mentioned in the instructions.
Light Management: For tulips in partial shade (Step 4), consider supplementing with a grow light for 2-3 hours daily if you notice weak growth. I've seen tulips in north-facing gardens benefit from this extra light boost. The quarter-turn rotation every few days is crucial—it prevents the plants from growing lopsided as they stretch toward available light.
Fertilizer Timing: When applying the ½ teaspoon of balanced fertilizer in Step 5, work it into the soil when it's slightly moist—not bone dry. This helps the nutrients dissolve and reach the roots more effectively. I've noticed that fertilizing right after watering (as mentioned) gives the bulbs an immediate nutrient boost without shocking the plant.
Pro Tips for Tulip Care After Bloom
- These simple yet game-changing tricks will help your tulips store enough energy for next year's spectacular show.
- Pruning Precision: When deadheading in Step 1, use clean pruners to avoid damaging the stem.
- Moisture Monitoring: During the critical 6-8 week leaf maturation period in Step 2, I've found that morning watering works best.
Frequently asked questions
Got questions about keeping your tulips happy after their big bloom? You’re not alone! Here are some of the most common concerns—and straightforward answers—to help you care for your tulips like a pro.
What should I do with tulip bulbs after the flowers die back?
Once the blooms fade and the foliage yellows, don’t cut it back yet! Let the leaves die back naturally (about 6–8 weeks) to allow the bulb to store energy for next year. Afterward, you can trim the dead foliage and remove spent blooms to keep the garden tidy.
How long do tulip bulbs last in the ground?
With proper care, tulip bulbs can thrive for 3–5 years in the ground. Over time, they may produce fewer blooms, but you can rejuvenate them by dividing and replanting bulbs every few years. Mulching in winter also helps extend their lifespan!
Can I cut back tulip leaves before they turn brown?
Yes, but only after they’ve fully yellowed and died back. Cutting leaves too soon robs the bulb of nutrients, weakening it for next year. If you must tidy up early, leave at least half the foliage intact until it’s completely brown.
Will tulips come back every year if I don’t dig them up?
Many tulip varieties are perennial and will return yearly if planted in well-draining soil and given full sun. However, some hybrid tulips (like Darwin or species tulips) are more reliable for repeat blooms. For best results, dig and divide bulbs every 3–4 years.
Why are my tulip bulbs not blooming this year?
No blooms? Check these common culprits:
- Too much shade—tulips need 6+ hours of sun daily.
- Overcrowded bulbs—divide bulbs if they haven’t bloomed in 2+ years.
- Poor drainage—soggy soil can rot bulbs.
- Lack of nutrients—fertilize in early spring with bulb-specific food.
Wrapping up and next steps
Caring for your tulips after they bloom doesn’t have to be complicated—just follow these simple steps to help them thrive next season! With a little patience and the right techniques, you’ll enjoy vibrant blooms year after year.
Now that you’re armed with the know-how, why not share your tulip-growing journey with fellow gardeners or experiment with new varieties? Happy gardening! 🌸✨