
How To
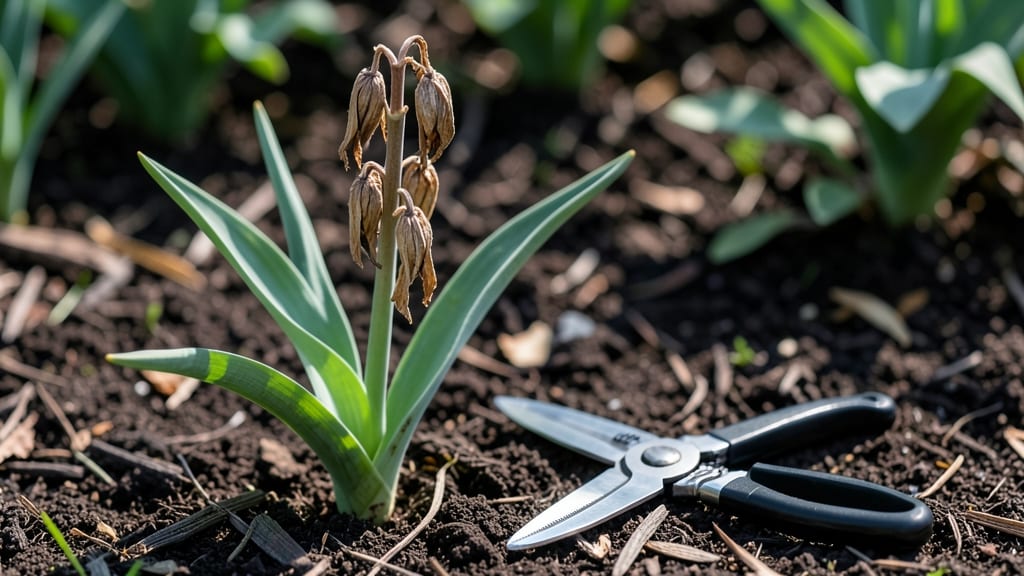
After those stunning tulip blooms fade, taking care of tulips after blooming isn’t just about cleanup—it’s how you guarantee next spring’s showstopper display. 🌷 I’ve learned the hard way that skipping this step means fewer (or no!) flowers the following year, but the right moves turn last year’s blooms into next year’s stars.
The secret lies in three simple steps: deadheading properly (not just snipping the flower!), feeding the bulbs just right, and letting the foliage die back naturally. Most gardeners mess up the timing—especially the foliage part—but patience here pays off with stronger bulbs and bigger blooms.
Think of it like giving your tulips a spa day after their big debut.
By summer’s end, you’ll have bulbs stocked with energy for next spring, ready to push through the soil with bold, vibrant blooms again. The key is consistency: no overwatering, no early fertilizer, and definitely no cutting those leaves too soon.
Trust me, your future self will thank you when tulips erupt earlier and more dramatically than ever.
This method works for both new and established gardens, whether you’ve got a single pot or a whole border. The only tools you need are pruners, a little patience, and a reminder to resist the urge to tidy up too soon. Let’s make next spring your best yet!
📚 In This Guide
- What you need
- Instructions
- Tips and common mistakes
- Wrapping up and next steps
What you need
- ● Pruning shears or sharp garden scissors – 1 pair (sterilized with rubbing alcohol or a 10% bleach solution to prevent disease spread). Look for bypass pruners for clean cuts.
- ○ Gloves (optional but recommended) – 1 pair (gardening gloves to protect hands from dirt, thorns, or sap). Choose nitrile-coated gloves for durability.
- ● Compost bin or garden waste bag – For disposing of spent blooms and foliage. A 10-gallon bin or heavy-duty trash bag works well.
- ● Balanced, slow-release fertilizer – 1 bag (10-10-10 or 5-10-10 NPK ratio). Aim for organic options like bone meal or composted manure for long-term soil health.
- ○ Watering can or hose with a gentle spray nozzle – For deep watering (1–2 gallons per plant, depending on soil dryness). A soaker hose is a great optional upgrade!
- ○ Mulch (optional but beneficial) – 2–3 inches of organic mulch (straw, shredded leaves, or bark). Avoid plastic mulch—it can suffocate roots.
- ● Know your tulip variety – Some tulips (like species tulips) are perennial and will rebloom with proper care, while others (like hybrid tulips) may need annual division.
- ● Check soil moisture – Tulips prefer well-draining soil. If your garden retains too much water, amend with sand or perlite before fertilizing.
- ● Patience for foliage – Never remove all the leaves! Let 60% of the foliage die back naturally to feed the bulb for next year.
Step-by-Step instructions for reviving tulips after blooming
Here's how I nurse tulips back to strength for another stunning spring show.
✂️ Step 1: Deadhead Properly for Stronger Bulbs
Once your tulips finish blooming and the petals start wilting, snip the flower stem just above the top leaf—never at the base. This prevents the bulb from redirecting energy to seed production and lets it store nutrients for next year. I always use clean, sharp pruners to avoid damaging the stem.
Watch for the first sign of petal droop—that's your cue to act. If you wait too long, the stem becomes woody and harder to cut cleanly. Remove any remaining flower stalks that haven't been cut yet, but leave the foliage intact for now.
🌿 Step 2: Leave Foliage Until It Fully Yellows
This is where most gardeners mess up—don't cut the leaves! The foliage needs 6-8 weeks to turn completely yellow and wither naturally. During this time, the leaves photosynthesize and send vital nutrients back into the bulb, building its strength for next spring.
If your tulips are in a shady spot, the foliage might take longer to yellow. I check weekly and wait until at least 50% of the leaves have turned yellow before considering any trimming. The goal is to let the bulb recharge fully.
💧 Step 3: Water Consistently Until Foliage Dies Back
Keep the soil evenly moist but not soggy during the foliage's final growth phase. Water deeply once a week if rainfall is light, focusing on the base of the plant. Overwatering now can rot the bulbs, but underwatering starves them of the nutrients they need to store.
You'll know you're doing it right when the soil feels damp 2 inches down after watering. Stop watering completely once the foliage has turned completely yellow and collapsed on its own—this signals the bulb is dormant and ready for summer rest.
☀️ Step 4: Provide Light and Airflow for Bulb Health
After the foliage dies back, move tulips to a spot with bright, indirect light—they don't need full sun now, but they still need light to stay healthy. I often leave mine where they are but remove any nearby plants that might block airflow, as good circulation prevents fungal issues.
If your tulips are in a container, consider moving them to a shaded patio or garage during the hottest summer months. Bulbs can overheat in direct sun, which weakens them. Just keep them in a spot that stays between 60-80°F—no cooler than 50°F.
⏰ Step 5: Prepare for Next Year's Blooms
In late summer or early fall, 4-6 weeks before your first frost, fertilize the soil with a low-nitrogen, high-phosphorus bulb food (like 5-10-10). This gives the bulbs a phosphorus boost to encourage strong root and flower development next year. Water lightly after applying to help it soak in.
If you notice any browned or mushy bulbs when digging, remove them immediately to prevent disease spread. Healthy bulbs should feel firm and plump. With proper care now, your tulips will reward you with even bigger, more vibrant blooms next spring.
Tips & tricks for perfect post-bloom tulip care
Here's what nobody tells you about keeping tulips thriving after their big show.
Precision Deadheading: When you're ready to snip those spent blooms in Step 1, make your cut just above the top leaf where the stem meets the foliage. This tiny detail keeps nutrients flowing back to the bulb instead of wasting energy on seed production. I've seen gardeners cut too low—don't make that mistake! The goal is to preserve that leaf junction where the magic happens.
Leaf Monitoring Secret: During those critical 6-8 weeks in Step 2, I've learned to check my tulips weekly using this simple test: gently tug on the leaves. If they resist and don't pull away easily, they're still working. If they come away cleanly, you've waited too long. This visual cue helps me avoid the common mistake of cutting leaves too soon while still catching any that might be dying prematurely.
Watering Wisdom: The "evenly moist but not soggy" rule in Step 3 is crucial, but here's the extra detail: water in the morning so excess moisture can evaporate during the day. I've noticed tulips in containers dry out faster than in-ground plants, so I check container soil daily during hot weather. The 2-inch dampness test works perfectly—just stick your finger in and feel for moisture at that depth.
Summer Temperature Strategy: That 60-80°F range in Step 4 isn't just arbitrary—it's the perfect balance for bulb dormancy. I've found that moving potted tulips to a shaded garage during summer heat waves prevents bulb stress. Just avoid temperatures below 50°F, which can shock the bulbs. A simple thermometer in your storage area gives you peace of mind.
Pro Tips for Take Care Of Tulips After Blooming
- Here's what nobody tells you about keeping tulips thriving after their big show.
- Precision Deadheading: When you're ready to snip those spent blooms in Step 1, make your cut just above the top leaf where the stem meets the foliage.
- Leaf Monitoring Secret: During those critical 6-8 weeks in Step 2, I've learned to check my tulips weekly using this simple test: gently tug on the leaves.
Frequently asked questions
Got questions about post-bloom tulip care?
You’re not alone! Here are some of the most common queries—and straightforward answers—to help your tulips thrive for years to come.
Should I cut tulips after they bloom, or leave them?
Always deadhead (remove spent blooms) to redirect energy to the bulb for next year. But leave the foliage—it’s how the bulb stores nutrients! Snip just above the top set of leaves to keep things tidy without harming the plant.
How long after blooming can I cut tulip flowers?
Trim blooms immediately after they fade (usually 1–2 weeks post-bloom). Wait too long, and the bulb may weaken. For cut flowers, harvest when buds are half-open—they’ll last longer in a vase!
What if my tulip leaves turn yellow after blooming?
Yellowing leaves are normal if they’re brown at the tips first. But if the whole leaf yellows early (before wilting), your bulb might be stressed. Check for pests, overwatering, or poor drainage. Reduce watering and let leaves die back naturally.
Can I fertilize tulips after they bloom?
Yes! Apply a balanced, low-nitrogen fertilizer (like 5-10-10) after deadheading but before leaves yellow fully. Avoid high-nitrogen feeds—it encourages foliage over bulb storage. A light feeding in early summer boosts next year’s blooms!
What if my tulips don’t bloom next year?
No blooms often mean the bulb needs rest. Ensure 6+ weeks of foliage after blooming, and plant in full sun with well-draining soil. Overcrowded bulbs or poor care can also stunt flowers. Dig up and divide bulbs every 3–4 years for a fresh start.
Wrapping up and next steps
Taking care of tulips after they bloom doesn’t have to be complicated—just follow a few simple steps to ensure their return next year! With proper deadheading, fertilizing, and soil care, you’ll set the stage for a stunning comeback.
Remember, patience and consistency are key—your garden will thank you with vibrant blooms season after season.
Ready to level up your tulip care game? 🌱 Start by marking your calendar for next spring and repeat these steps to keep your tulips thriving. Happy gardening!