
Blooming
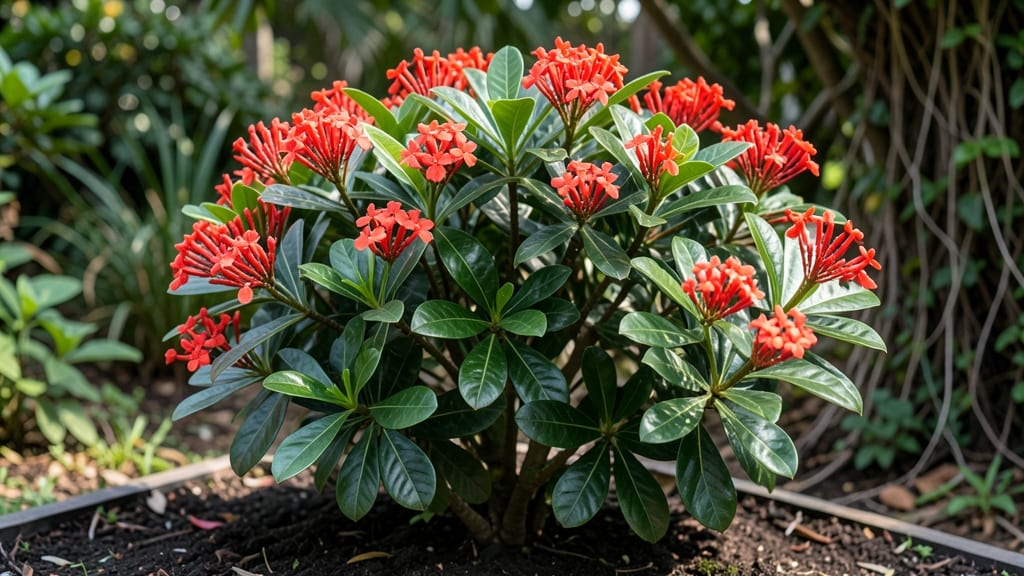
Creating a year-round blooming tropical bush starts with the right plant and conditions—no gardening degree required. ✨ I’ve turned my balcony into a vibrant oasis by mastering just three key elements: soil that drains like a dream, sunlight that mimics their native climate, and a watering routine that keeps roots happy without drowning them.
The payoff? Flowers that last from spring through frost, with minimal effort after the initial setup.
Your tropical bush thrives when you treat it like it’s still in its native jungle—just without the humidity extremes. Well-draining soil with added perlite or sand prevents root rot, while morning sun and afternoon shade keep leaves from scorching.
Water when the top inch feels dry, and you’ll avoid the most common killer: soggy roots. Varieties like hibiscus and bougainvillea reward this care with bold blooms that turn heads and attract hummingbirds.
The secret to vibrant, continuous blooms lies in pruning at the right time—after flowers fade, not before. A light trim encourages bushier growth, while fertilizing every six weeks with a balanced tropical blend keeps energy flowing to flowers instead of leaves.
Even in cooler months, these plants stay productive if you protect them from frost and adjust watering slightly.
This method works for containers or in-ground plantings, whether you’re in a warm climate or a cooler zone with seasonal adjustments. Start with one bush to perfect the routine, then expand—your garden will thank you with color that never quits. Let’s get those roots settled and those blooms popping!
📚 In This Guide
- What you need
- Instructions
- Tips and common mistakes
- Wrapping up and next steps
What you need
- ● Tropical Bush Plant: 1 Ixora (Jasmine), Plumeria, or Hibiscus (choose based on your climate zone—zones 9-11 for best results).
- ○ Optional: Pre-potted plant (3-5 gallons) for instant vibrancy.
- ● Well-Draining Soil: 50% cactus/succulent mix or pearlite (for aeration).
- ● 50% garden soil or compost (for nutrients).
- ● Container or In-Ground Spot: Container: 15-20 gallon pot with drainage holes (terracotta or fiberglass).
- ● In-Ground: Full sun location (6+ hours/day) with loose, sandy soil.
- ● Fertilizer: 1 balanced liquid fertilizer (10-10-10) or slow-release granules (follow label instructions).
- ● Basic Gardening Tools: 1 trowel (for planting/transplanting).
- ● 1 pruning shears (sterilized with rubbing alcohol).
- ○ 1 gloves (optional, for thorny varieties like Hibiscus).
- ● Watering Supplies: 1 hose with adjustable nozzle or watering can (for deep soaking).
- ○ Optional: Drip irrigation kit for automated care.
- ● Mulch: 2-3 inches of pine bark or coconut coir (retains moisture, deters weeds).
- ● Climate Check: Verify your USDA Hardiness Zone (zones 9-11 ideal; zones 8 or below need winter protection).
- ● 1 humidity tray (for indoor or dry climates).
- ● 1 pH testing kit (aim for 6.0-7.0 soil pH).
- ● 1 slow-release fertilizer spikes (for hassle-free feeding).
- ● Decorative rocks or pebbles (for a polished, tropical look).
Step-by-Step instructions for creating a lush tropical bush display
Here’s how to craft a vibrant tropical bush that thrives year-round with minimal fuss.
🌱 Step 1: Select the Right Tropical Plants
Choose four hardy tropical plants that complement each other in size and color. I like pairing a hibiscus (for bold blooms), a plumeria (for fragrant flowers), a bougainvillea (for cascading color), and a bird of paradise (for striking foliage). All four need full sun—at least 6-8 hours daily—so pick a spot where they’ll get plenty of warmth.
Check the mature height of each plant—aim for a mix of 3-6 feet so they create a layered, full look. If you’re using containers, ensure each pot has drainage holes and is at least 12 inches wide to accommodate root growth. Group them close together to mimic their natural tropical habitat.
🪴 Step 2: Prepare Soil and Planting Containers
Use a well-draining potting mix blended with 20% perlite or orchid bark to prevent root rot. Tropical plants hate soggy soil, so avoid garden soil—it compacts and suffocates roots. Fill each container ¾ full with the mix, leaving room for roots to expand.
If planting directly in the ground, amend the soil with 3 inches of compost and 1 inch of coarse sand to improve drainage. Dig holes twice as wide as each plant’s root ball but only as deep as the container it came in. This keeps the roots level and encourages upward growth.
☀️ Step 3: Plant and Water for Immediate Establishment
Remove each plant from its container and gently loosen the roots if they’re circling. Place it in the hole or pot, then backfill with soil, pressing lightly to eliminate air pockets. Water deeply right after planting—this settles the soil and helps roots make contact with moisture.
Use lukewarm water (cold water shocks tropical plants) and water until it drains freely from the bottom. After planting, mulch the surface with 1-2 inches of wood chips to retain moisture and regulate soil temperature. Avoid mulching too close to the stems—keep it 2 inches away to prevent rot.
💧 Step 4: Maintain Consistent Care for Year-Round Blooms
Water when the top 1-2 inches of soil feel dry—usually every 2-3 days in summer, but reduce to once a week in winter. Tropical plants wilt quickly if thirsty, so check daily during heatwaves. Fertilize every 4-6 weeks with a balanced liquid fertilizer (10-10-10) diluted to half strength to avoid burning roots.
Prune lightly after blooming to encourage bushier growth. Trim back 1/3 of the oldest stems in early spring to stimulate new shoots. Deadhead spent flowers regularly—this redirects energy to producing more blooms instead of seeds. Watch for pests like aphids or mealybugs; spray with neem oil if you spot any.
⏰ Step 5: Protect During Seasonal Shifts
In fall, gradually reduce watering as temperatures drop. Move containers to a sheltered spot if frost is forecasted—tropical plants won’t survive below 40°F. Use a frost cloth for overnight protection if needed. In winter, keep them just slightly moist and reduce fertilizer to once every 8-10 weeks.
Bring potted plants indoors if your winter climate dips below 50°F—a bright, sunny window or grow lights will keep them thriving. Avoid sudden temperature swings; tropical plants prefer steady warmth over fluctuating conditions. With this routine, your bush will stay lush and blooming all year long.
Tips & tricks for perfect blooming tropical bushes
Here's what I've learned after keeping tropical plants thrive for years—these tricks make all the difference for vibrant, year-round blooms.
Sunlight Strategy: The 6-8 hours of full sun mentioned in Step 1 is non-negotiable, but here's the secret: position your bush so it gets morning sun (cooler) and afternoon shade if temperatures exceed 90°F. I've seen hibiscus leaves scorch when exposed to midday sun in summer—watch for yellowing edges as an early warning sign.
Soil Science: When mixing your well-draining potting mix in Step 2, add a handful of worm castings to the 20% perlite/orchid bark blend. The castings provide gentle, natural nutrients while improving moisture retention. For in-ground planting, test your soil first—if it's heavy clay, mix in an extra 2 inches of coarse sand beyond the 1-inch recommendation to prevent compaction.
Watering Wisdom: The "top 1-2 inches dry" rule in Step 4 works, but here's how to implement it: stick a chopstick into the soil—if it comes out clean, water deeply. For containers, I use the "thumb test"—press your thumb into the soil; if it feels dry 1 inch down, it's time. Always water until it drains freely from the bottom to prevent salt buildup from fertilizer.
Seasonal Transition: When protecting your plants below 50°F in Step 5, don't just move them indoors—acclimate them first. Gradually reduce sunlight exposure over 3-4 days before bringing inside. I've lost plumeria blooms when they went from full sun to dim indoor light too quickly. Place them near the brightest window (south-facing is ideal) and supplement with grow lights if natural light is insufficient.
Pro Tips for Blooming Tropical Bush
- Here's what I've learned after keeping tropical plants thrive for years—these tricks make all the difference for vibr...
- Sunlight Strategy: The 6-8 hours of full sun mentioned in Step 1 is non-negotiable, but here's the secret: position y...
- Soil Science: When mixing your well-draining potting mix in Step 2, add a handful of worm castings to the 20% perlite...
Frequently asked questions
Got questions about keeping your blooming tropical bush lush and thriving? You’re not alone! Here are answers to the most common queries—from pruning tips to troubleshooting—so you can enjoy year-round vibrancy with ease.
How often should I water my blooming tropical bush?
Water deeply once a week during warm months (more if your soil dries quickly) and reduce to every 2-3 weeks in winter. Stick your finger 1-2 inches into the soil—if it’s dry, it’s time to water. Overwatering is the #1 killer, so drainage is key! Use a pot with holes or raised beds to prevent soggy roots.
When is the best time to prune for more blooms?
Prune right after flowering (late spring/early summer) to encourage new growth and denser blooms. Avoid heavy pruning in fall/winter—this is when the plant focuses on root development. Use clean, sharp shears to trim 1/3 of the oldest stems and shape lightly. Pro tip: Deadhead spent blooms regularly to redirect energy to fresh flowers!
Why aren’t my tropical blooms lasting long?
Short-lived blooms often mean low humidity, poor drainage, or nutrient deficiencies. Boost humidity with a pebble tray or misting (especially indoors). Feed with a balanced, water-soluble fertilizer every 4-6 weeks during growing season. If blooms drop quickly, check for overwatering or root rot—yellow leaves are a red flag!
Can I grow a blooming tropical bush indoors year-round?
Choose compact varieties like Mandevilla or Bougainvillea for indoor pots. Place near bright, indirect light (south/west-facing windows) and supplement with grow lights if needed. Rotate the pot weekly for even growth. Watch for pests (like spider mites) and increase humidity with a humidifier or group plants together.
What’s a low-maintenance alternative to high-care tropical bushes?
If you want color without fuss, try:
All three are blooming powerhouses with minimal care once established!
Wrapping up and next steps
Transforming your space into a lush, blooming tropical bush isn’t just possible—it’s easier than you think! With the right plants, minimal care, and a dash of creativity, you can enjoy vibrant colors and fragrant blooms year-round.
Whether you’re a gardening newbie or a seasoned green thumb, this low-maintenance project brings nature’s beauty straight to your doorstep.
Ready to take the next step? Start small—pick one or two plants from your favorites and experiment with containers or garden beds. Before you know it, your tropical oasis will be the envy of the neighborhood! 🌺✨