
Blooming
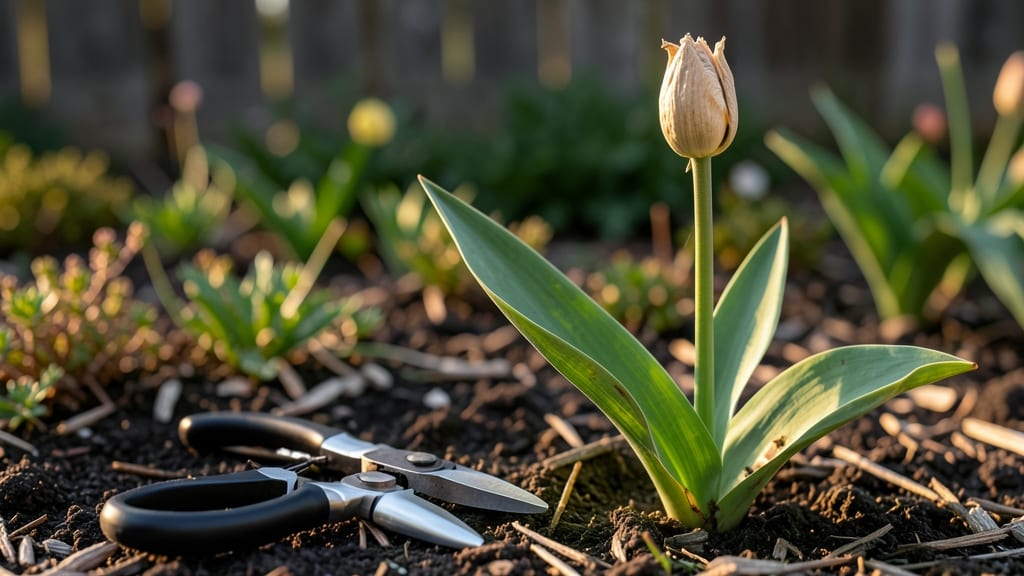
After tulips bloom, don’t toss those plants—revive them for next year’s showstopper display. 🌷 The secret to repeat blooms lies in what you do after the flowers fade, not just while they’re in full glory.
Most gardeners cut stems too soon, but leaving foliage to feed the bulb is the game-changer that ensures stronger blooms in spring. Deadheading spent blooms keeps the plant focused on bulb storage, but the real work happens in the weeks after.
Let those yellowing leaves stay until they brown completely—this process fuels the bulb for next season. A light feeding of balanced fertilizer (10-10-10) after blooming gives them a boost, while deep watering once a week keeps roots happy without drowning them.
By late summer, your tulips will look ragged, but that’s when the magic happens underground. The bulb stores energy for next year’s shoot, so resist the urge to trim early.
In fall, you’ll have the chance to divide and replant bulbs for even more dramatic displays—just wait until foliage fully dies back. This method works for all tulip varieties, from classic reds to bold two-tone hybrids. With patience, you’ll transform last year’s blooms into next year’s standout garden centerpiece.
Let’s get those bulbs ready!
📚 In This Guide
- What you need
- Instructions
- Tips and common mistakes
- Wrapping up and next steps
What you need
- ● Garden gloves – 1 pair (to protect your hands from soil and sharp tools).
- ● Pruning shears or sharp scissors – 1 (for clean cuts, sterilized with rubbing alcohol).
- ● Garden fork or trowel – 1 (for digging up bulbs gently).
- ● Compost or well-aged manure – 2–3 cups (per plant, for nutrient-rich soil).
- ● Balanced fertilizer (10-10-10 or similar) – 1 small bag (follow label for dilution ratios).
- ● Mulch (straw, pine needles, or shredded leaves) – Enough to cover soil 2–3 inches deep.
- ● Watering can or hose with a gentle spray nozzle – 1 (for hydration without bulb damage).
- ○ New planting location (optional but recommended) – A spot with full sun (6+ hours/day) and well-draining soil.
- ● Bulb fertilizer (like bone meal or bulb-specific food) – Boosts root growth before replanting.
- ● Soil test kit – Checks pH (ideal: 6.0–7.0) and nutrient levels.
- ● Plant tags or labels – If replanting mixed bulbs, track varieties!
- ● Pest control (neem oil or diatomaceous earth) – For slugs/snails that target stressed bulbs.
- ● Storage container (mesh bag or paper sack) – If curing bulbs indoors before replanting.
Step-by-Step guide to reviving and replanting tulips after blooming
Here’s how to turn this year’s tulips into next year’s showstopper garden stars.
🌱 Step 1: Wait Until Foliage Fully Yellows and Dies Back
After tulips bloom, don’t cut the leaves—this is critical. Tulips store energy in their bulbs through the green foliage, and removing it too soon starves next year’s flowers. Let the leaves yellow naturally and wither on their own. You’ll know they’re ready when the foliage turns completely brown and crispy, which usually takes 6-8 weeks after blooming.
If you’re impatient, resist the urge to trim early. I’ve seen gardeners cut leaves too soon, only to get weak, non-flowering bulbs the next spring. The rule is simple: Leave the leaves until they’re dead. This ensures your bulbs have all the energy they need to produce strong stems and blooms next season.
✂️ Step 2: Cut Back Dead Foliage and Flower Stems
Once the leaves are completely brown and crispy, it’s safe to cut them back. Use clean, sharp pruners to trim the dead foliage down to about 1 inch above the soil line. This keeps the garden tidy while allowing the bulb to rest. You can also remove the spent flower stems at this time—they’re done serving their purpose.
Don’t dig up the bulbs just yet, even if they look dormant. Tulips need time to recharge underground. If you’re replanting in the same spot, mulch lightly with 2-3 inches of organic mulch (like shredded leaves or straw) to protect the bulbs over winter. This helps insulate them from extreme temperatures and keeps moisture levels steady.
🪴 Step 3: Dig Up, Inspect, and Replant Bulbs (If Needed)
If you’re replanting tulips in a different location or want to divide clumps, dig up the bulbs in late summer (August) or early fall (September), before new shoots appear. Use a garden fork to gently lift the bulbs, being careful not to puncture them. Shake off excess soil and inspect for signs of rot or pests. Healthy bulbs should feel firm and dry.
Separate any offsets (small bulbs that form around the parent bulb) and replant them immediately in a new spot. Store the remaining bulbs in a cool, dry place (like a mesh bag in the refrigerator) until planting time in fall (6-8 weeks before the first frost). This gives them time to establish roots before winter sets in.
☀️ Step 4: Replant Tulip Bulbs in Well-Draining Soil
When replanting, choose a location with full sun (6+ hours daily) and well-draining soil. Tulips hate soggy roots, so amend heavy or clay soil with compost or sand to improve drainage. Plant bulbs 6 inches deep and 4-6 inches apart, with the pointed end facing upward. This depth protects them from freezing and thawing cycles.
Water the newly planted bulbs thoroughly after planting to settle the soil and encourage root growth. Over the next few weeks, keep the soil consistently moist but not waterlogged. Once the ground freezes, the bulbs will enter dormancy and wait for spring to bloom again. With proper care, your tulips will return year after year with even more vibrant flowers.
⏰ Step 5: Fertilize and Mulch for Next Season’s Growth
In early spring, before new shoots emerge, apply a balanced, slow-release fertilizer (10-10-10) around the planting area. This gives the bulbs a nutrient boost without burning tender new growth. Water lightly after fertilizing to help the granules dissolve into the soil. You can also top-dress with a thin layer of compost to improve soil fertility.
Mulch again with 2-3 inches of organic mulch to retain moisture and suppress weeds. This protects the emerging shoots from temperature swings and keeps the soil cool and moist. By following these steps, you’ll ensure your tulips come back stronger and more spectacular than ever before.
Tips & tricks for perfect tulip revival after blooming
Here’s what I’ve learned from years of gardening—simple tricks that’ll make all the difference when reviving your tulip bulbs.
Patience Pays Off: Those 6-8 weeks of waiting for foliage to fully yellow and die back are non-negotiable. I’ve seen tulips skip blooming entirely when impatient gardeners cut leaves too soon. Try this: Mark the date when your tulips bloom, then count 6 weeks ahead. That’s your deadline for cutting back—no exceptions!
Pruning Precision: When you finally cut back the dead foliage in Step 2, aim for that 1-inch mark above the soil line. Use clean pruners and make sharp cuts to avoid tearing the stems. I’ve found that leaving even a little extra foliage can attract pests, while cutting too short might expose the bulb to temperature fluctuations.
Bulb Storage Strategy: If you’re storing bulbs before replanting, place them in a mesh bag (not plastic!) in the refrigerator’s crisper drawer. This mimics their natural dormancy conditions. I’ve had great success with this method—just check them monthly for signs of rot or mold. When you’re ready to replant, let them sit at room temperature for 24 hours first to prevent shock.
Soil Secrets: Tulips despise soggy soil, so if your garden has heavy clay, mix in 2-3 inches of sand or perlite when replanting. I’ve seen bulbs rot in poorly draining soil, even with proper depth. For extra insurance, create a slight mound when planting—this helps water run off rather than pooling around the bulbs.
Pro Tips for Tulip Plants After Blooming
- Here’s what I’ve learned from years of gardening—simple tricks that’ll make all the difference when reviving your tulip bulbs.
- Patience Pays Off: Those 6-8 weeks of waiting for foliage to fully yellow and die back are non-negotiable.
- Pruning Precision: When you finally cut back the dead foliage in Step 2, aim for that 1-inch mark above the soil line.
Frequently asked questions
Got questions about what to do with your tulips after they’ve put on their stunning show? You’re not alone! Here are some of the most common concerns—and their simple solutions—to keep your tulips thriving for years to come.
Do tulip bulbs die after flowering?
Not necessarily! While the flower dies back, the bulb itself stays alive underground—if cared for properly. Many gardeners leave bulbs in the soil for years, letting them multiply and produce even more blooms. However, if the foliage turns yellow or brown too soon, the bulb may not store enough energy for next year.
How long after tulips bloom should I cut the flowers?
Deadhead (remove spent blooms) immediately after they fade to redirect the plant’s energy to bulb growth. But leave the foliage alone—it needs 6–8 weeks to yellow and wither naturally. Cutting it too soon starves the bulb of nutrients, weakening next year’s blooms.
Can I replant tulip bulbs in the same spot every year?
Yes, but with caution! Tulips thrive in the same location for 2–3 years before pests (like aphids or squirrels) or diseases may build up. Rotate bulbs every few years to a new spot, or add compost to refresh the soil. Just avoid moving them mid-season—wait until foliage dies back completely.
What if my tulip foliage turns yellow or brown too early?
This usually means the bulb isn’t getting enough sunlight, water, or nutrients. Check for overwatering (bulbs rot in soggy soil) or shade (they need full sun). Fertilize lightly with bulb-specific food in early spring, and ensure well-draining soil. If the issue persists, the bulb may be exhausted—replace it!
Should I dig up tulip bulbs after blooming?
Only if you’re in a hot, humid climate (like Zones 7–10) or dealing with pests. In cooler regions, leave them in the ground—they’ll naturalize and spread. If you dig them up, do it 6 weeks after blooming, cure them in a dry, dark place for 2 weeks, then store in a cool (40–50°F) spot until replanting in fall.
Wrapping up and next steps
Caring for your tulips after they bloom doesn’t have to be complicated—just a little patience and the right steps can ensure a stunning comeback next season!
By deadheading spent blooms, fertilizing, and providing consistent care, you’re setting the stage for even more vibrant tulips in the future. Don’t let your hard work go to waste—give your plants the love they deserve, and you’ll be rewarded with a garden that blooms brighter than ever!
Ready to take the next step? Plan your replanting schedule now—whether you’re dividing bulbs, adding mulch, or prepping for winter. Your future garden will thank you! 🌱✨