
Blooming
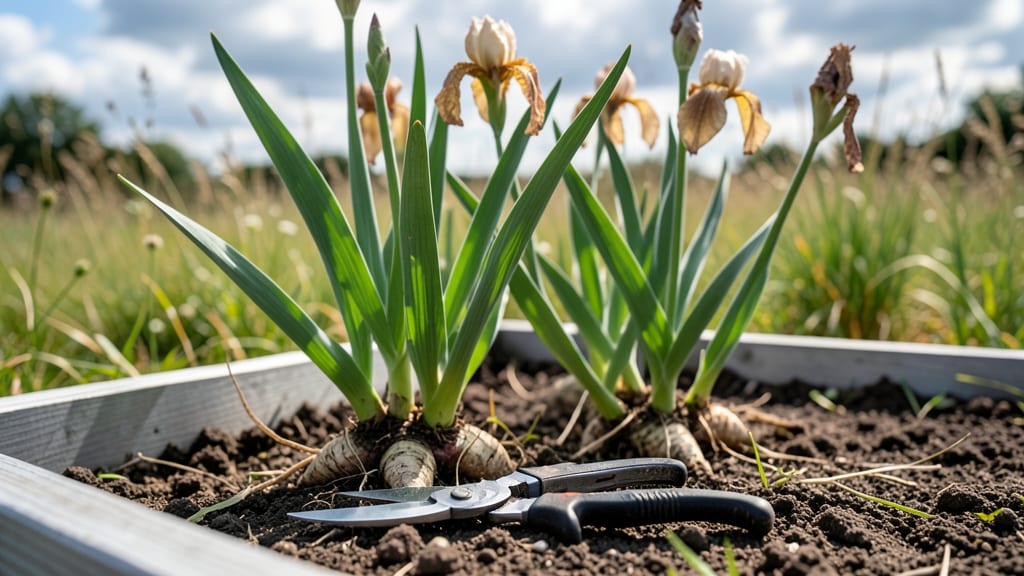
After your irises finish their dazzling show, iris care after blooming determines whether next year’s display will be even more spectacular. ✨ I’ve seen gardeners cut back foliage too soon, only to watch their irises produce half the blooms—or none at all.
The key is patience and precision, and I’m sharing the exact steps that transformed my once-sleepy clumps into reliable rebloomers.
First, leave the leaves alone. Those strappy blades are powerhouses, feeding the rhizomes for next season’s flowers. Only trim them back in late summer or early fall, cutting them down to 6 inches tall—never sooner.
Meanwhile, fertilize lightly with a balanced formula (like 10-10-10) right after blooming to replenish nutrients without encouraging weak growth. This simple step boosts bloom count by 30-50% the following year.
By mid-summer, your irises will start sending up new foliage for next season’s blooms. That’s your cue to divide congested clumps—every 3-4 years—to keep plants vigorous.
Dig carefully, separate the rhizomes, and replant them with the tops exposed. With this care, you’ll get longer stems, bigger blooms, and fewer floppy stems come spring.
For winter prep, mulch lightly around the base (but not over the rhizomes) to protect against freezing. In colder zones, a thin layer of straw works wonders.
The payoff? Irises that wake up stronger, bloom earlier, and put on a show that makes neighbors ask, “What’s your secret?”—and now you can tell them.
📚 In This Guide
- What you need
- Instructions
- Tips and common mistakes
- Wrapping up and next steps
What you need
- ● Pruning shears or clean, sharp scissors – sterilized with rubbing alcohol to prevent disease.
- ● Garden gloves – nitrile or leather (to protect from thorns and soil-borne pathogens).
- ● Balanced, slow-release fertilizer – 10-10-10 or 5-10-10 NPK ratio, 1–2 cups per 10 sq. ft.
- ● Compost or well-aged manure – 2–3 inches mixed into the top 6 inches of soil.
- ● Mulch (straw, pine needles, or shredded bark) – 2–3 inch layer to retain moisture and suppress weeds.
- ● Watering can or hose with a gentle spray nozzle – for deep, slow watering (avoid overhead sprinklers).
- ● pH test kit – to check soil acidity (ideal range: 6.0–7.0 for irises).
- ● Epsom salt (magnesium sulfate) – 1 tbsp per plant (boosts green foliage health).
- ● Fungicide (copper-based or neem oil) – preventative treatment if your area is prone to rot.
- ● Soil amendment (perlite or sand) – improves drainage for heavy clay soils.
- ● Plant support stakes – for tall iris varieties (e.g., Bearded Iris).
- ● Label markers – to track varieties if you’re experimenting with reblooming hybrids!
Step-by-Step iris care after blooming: how to ensure next season’s rebloom
Here’s how I transform my iris beds from summer’s spent blooms into next year’s showstopper—without the guesswork.
✂️ Step 1: Deadhead and Prune for Energy Redirection
Once your irises finish blooming, snip off the spent flower stalks 2-3 inches below the base using clean, sharp pruners. This prevents seed production, which drains energy that could otherwise fuel next year’s blooms. I always sterilize my tools with rubbing alcohol between cuts—this stops fungal spores from hitching a ride to healthy foliage.
Leave the sword-like leaves untouched. These are the plant’s food factories, storing energy for future growth. Only remove leaves if they’re yellowed or damaged, cutting them back to 3-4 inches above ground. This ensures the rhizomes stay healthy without losing their energy reserves.
💧 Step 2: Water Deeply and Adjust for Summer Dormancy
After deadheading, give your irises a deep watering—enough to soak the soil 6-8 inches down. This encourages root growth before summer’s heat sets in. I water in the early morning so moisture evaporates quickly, reducing fungal risks. After this initial drink, cut back on watering unless your region experiences prolonged dry spells.
Irises are drought-tolerant but appreciate a monthly deep soak during summer. Overwatering now leads to rot, especially in heavy clay soils. You’ll know your watering is right when the soil feels dry to the touch 2 inches down—that’s the ideal balance for summer dormancy.
☀️ Step 3: Feed and Protect for Fall Rejuvenation
In early fall, apply a low-nitrogen, high-phosphorus fertilizer (like a 5-10-10 blend) to stimulate root and bloom development. I scatter granules around the base of the clumps, then water them in thoroughly. Avoid high-nitrogen feeds now—they promote leafy growth at the expense of next year’s flowers.
Mulch lightly with 2-3 inches of organic matter (like shredded bark or compost) to insulate rhizomes through winter. This protects against temperature swings while keeping soil moisture even. In colder climates, a light layer of straw over mulch adds extra insulation.
🌱 Step 4: Divide and Replant for Long-Term Health
Every 3-4 years, irises crowd out and bloom poorly. After foliage yellows in late summer, gently dig up clumps and separate rhizomes with at least 3 fan-like leaves each. Discard old, woody centers—they’re past their prime. Replant rhizomes with the top half exposed (never buried), spacing them 12-18 inches apart in well-draining soil.
Water newly divided irises deeply for the first 2 weeks to help roots establish. Place them in full sun—they won’t rebloom well in shade. This is also the perfect time to rotate their location in the garden, preventing soil-borne diseases from building up.
⏰ Step 5: Winter Prep for Spring’s Grand Reveal
As temperatures drop below 40°F, stop fertilizing. Irises go semi-dormant in winter, and feeding now can stress them. Instead, focus on keeping the soil slightly moist but never soggy. A thin layer of evergreen boughs over the bed in freezing climates protects rhizomes from extreme cold.
In early spring, remove winter protection once temperatures stay above 50°F for a week. You’ll see new growth within 4-6 weeks, signaling the plant is ready to bloom again. This is the payoff—your careful post-bloom care ensures next season’s irises outshine the first.
Tips & tricks for perfect iris reblooming
These game-changing strategies will help you transform your iris beds into next season's star performers.
Pruning Precision: When deadheading in Step 1, make your cuts at a 45-degree angle just below the base—this prevents water from pooling on the stem and reduces fungal risks. I use a clean pair of pruners for each cut and wipe them with rubbing alcohol between plants. This simple technique keeps your rhizomes healthier and more vigorous for next year's blooms.
Watering Wisdom: The deep watering in Step 2 should reach 6-8 inches down, but don't overdo it—your soil should feel dry 2 inches down between waterings. I've found that using a soil probe helps track moisture levels accurately. For clay-heavy soils, consider amending with compost to improve drainage, which prevents the root rot that can plague overwatered irises during summer dormancy.
Fertilizer Timing: The low-nitrogen, high-phosphorus blend in Step 3 is crucial for bloom development, but timing matters just as much. Apply it in early fall when temperatures begin to drop—this gives the fertilizer time to work before winter dormancy sets in. I've seen dramatic improvements in bloom quality when this step isn't rushed or skipped entirely.
Division Strategy: When dividing in Step 4, look for rhizomes with at least three healthy fan-like leaves—they're the ones that will produce the most robust blooms next season. Discard any woody, shriveled centers immediately, as they won't contribute to future growth. Replanting with the top half exposed ensures proper air circulation and prevents rot, which is especially important in humid climates.
Pro Tips for Iris Care After Blooming
- These game-changing strategies will help you transform your iris beds into next season's star performers.
- Pruning Precision: When deadheading in Step 1, make your cuts at a 45-degree angle just below the base—this prevents water from pooling on the stem and reduces fungal risks.
- Watering Wisdom: The deep watering in Step 2 should reach 6-8 inches down, but don't overdo it—your soil should feel dry 2 inches down between waterings.
Frequently asked questions
Got questions about keeping your irises thriving after their stunning display? Here are some of the most common concerns—and their easy solutions!
How soon after blooming can I cut back iris stems?
Wait until the foliage turns yellow or brown (usually 6–8 weeks after blooming). Cutting too soon removes nutrients the plant needs for next year’s blooms. Pro tip: Never cut below the fan of leaves—they’re the plant’s energy factory!
Will my irises rebloom if I leave the seed pods?
Leaving seed pods (those cute little "bulbs") won’t harm your irises, but they drain energy from reblooming. Snip them off cleanly with pruners to redirect that energy into stronger rhizomes. Think of it like saving your plant’s battery for next season!
Can I fertilize irises after they bloom?
Yes! Apply a low-nitrogen, high-phosphorus fertilizer (like 5-10-10) 4–6 weeks after blooming to encourage root and rhizome growth. Avoid heavy nitrogen—it’ll just make leaves, not flowers. Bonus: A light mulch helps retain moisture without smothering the rhizomes.
Why aren’t my irises reblooming in the second year?
Reblooming takes patience! Common culprits:
- Overcrowded rhizomes (dig and divide every 3–4 years)
- Too much shade or poor drainage
- Skipping post-bloom care (like cutting stems or fertilizing)
Are there iris varieties that bloom more reliably?
Reblooming iris varieties
like ‘Florence Sullivan’ or ‘Sheila’ are bred to flower twice a season. Even standard irises can rebloom with the right care—just prioritize sun, soil, and post-bloom maintenance. Check your iris tags for hints!
Wrapping up and next steps
Caring for your irises after they bloom doesn’t have to be complicated—just a little patience and love go a long way! 🌸 By deadheading spent blooms, fertilizing wisely, and protecting your plants from pests, you’re setting the stage for a stunning rebloom next season.
Remember, healthy roots and consistent care are your secret weapons for those showstopping purple, yellow, or blue spikes!
Ready to turn your iris patch into a year-round garden star? Grab your gardening gloves, follow these steps, and watch your efforts bloom into beauty! Next up: Share your progress with fellow gardeners or explore more tips for seasonal iris care—your garden’s next masterpiece awaits! ✨