
Blooming
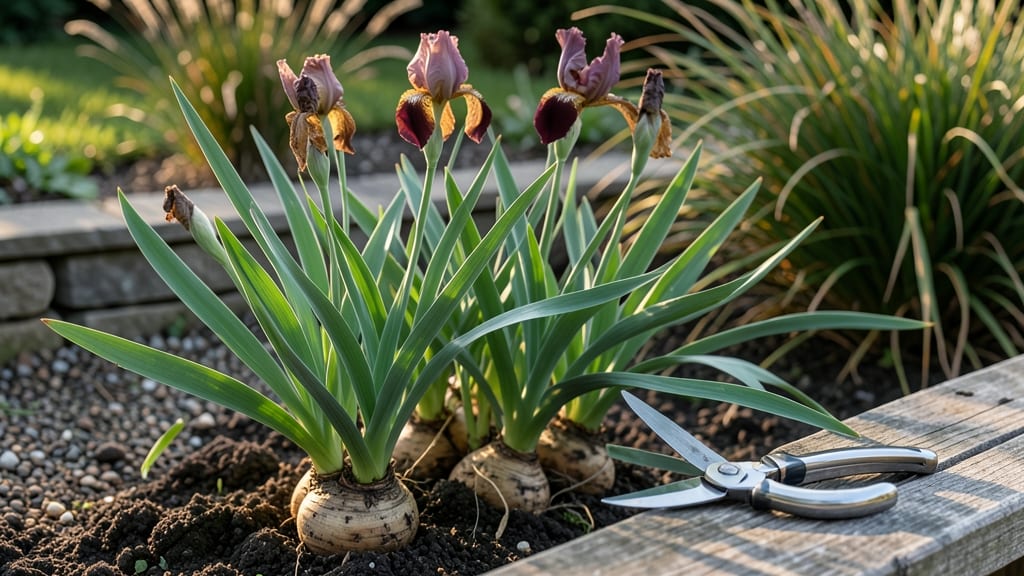
After your irises finish their stunning spring show, the real work begins—iris flower care after blooming determines whether you'll see next year's bold purple, yellow, or white spikes. ✨ I've learned the hard way that skipping this step means fewer blooms and weaker plants, but with the right moves, your irises will reward you with even bigger, brighter flowers in just a few months.
The first step is deadheading—snip off the spent blooms at the base of the stem, but leave the fan-shaped leaves untouched. This might seem counterintuitive, but those leaves are the plant's food factory, storing energy for next season's blooms.
After deadheading, reduce watering gradually; irises hate soggy roots but need enough moisture to keep growing strong through summer.
By late summer, your irises will start sending up new growth. That's when you can fertilize lightly with a balanced, low-nitrogen formula to encourage root development. If your clumps are getting crowded—more than three fans per section—now's the time to divide them.
The payoff? Healthier plants, more blooms, and irises that look like they belong in a botanical garden rather than your backyard.
This routine works for bearded, Siberian, and Japanese irises alike, and it's the secret to turning a one-time spring spectacle into a garden centerpiece that comes back stronger every year.
The best part? Once you master these steps, your irises will practically care for themselves—with just a little help from you.
📚 In This Guide
- What you need
- Instructions
- Tips and common mistakes
- Wrapping up and next steps
What you need
- ● Pruning shears or clean, sharp scissors – 1 pair (sterilized with rubbing alcohol to prevent disease).
- ● Gloves – 1 pair (gardening gloves to protect hands from thorns or soil).
- ● Compost or well-aged manure – 1-2 gallons (for fertilizing after deadheading).
- ● Balanced, slow-release fertilizer – 10-10-10 or 5-10-10 NPK ratio (1 tbsp per plant).
- ○ Mulch (optional but recommended) – 2-3 inches (straw, shredded bark, or pine needles to retain moisture).
- ● Pruning sealant – Small bottle (to coat cut stems and prevent rot).
- ● Soil test kit – 1 kit (to check pH and nutrient levels before fertilizing).
- ● Rainwater or hose with a gentle spray nozzle – For deep watering (irises prefer bottom-watering).
- ● Plant tags or markers – If labeling varieties (helpful for future reference!).
Step-by-Step iris flower care after blooming
Here's how to keep your irises thriving and ready for next year's stunning blooms.
✂️ Step 1: Deadhead Properly to Encourage Next Year's Flowers
Wait until the iris blooms completely fade and the seed pods begin to form before cutting. Use clean, sharp pruners to snip the spent bloom stem about 2 inches below the base—never cut into the leaf fan. This prevents disease and preserves the plant's energy for next season's growth.
I always check for any remaining seed pods first. If left on the plant, they'll drain energy that could go toward root and rhizome development. A quick visual scan ensures you're not missing any hidden blooms that might still be holding out.
🌱 Step 2: Leave the Foliage Until It Naturally Dies Back
Never cut back the iris leaves after blooming—they're working hard to feed the rhizomes for next year's flowers. Let them stand until they turn completely yellow and crispy, usually by late summer or early fall. This process can take 6-8 weeks depending on your climate.
Resist the urge to tidy up early. The leaves are the plant's solar panels, converting sunlight into stored energy. If you cut them too soon, you'll starve the rhizomes and get weak or no blooms next season.
💧 Step 3: Water and Fertilize for Post-Bloom Recovery
Give your irises a deep watering after deadheading to help them recover. Aim for 1 inch of water per week during dry spells, but never let them sit in soggy soil. Irises prefer well-draining conditions and will rot if overwatered.
Apply a balanced, slow-release fertilizer in early fall with equal parts nitrogen, phosphorus, and potassium. I like to use a 10-10-10 formula at half-strength to avoid overfeeding. This timing gives the rhizomes a nutrient boost before winter dormancy.
☀️ Step 4: Divide and Transplant if Needed Before Dormancy
If your iris clumps have more than 3-4 fans of leaves or aren't blooming well, it's time to divide. Wait until the foliage has completely died back in late summer or early fall. Dig up the rhizomes carefully, separating them into individual sections with at least 1-2 healthy leaves per division.
Replant the divisions at the same depth they were growing before, with the tops exposed to sunlight. Space them 12-24 inches apart depending on the variety. Water them in well after transplanting to help them establish before winter.
⏰ Step 5: Prepare for Winter Dormancy
Once the foliage has completely died back, you can cut it down to about 2 inches tall for a cleaner look. This is the plant's natural dormancy period, so avoid fertilizing or watering heavily. A 2-3 inch layer of mulch around the base helps protect the rhizomes from freezing temperatures.
I always mark the planting area with small stakes so I don't accidentally disturb the dormant rhizomes in spring. This simple step prevents unnecessary digging and keeps the plants undisturbed until new growth appears in early spring.
Tips & tricks for perfect iris flower care after blooming
Here's what nobody tells you about keeping your irises thriving for next year's showstopping blooms.
Timing is Everything: In Step 1, those seed pods are your biggest enemy. I learned this the hard way after leaving some on my plants—next season's blooms were half the size! Always check for hidden pods by gently brushing aside the foliage. This one visual scan can make all the difference between a weak rebloom and a spectacular display.
Patience Pays Off: The 6-8 week wait in Step 2 to let foliage die back naturally is non-negotiable. I've seen gardeners cut back too soon and end up with plants that barely bloom the next year. Think of those leaves as solar panels—they're storing energy for next season's flowers. If you cut them early, you're essentially starving your plants.
Precision Matters: When dividing in Step 4, those 1-2 healthy leaves per division are critical. I once split a rhizome with only one leaf and it never rebloomed. Each division needs enough foliage to photosynthesize and build energy. Also, maintaining the same planting depth prevents crown rot—a common mistake that kills irises.
Mulch Magic: That 2-3 inch layer of mulch in Step 5 isn't just for looks. It acts like a winter blanket, protecting rhizomes from temperature swings that can stress the plant. I use straw mulch because it breaks down slowly, adding organic matter to the soil as it decomposes. Avoid thick layers of wood chips—they can mat down and create soggy conditions.
Pro Tips for Iris Flower Care After Blooming
- Here's what nobody tells you about keeping your irises thriving for next year's showstopping blooms.
- Timing is Everything: In Step 1, those seed pods are your biggest enemy. I learned this the hard way after leaving so...
- Patience Pays Off: The 6-8 week wait in Step 2 to let foliage die back naturally is non-negotiable. I've seen gardene...
Frequently asked questions
Got questions about keeping your irises thriving after they’ve said their floral goodbye?
You’re not alone! Here are answers to the most common concerns—so you can enjoy those stunning blooms again next season.
Do I need to cut iris flowers after they bloom?
Yes! Deadheading (removing spent blooms) redirects the plant’s energy to roots and foliage, not seed production. Snip stems just above the first set of leaves (or the fan of leaves) to keep your iris strong for next year. Skip this step, and you might see fewer—or weaker—flowers in spring.
How soon after blooming should I deadhead irises?
Deadhead as soon as blooms fade (usually 1–2 weeks after flowering). If you wait too long, the seed pods may form, draining energy from your plant. Pro tip: Check daily during peak bloom time for the best results!
Can I cut iris leaves after blooming?
No—never cut iris leaves until they naturally yellow and die back in late summer or early fall. Leaves photosynthesize, feeding the rhizomes (underground stems) for next year’s blooms. Trimming too early weakens the plant.
What if my iris flowers don’t rebloom after deadheading?
Reblooming depends on variety, sunlight, and care. Some irises (like bearded types) are one-time bloomers, while others (like reblooming hybrids) may need 6+ hours of sun, rich soil, and patience. If blooms are sparse, check for overcrowding or nutrient deficiencies.
Can I use iris blooms for arrangements after deadheading?
Cut stems early
(before seed pods form) for fresh bouquets. Just skip the deadheading if you’re saving blooms—let them go to seed for next year’s natural propagation. Bonus: Dried iris blooms make gorgeous, long-lasting arrangements too!
Wrapping up and next steps
Caring for your iris after blooming doesn’t have to be complicated—just a little patience and the right steps can set the stage for stunning returns next season. 🌸 By deadheading spent blooms, fertilizing wisely, and giving your plants room to thrive, you’re not just maintaining beauty—you’re nurturing growth.
Now that you’ve got the know-how, roll up your sleeves and give your irises the love they deserve—your future garden will thank you!
Ready to take the next step? Plan a quick check-in every few weeks to monitor progress, and soon, your iris patch will be a showstopper once again! 🌿