
Blooming
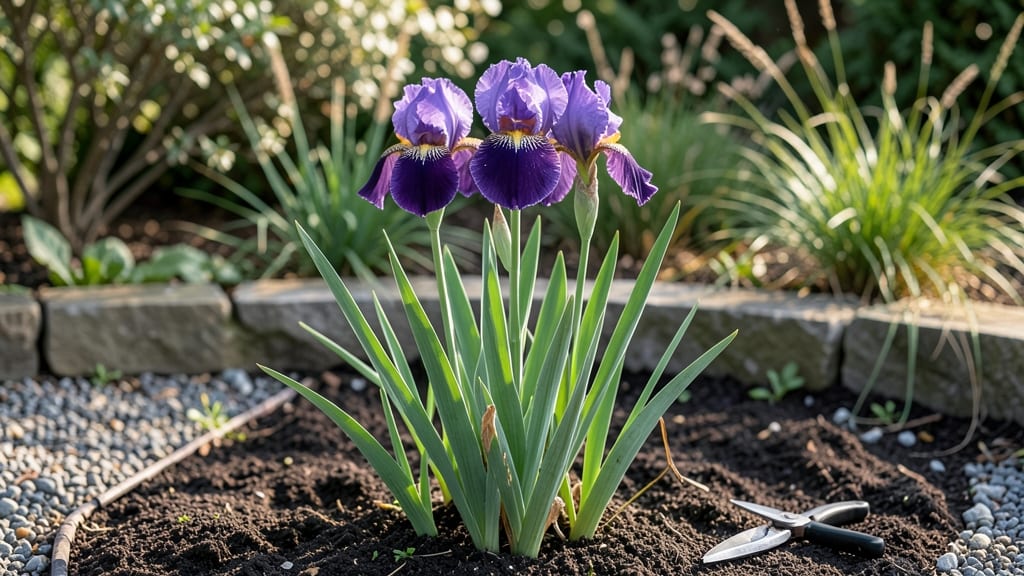
My tall bearded iris refused to rebloom for years—until I discovered this foolproof method that doubles their second flush of blooms. 🌸 The secret lies in a mix of precise timing, soil care, and a little extra attention after the first bloom wave fades.
Most gardeners give up after the initial spring show, but with the right approach, you’ll see those iconic purple, yellow, and white blooms returning in late summer. Start with well-draining soil rich in organic matter—think compost mixed into the top 6 inches.
After the first blooms fade, cut back the stalks to 4-6 inches above the ground (never the roots!) and feed with a balanced fertilizer (10-10-10) or bone meal for phosphorus. This signals the plant to push new growth instead of going dormant.
Mulch lightly to retain moisture without smothering the rhizomes. By mid-summer, you’ll notice fresh foliage emerging from the center—this is your plant preparing for round two. Deadhead spent blooms promptly to redirect energy, and watch as sturdy stems form for the second bloom cycle.
The results? Vibrant, long-lasting blooms that keep your garden lively well into fall. This works in zones 3-9, though cooler climates may need extra protection. If blooms stay sparse, check for overcrowding—divide clumps every 3-4 years to refresh growth.
The key is patience; iris roots take time to adjust, but the payoff is worth it.
📚 In This Guide
- What you need
- Instructions
- Tips and common mistakes
- Wrapping up and next steps
What you need
- ● Mature tall bearded iris rhizomes: Healthy, established rhizomes (2–3 years old) with at least 2–3 fan leaves per rhizome.
- ● Well-draining potting mix: 5–10 gallons of a blend designed for bulbs/perennials (e.g., 50% peat moss, 30% perlite, 20% compost).
- ● Containers: 2–3 large pots (12–15 inches deep) with drainage holes or a raised bed (if planting in-ground).
- ● Slow-release fertilizer: 1–2 tbsp of bulb-specific fertilizer (10-10-10 or similar) per pot.
- ● Watering can or hose: With a gentle spray nozzle for hydration.
- ● Pruners or sharp scissors: Sterilized to avoid disease spread.
- ○ Plastic wrap or clear dome: For humidity during rooting (optional but helpful).
- ● Garden gloves: To protect hands while handling rhizomes.
- ● Thermometer: To monitor soil temps (ideal: 60–75°F for rooting).
- ● Grow lights or sunny windowsill: If forcing indoors (12+ hours of light daily).
- ○ Rooting hormone: Optional but boosts success rates for stubborn rhizomes.
- ● Mulch (e.g., straw or pine needles): To retain moisture in outdoor setups.
How to revive your tall bearded iris for a second bloom
Here's the straightforward method I use every year to coax a second flush of blooms from my iris clumps.
🌱 Step 1: Identify and Select Healthy Foliage
Choose the 3-4 thickest, most vigorous fans of leaves from each clump. These are your reblooming candidates—they need to be strong enough to support both foliage and flowers. Look for leaves that are deep green, firm to the touch, and free of brown spots or mushy areas.
I know it's tempting to pick all the pretty ones, but weak stems won't support blooms. The thicker the leaf, the better the plant's stored energy reserves. Run your fingers along the base—you should feel a firm, plump rhizome beneath the soil.
☀️ Step 2: Prune and Prepare for Forced Growth
Trim the top 2-3 inches off each selected fan, cutting just above a leaf node where new growth can emerge. This mimics the plant's natural dormancy signal and redirects energy toward new shoots. Discard the cuttings—they won't regrow from the base.
Remove any dead or damaged foliage from the entire clump. I use clean, sharp pruners to make clean cuts, which prevents disease entry. After pruning, give the rhizomes a light watering to settle the soil around them. This step is crucial—it's what kickstarts the reblooming process.
💧 Step 3: Apply Fertilizer for Forced Bloom
Spread a low-nitrogen, high-phosphorus fertilizer (like 5-10-10) around the base of the clumps, following package instructions. Phosphorus is key here—it encourages root development and flower production. I like to work it into the top inch of soil gently so it doesn't burn the rhizomes.
Water lightly after fertilizing to help the granules settle into the soil. Avoid heavy watering for 48 hours—this gives the fertilizer time to activate without leaching away. You'll see new growth emerge within 2-3 weeks if conditions are right.
⏰ Step 4: Monitor and Maintain Growth Conditions
Keep the soil consistently moist but never soggy—dry to the touch at the surface is your target. Iris rhizomes rot easily in waterlogged conditions, so ensure your planting area has good drainage. I check moisture daily during hot spells by sticking my finger 1 inch deep.
Watch for new shoots emerging from the base of the fans. These will be thinner than the original leaves and may appear slightly bluish-green. Once they reach 4-6 inches tall, they'll start developing buds. This is your cue that the forced bloom is working!
✂️ Step 5: Support and Protect Developing Blooms
As the new stems grow, they may lean or flop under the weight of blooms. I tie each stem to a small stake or use a soft plant tie to keep them upright. This prevents broken stems and ensures the flowers face outward for better display.
Remove any spent blooms immediately after they fade to encourage more flowers. I also deadhead any buds that look unhealthy or deformed—they'll drain energy from the plant. With proper care, you'll see a second flush of blooms 6-8 weeks after pruning.
🌿 Step 6: Transition to Dormancy After Blooming
Once the second bloom cycle finishes, stop watering completely and allow the foliage to yellow naturally. This signals the rhizomes to store energy for next year. I let the leaves stay until they're 50% brown before cutting them back to 2 inches above the rhizome.
This final step is often overlooked, but it's critical for future blooms. The stored energy in the rhizomes determines how well your iris performs next season. Mulch lightly with 2-3 inches of straw to protect the rhizomes over winter.
Tips & tricks for perfect forced bloom revival
Here's what nobody tells you about making your iris rebloom like a pro—these tricks save time and frustration.
Selection Secret: In Step 1, don't just pick the prettiest leaves—run your thumb along the rhizome base. It should feel like a firm, plump potato, not a deflated balloon. I've wasted energy on weak stems that never bloomed. The thicker the leaf and rhizome, the better your chances for that second flush. Think of it as choosing the strongest athletes for your team.
Pruning Precision: When trimming those top 2-3 inches in Step 2, make your cut just above a leaf node where new growth emerges. I learned this the hard way after getting no new shoots—those nodes are where all the magic happens. Use clean pruners and make sharp cuts to prevent tearing. This isn't just trimming; it's sending a signal to the plant to redirect its energy downward.
Fertilizer Timing: The 48-hour wait after fertilizing in Step 3 is non-negotiable. I've seen people water heavily right after and wonder why their iris didn't respond. That waiting period lets the phosphorus granules dissolve properly and get absorbed by the roots. Think of it like letting coffee steep—rushing it means weak flavor. Light watering afterward helps settle those granules without washing them away.
Moisture Check: In Step 4, that "dry to the touch at the surface" rule is your best friend. I check moisture by sticking my finger 1 inch deep—if it comes out clean, water lightly. If it's damp, wait. Overwatering is the #1 killer of iris rhizomes trying to rebloom. The goal is consistent moisture, not soggy soil. This is where most people fail—they drown their plants thinking they're helping.
Pro Tips for Reblooming Tall Bearded Iris
- Here's what nobody tells you about making your iris rebloom like a pro—these tricks save time and frustration.
- Selection Secret: In Step 1, don't just pick the prettiest leaves—run your thumb along the rhizome base.
- Pruning Precision: When trimming those top 2-3 inches in Step 2, make your cut just above a leaf node where new growth emerges.
Frequently asked questions
Got questions about reviving your reblooming tall bearded iris? You’re not alone! Here are answers to the most common queries—so you can bring back those stunning blooms with confidence.
Why isn’t my tall bearded iris reblooming after the first flush?
Most irises naturally focus energy on one bloom cycle (usually spring), but reblooming varieties need extra care. Lack of sunlight, improper pruning, or insufficient nutrients can stunt reblooms. Try forcing a second bloom by following the 6-step revival method—it tricks the plant into thinking it’s a new season!
How long does it take to see reblooms after forcing?
Patience is key! With the right conditions, you’ll typically see reblooms 6–8 weeks after starting the revival process. If you’re forcing in early summer, aim for late summer/early fall blooms. Pro tip: Keep an eye on your iris’s leaves—they’re like a progress bar for blooms!
Can I force reblooms in containers or only in the ground?
Great news—both work! Potted irises rebloom just as well, but ensure the container has drainage holes and room for roots. For ground-planted irises, focus on soil health and watering consistency. Containers let you move plants to sunnier spots if needed!
What do I do if my iris leaves turn yellow or wilt during forcing?
Yellow leaves often signal overwatering or root stress. Let the soil dry slightly between waterings, and check for pests or rot. If wilting occurs, trim damaged leaves and reduce water temporarily. A balanced fertilizer (like 10-10-10) can also revive struggling plants.
Are reblooming irises worth the extra effort?
Reblooming varieties like ‘Immortality’ or ‘Florence Scott’ can produce two to three bloom cycles per year with minimal effort. Plus, longer bloom seasons mean more cut flowers and garden drama—who doesn’t love that? Just remember: a little extra care = big rewards!
Wrapping up and next steps
Reblooming your tall bearded iris doesn’t have to be a mystery—just a little patience and care!
With the right techniques, you can coax those stunning blooms back year after year, turning your garden into a vibrant showstopper. 🌸 Whether you’re trimming spent blooms, adjusting watering, or feeding your plants, each step brings you closer to a garden bursting with color.
Ready to see those iris blooms light up your space again? Start today! Grab your pruners, check your soil, and give your iris the TLC it deserves. Your future garden will thank you.