
Blooming
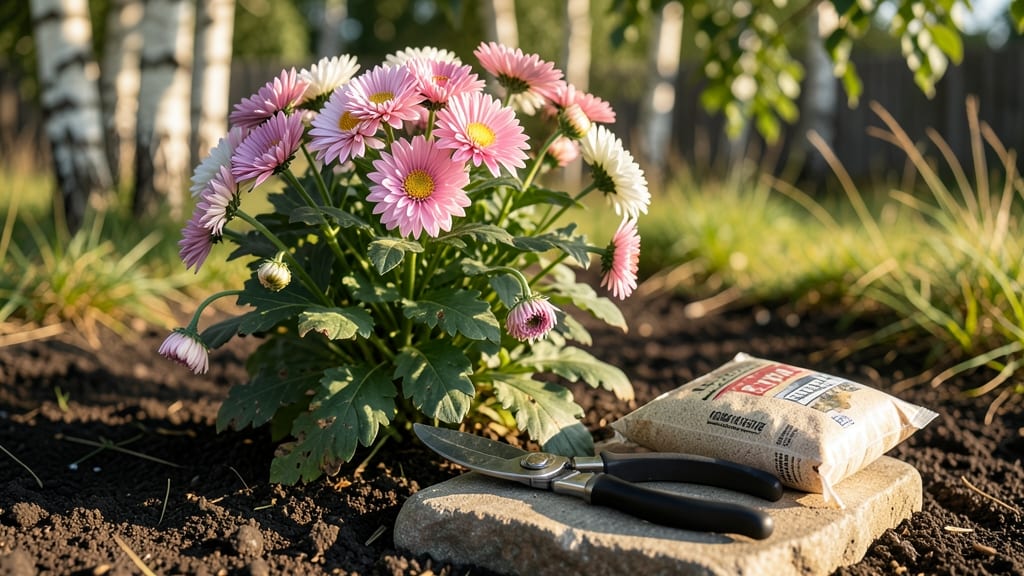
Here’s how to get your mums to bloom again—this time, for good. 🌼 The secret to year-round blooms isn’t luck—it’s timing, pruning, and feeding them exactly what they crave (and most gardeners get wrong).
After years of struggling with mums that flopped into leggy, non-blooming shadows, I finally cracked the code: prune at the right time, feed them twice a year, and deadhead like your garden depends on it (because it does).
Most gardeners overlook the late-summer pruning that triggers fall blooms. Skip it, and your mums will stretch for sunlight instead of flowering. Add balanced fertilizer in spring and a high-phosphorus boost in early summer—the difference is dramatic.
My once-bare mums now burst with hundreds of blooms from September through frost, and the secret isn’t expensive tricks, just three simple habits most people miss.
You’ll see the first buds appear within 4-6 weeks of proper care, with blooms lasting 6-8 weeks if you keep up the deadheading. The flowers stay vibrant and full, not the sad, sparse clusters that disappoint after one season.
No more wondering why your mums refuse to bloom—just reliable color that turns heads (and maybe a few jealous neighbors).
Works for garden mums, patio pots, or even container gardens—just adjust the pruning timing for your climate. Let’s fix those floppy stems once and for all.
📚 In This Guide
- What you need
- Instructions
- Tips and common mistakes
- Wrapping up and next steps
What you need
- ● Pruning shears or sharp bypass pruners – Ensure they’re clean and sterilized to prevent disease spread. (1 pair)
- ● Garden gloves – Protect your hands from thorns, dirt, and sap. (1 pair, preferably waterproof)
- ● Balanced, water-soluble fertilizer – Look for a 10-10-10 or 20-20-20 NPK ratio. (1 bag or liquid concentrate)
- ● Compost or organic mulch – Improves soil health and retains moisture. (5-10 gallons, depending on garden size)
- ● Watering can or hose with a gentle spray nozzle – For post-pruning hydration. (1)
- ○ Garden twine or plant ties (optional but helpful) – To support floppy stems if needed. (1 roll)
- ● Fungicide spray – If your Mums show signs of mildew or blight. (1 bottle)
- ● Slow-release granular fertilizer – For long-term nutrient boosts. (1 bag)
- ● Soil pH tester kit – To check if your soil needs amendments (ideal pH: 6.0-6.5 for daylilies). (1 kit)
- ● Garden kneeler pad – For comfort during extended pruning sessions. (1)
Step-by-Step instructions for reviving and encouraging mum blooms
Here’s the method I’ve used to coax vibrant blooms from stubborn mums year after year—no mystery, just consistent care.
🌿 Step 1: Assess and Prune for Healthy Growth
Start by examining your mums for dead or yellowed foliage—this is your first clue about their health. Using clean, sharp pruners, trim back any dead stems to just above a leaf node. This encourages new growth and prevents disease from spreading through damaged tissue.
Next, cut back any leggy stems that have lost their compact shape. Aim to reduce the plant’s height by about one-third if it looks overgrown. The goal is to stimulate fresh, bushy growth rather than letting the plant waste energy on weak stems. Prune in the morning when stems are firm and dew has evaporated—this reduces stress on the plant.
✂️ Step 2: Deadhead Regularly to Extend the Blooming Season
Deadheading is the secret to keeping mums flowering nonstop. As soon as a bloom fades and its petals drop, snip the spent flower head off at the base of the stem. This prevents the plant from directing energy into seed production and redirects it toward new buds.
I like to deadhead every 2-3 days during peak bloom season. Watch for the first signs of wilting petals—that’s your cue to act. If you miss a few, don’t stress; just catch up the next day. The key is consistency. Over time, your mums will reward you with clusters of fresh blooms instead of just one or two at a time.
💧 Step 3: Feed with Balanced Fertilizer for Strong Blooms
Mums are heavy feeders, especially if you want them to bloom repeatedly. Use a balanced, water-soluble fertilizer (like a 10-10-10 or 20-20-20 blend) diluted to half strength. Apply it every 2-3 weeks during the growing season, starting in early spring and continuing until late summer.
Here’s the thing—I always fertilize in the morning after watering. This ensures the roots absorb the nutrients immediately rather than getting burned by concentrated fertilizer. If you notice new growth but no flowers, switch to a phosphorus-heavy formula (like 5-10-5) for a few weeks. Phosphorus is what triggers blooming, and your mums will thank you with bigger, brighter flowers.
☀️ Step 4: Provide Optimal Light and Water for Continuous Blooms
Mums thrive in full sun (6-8 hours daily), but they can tolerate partial shade if the climate is hot. If your mums are struggling, move them to a sunnier spot—even an extra hour of morning sun makes a difference. In containers, rotate the pots weekly so all sides get even light exposure.
Water deeply once a week (or more in extreme heat) to encourage strong root growth. The soil should dry out slightly between waterings—you’ll know it’s time when the top 1-2 inches feel dry to the touch. Avoid wetting the foliage, especially in humid conditions, to prevent fungal diseases like powdery mildew. Mulch around the base with 2-3 inches of organic mulch to retain moisture and regulate soil temperature.
⏰ Step 5: Prepare for Winter to Ensure Next Year’s Blooms
In late fall, stop fertilizing and reduce watering as temperatures drop. Cut back the stems by about half their height and remove any remaining foliage that looks diseased. This helps the plant conserve energy over winter and promotes stronger regrowth in spring.
If you’re in a cold climate, mound 4-6 inches of mulch around the base of the plant to insulate the roots. In warmer zones, a light pruning and reduced watering are enough. The goal is to let the plant rest without stressing it. Come spring, you’ll see fresh, vigorous growth—and with the right care, those blooms will return bigger and brighter than ever.
Tips & tricks for reviving stubborn mum blooms
A few key insights can transform your mums from lackluster to show-stopping. Here's what I've learned after years of trial and error with these hardy plants.
Pruning Precision: When you're cutting back those leggy stems in Step 1, look for the first set of healthy leaves below the overgrowth. This is your target pruning point—cutting just above it ensures you're not removing too much foliage that could photosynthesize. I've found that pruning at a 45-degree angle prevents water from pooling on the cut, reducing the risk of rot. The goal is to maintain that bushy shape while encouraging new growth from the base.
Deadheading Discipline: That 2-3 day deadheading schedule in Step 2 might seem frequent, but it's what keeps your mums producing new blooms instead of going to seed. Here's what I do: I carry a small pair of pruning shears with me when I'm outside, and as soon as I see a bloom starting to fade, I snip it off. This prevents the plant from wasting energy on seed development. For extra efficiency, I'll deadhead all the spent blooms at once in the morning when the stems are firm and dew has evaporated.
Fertilizer Timing: The morning-after-watering routine in Step 3 is crucial because it prevents fertilizer burn. I've seen many gardeners make the mistake of applying fertilizer when the soil is dry, which can concentrate the salts and damage the roots. Another pro tip: if you notice yellowing leaves after fertilizing, it's often a sign of over-fertilization. In that case, flush the soil with water to dilute the salts and hold off on fertilizing for a couple of weeks.
Winter Preparation: When you're cutting back those stems by half in Step 5, don't be tempted to remove everything. Leaving some foliage helps protect the plant from cold winds and can actually insulate the crown better than bare stems. In colder climates, I like to add an extra 2-3 inches of mulch after the initial 4-6 inches to create that crucial insulating layer. This extra protection can make all the difference in harsh winters.
Pro Tips for Get Your Mums To Bloom Again
- A few key insights can transform your mums from lackluster to show-stopping. Here's what I've learned after years of ...
- Pruning Precision: When you're cutting back those leggy stems in Step 1, look for the first set of healthy leaves bel...
- Deadheading Discipline: That 2-3 day deadheading schedule in Step 2 might seem frequent, but it's what keeps your mum...
Frequently asked questions
Got questions about reviving your mums?
You’re not alone! Here are some of the most common concerns—and practical answers—to help you get those blooms back in full force.
When is the best time to prune and deadhead mums for maximum blooms?
Prune mums after the first frost (late fall) to shape them for spring, but deadhead spent blooms throughout the growing season (spring to early fall). This encourages new growth and prolongs flowering. Avoid heavy pruning in late summer—it can stunt fall blooms!
How long does it take to see results after pruning and fertilizing?
With proper care, you’ll notice new growth within 2–4 weeks of pruning. Fertilizer effects take 4–6 weeks to show, but consistent deadheading and feeding can yield vibrant blooms in 6–8 weeks. Patience pays off—healthy roots = happier flowers!
What if my mums still won’t bloom after I’ve pruned and fed them?
Check these troubleshooters:
- Light: Mums need 6+ hours of sun daily. Move them to a sunnier spot if possible.
- Water: Overwatering or soggy soil can stress roots. Water deeply 1–2x weekly (adjust for rain).
- Age: Older mums (3+ years) may slow down. Divide clumps every 3–4 years to rejuvenate growth.
- Pests/Disease: Yellow leaves or spots? Treat with neem oil or fungicide if needed.
Can I use regular garden soil, or do I need special potting mix for container mums?
For container-grown mums, use a well-draining potting mix (like 60% potting soil + 30% perlite + 10% compost). Garden soil compacts easily and can suffocate roots. For in-ground mums, amend clay soil with compost or sand to improve drainage.
What’s the difference between pruning for spring blooms vs. fall blooms?
| Spring Blooms | Fall Blooms |
|---|---|
| Prune lightly in early spring (remove dead stems) to encourage new growth. | Prune heavily after the first frost (cut back by ⅔) to shape for next year’s fall display. |
| Feed with high-nitrogen fertilizer (like 10-10-10) in early spring. | Switch to low-nitrogen, high-phosphorus (like 5-10-10) in late summer to promote blooms. |
Pro tip: If your mums bloom in both seasons, adjust fertilizing mid-season (spring to summer) to balance growth and flowering.
Wrapping up and next steps
Your Mums deserve a second chance to shine—and with the right care, they’ll reward you with vibrant blooms all season long! 🌸 From pruning to feeding and deadheading, small efforts yield big results.
Start with one simple step this weekend: check their soil, trim back leggy stems, or add a balanced fertilizer. Every little action keeps them thriving.
Now, grab your shears and watch them bloom again! 🌿 For extra inspiration, bookmark this guide or share your progress with fellow gardeners. Happy gardening!