
Pruning
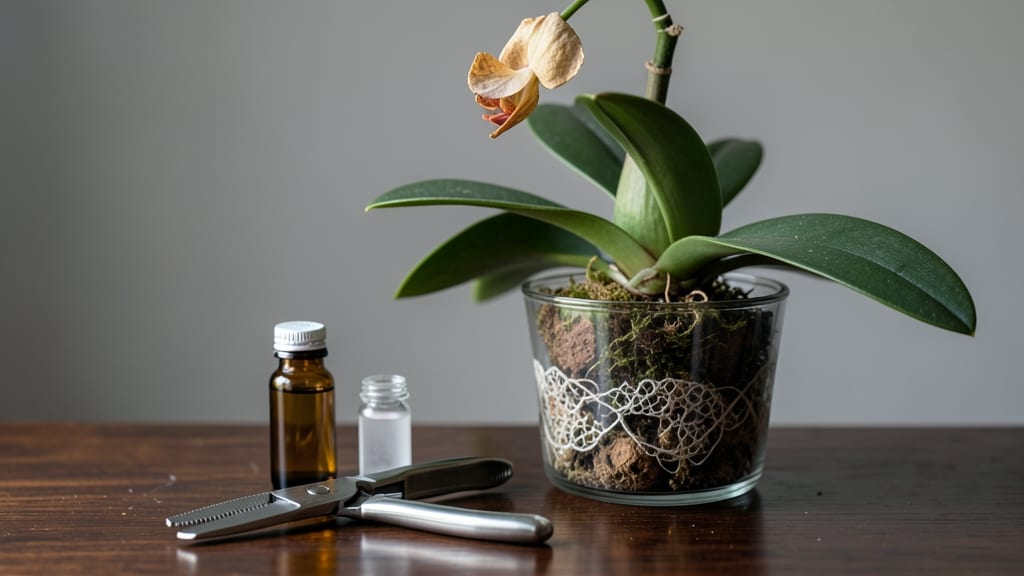
Cutting orchid stems after bloom isn’t guesswork—it’s about precision. ✂️ I’ve learned that the right cut determines whether your Phalaenopsis reblooms or struggles to recover. The key is finding that sweet spot just above a node, where new growth can emerge without risking rot or stunted regrowth.
You’ll need sharp, sterilized pruners and a clear view of those tiny nodes along the stem. Most people cut too close to the base or above a dormant node, which can prevent reblooming.
For Phalaenopsis, aim for the first node below the bloom spike—this gives the plant energy to produce new shoots while keeping the stem intact for future flowers.
After cutting, reduce watering slightly for a week to help the wound heal. You’ll notice new growth within 4-6 weeks, and with proper care, your orchid can rebloom in as little as 6 months. The trick is patience and attention to detail—no more dead stems or missed blooms.
This method works for most common orchids, including Cattleyas and Dendrobiums. Just adjust the cutting point based on the plant’s natural growth habits. Here’s how to do it right the first time!
📚 In This Guide
- What you need
- Instructions
- Tips and common mistakes
- Wrapping up and next steps
What you need
- ● Sharp pruning shears or sterilized scissors – A clean, sharp pair (sterilized with rubbing alcohol) prevents disease and ensures a precise cut. Avoid dull tools—they crush stems instead of cutting cleanly!
- ● Rubbing alcohol (70% isopropyl) or hydrogen peroxide (3%) – For sterilizing tools before and after use to kill bacteria and fungi.
- ○ Cinnamon powder or antifungal powder – A natural 1/4-inch sprinkle on the cut stem to prevent infection (optional but highly recommended!).
- ○ Gloves (optional) – Protects your hands from sap or sharp edges, especially if your orchid has thorns (like Cattleya varieties).
- ● Identify your orchid type – Some orchids (e.g., Phalaenopsis) respond differently to pruning than Cymbidium or Dendrobium. Know if yours is a monopodial (single stem) or sympodial (clumping) orchid.
- ● Wait until the stem is fully wilted – Cutting too soon can stress the plant. Aim for 2–4 weeks after blooms drop.
- ● Check for new growth – If buds or shoots appear on the stem, leave it be—pruning could remove potential blooms!
- ● Horticultural sealant – A tree wound pruning sealant (like Tanglefoot) for extra protection on larger cuts.
- ● Notebook or camera – To track where you cut and observe regrowth patterns over time.
- ● Grow lights or a sunny windowsill – Boosts recovery if your orchid needs extra light post-pruning.
Step-by-step guide to cutting orchid stems after bloom
Here's how I trim orchids to keep them thriving for years—no guesswork, just precision cuts.
🌿 Step 1: Identify the Correct Cutting Point
Look for the second or third node from the top of the flower spike after blooms fade. Nodes are those little bumps where leaves or roots grow. This is where new growth will sprout. If you cut too high, you risk losing potential blooms; too low, and you stunt regrowth. I always count from the top—this ensures consistency every time.
Use clean, sharp scissors or pruners to avoid crushing the stem. A clean cut prevents disease and promotes faster healing. If your orchid has multiple spikes, treat each one individually—some may need cutting while others can be left to mature.
✂️ Step 2: Make the Cut at a 45-Degree Angle
Angle your cut just above the chosen node, about ¼ inch above it. This prevents water from pooling on the node, which can cause rot. I like to visualize a diagonal slice—like cutting a slice of pie—so the stem doesn’t sit flat against the node. A slanted cut also gives the plant more surface area to heal.
Wear gloves if you’re squeamish about sap—orchid stems can be sticky. After cutting, toss the spent spike in the compost (it’s sterile by now) and avoid overwatering for 3-5 days to let the wound seal. This small pause helps prevent infection.
💧 Step 3: Monitor for New Growth
Place your orchid in bright, indirect light (like an east-facing window) and keep humidity high—orchids love 50-70% humidity. Within 4-8 weeks, you’ll see a new spike or baby orchid (called a "keiki") emerging from the node. If nothing appears after 8 weeks, check your light—too little light slows growth, while too much can scorch.
If your orchid produces a keiki, let it grow until it has 3-4 leaves and its own roots. Then, you can carefully separate it from the mother plant. I usually wait until the keiki is about half the size of the parent before transplanting—this gives it a fighting chance to thrive on its own.
☀️ Step 4: Adjust Care for Regrowth
Once new growth starts, increase watering slightly—let the top inch of soil dry out between waterings. Overwatering now can drown tender new shoots. I use room-temperature water and avoid getting the crown wet, which invites fungal issues. Fertilize lightly with a balanced orchid fertilizer (like 10-10-10) diluted to half strength every 2-4 weeks during active growth.
Rotate your orchid quarter-turn weekly so it grows evenly toward the light. You’ll notice new leaves emerging with a vibrant green color—this is your sign that the plant is happy and recovering. If leaves turn yellow, it’s often a sign of overwatering or poor drainage. Adjust your routine until you see steady, healthy growth.
⏰ Step 5: Plan for Next Bloom Cycle
After your orchid finishes regrowing, it’ll need 6-12 months of consistent care before blooming again. During this time, focus on strong root development—healthy roots mean bigger, longer-lasting blooms. I keep mine in a stable 65-80°F environment and avoid drastic temperature swings, which stress the plant.
When you see a new spike forming, reduce fertilizer slightly to encourage flowering instead of leaf growth. The first spike after cutting is often the strongest, so give it the best conditions. With patience, your orchid will reward you with another stunning display—proving that a little precision goes a long way.
Tips & tricks for perfect orchid stem pruning
A few simple tricks will help you avoid common mistakes and give your orchid the best chance at thriving after cutting those spent blooms.
The Node Counting Rule: I can't stress enough how important it is to count nodes from the top down—starting at the first node below the faded blooms. The second or third node is your sweet spot because it gives the plant enough energy reserves while still allowing room for new growth. If you're unsure, count the total nodes on the spike first, then work backward from the top. This method has saved me from cutting too high more times than I can count!
Tool Talk: Never use dull scissors or kitchen knives for orchid pruning—they crush stems and create jagged cuts that invite disease. Invest in a pair of clean, sharp pruners or even small gardening shears. I keep a dedicated pair just for orchids, and they last years. After each use, wipe them down with rubbing alcohol to prevent bacterial buildup. This small habit has kept my orchids healthier than ever.
Post-Cut Recovery: The 3-5 day watering pause after cutting is absolutely critical, but I've learned that consistency matters just as much as timing. During this period, place your orchid in a spot with good air circulation—like near an open window with a gentle breeze—to help the wound dry faster. I also avoid fertilizing during this time, as fresh cuts are more vulnerable to nutrient burn. Think of it as giving your orchid a mini spa treatment to recover properly.
Keiki Watch: When monitoring for new growth, pay attention to the color of emerging leaves—they should be a vibrant, rich green, not pale or yellowish. If you notice pale new growth, it's often a sign of insufficient light. I've found that moving orchids to a slightly brighter spot (but still indirect) can make all the difference. Remember, orchids are tropical plants that need bright light to thrive, but direct sun can scorch their delicate leaves.
Pro Tips for Where To Cut Orchid Stem After Bloom
- A few simple tricks will help you avoid common mistakes and give your orchid the best chance at thriving after cutting those spent blooms.
- The Node Counting Rule: I can't stress enough how important it is to count nodes from the top down—starting at the first node below the faded blooms.
- Tool Talk: Never use dull scissors or kitchen knives for orchid pruning—they crush stems and create jagged cuts that invite disease.
Frequently asked questions
Got more questions about pruning orchid stems? Here are some common ones—and their answers—to help you keep your orchids thriving after blooming!
What if I don’t cut the orchid stem after it blooms?
You can leave it, but expect fewer blooms and potential energy drain. Unpruned stems may produce smaller blooms or even rot over time. Cutting encourages new growth and healthier flowers—just follow the right technique!
Can I cut the stem too early?
Yes! If you cut too soon (while buds are still forming), you’ll lose potential blooms. Wait until all flowers wilt and the stem turns yellow or brown before pruning. Patience pays off for stronger regrowth!
What if my orchid stem has no visible nodes?
Some stems (like Phalaenopsis) may have tiny, hard-to-spot nodes. Run your fingers gently along the stem—nodes feel like small bumps. If none are visible, cut just above the base or let the stem die back naturally.
Can I propagate the cut stem?
Place the cut section in water or sphagnum moss to encourage root growth. Keep it in bright, indirect light and mist regularly. It may take 4–8 weeks for roots to form—great for free orchid babies!
My orchid stem turned mushy after cutting—what went wrong?
Overwatering or cutting too close to the base can cause rot. Always use sterile tools, let cuts dry for 10–15 minutes, and avoid soggy soil. If rot spreads, trim further back to healthy tissue and repot if needed.
Wrapping up and next steps
Mastering where to cut orchid stems after bloom is your ticket to lush, repeat blooms and thriving plants! 🌸 By following the right techniques—like cutting above a node or just above the second node from the base—you’ll encourage healthy regrowth and maximize your orchid’s potential.
Don’t let hesitation hold you back; with confidence and precision, your orchid will reward you with stunning flowers again and again.
Ready to put your new skills to the test? Grab your shears, pick an orchid, and give it the fresh start it deserves! 🌱