
Pruning
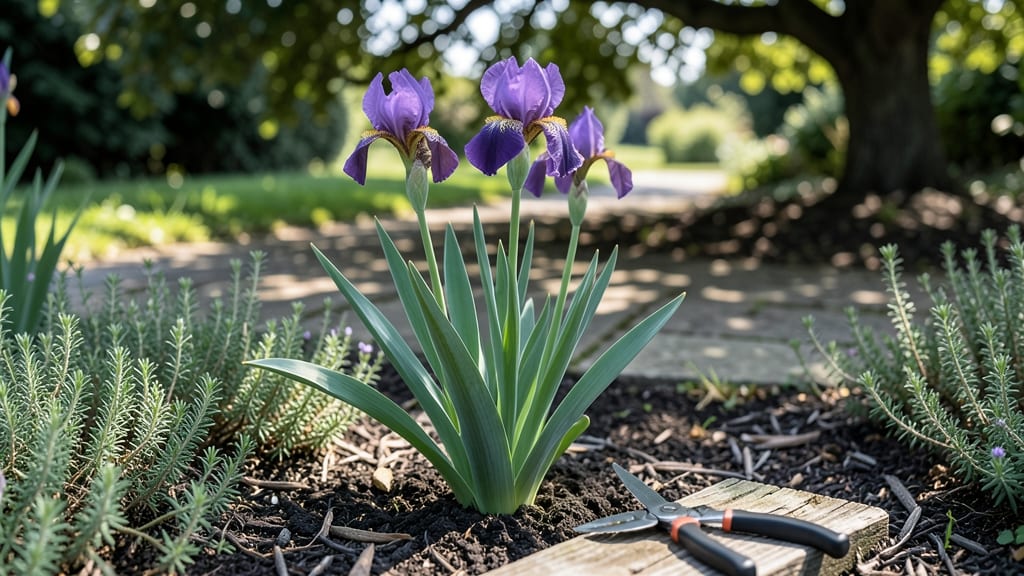
Trimming iris leaves at the wrong time can kill next year’s blooms—here’s the exact timing trick that works every season. 🌿 After those dramatic purple (or white or yellow) spikes fade, resist the urge to cut everything back.
The leaves store energy for next year’s flowers, so wait until they yellow naturally, usually 6-8 weeks after blooming—that’s your cue to clean up. I used to hack off leaves right after flowering, thinking I was helping, but my irises weakened each year.
Now I mark the date when blooms finish and wait patiently. By late summer, the old foliage turns crispy brown, signaling it’s safe to remove—never cut healthy green leaves, even if they look messy. You’ll see fresh, vibrant growth emerge from the center in spring, stronger than ever.
The secret is letting those leaves do their job until they’re truly done. With this method, my irises now produce more blooms each year and look healthier than ever. Grab clean pruners and a sunny afternoon—this takes 10 minutes and makes all the difference. The key is timing, not rushing.
Your irises will thank you with a spectacular show next season!
📚 In This Guide
- What you need
- Instructions
- Tips and common mistakes
- Wrapping up and next steps
What you need
- ● Sharp pruning shears – A bypass pruner (not anvil-type) is ideal for clean cuts. Choose a pair with 4- to 6-inch blades for precision.
- ● Garden gloves – Opt for cut-resistant, breathable gloves (e.g., nitrile-coated) to protect your hands from thorns and dirt.
- ● Disinfectant (70% isopropyl alcohol or bleach solution) – A small spray bottle or wipe to sterilize tools between cuts and prevent disease spread.
- ● Garden twine or rubber bands – For tying up leaves if you’re prepping for division or storage.
- ● Hand pruners or small scissors – For trimming smaller leaves or stubborn stems.
- ● Knee pad or small stool – If your irises are in a hard-to-reach spot, comfort is key!
- ● Compost bin or bag – To collect trimmed leaves for mulch or disposal.
- ● Plant marker or labels – If you’re dividing irises, label new clumps to track varieties.
Step-by-step instructions for trimming iris leaves after blooming
Here's the exact timing and technique I've used for years to keep irises thriving.
🌿 Step 1: Wait Until Leaves Turn Brown and Crispy
Don't cut anything until at least 6 weeks after blooming—this gives the plant time to store energy in its rhizomes. You'll know it's time when the leaves turn completely brown and crispy, usually in late summer or early fall. I always wait until after the first frost in colder climates to avoid shocking the plant.
Resist the urge to trim earlier, even if leaves look yellow or ragged. The plant needs those leaves to photosynthesize until the very end. If you cut too soon, you'll weaken next year's blooms. I've seen gardeners rush this step and end up with half the flower stalks the following spring.
✂️ Step 2: Cut Leaves Back to Within 2 Inches of the Rhizome
Once leaves are fully brown, use clean, sharp pruners or shears to cut them back to within 2 inches of the rhizome. This prevents disease from lingering in old leaf tissue while leaving enough stubble to protect the rhizome over winter. I like to make clean cuts at a slight angle to avoid tearing the leaves.
Don't pull or yank the leaves—this can damage the rhizome. If you have thick, woody leaves, you might need to cut them in stages to avoid breaking them. The goal is to remove all the dead foliage while leaving the base intact. This is also a great time to check for any signs of iris borer or other pests hiding in the old growth.
🌱 Step 3: Remove Any Flower Stalks and Debris
After cutting back the leaves, remove any remaining flower stalks by snapping them off at the base. These stalks are now dead and can harbor fungal diseases. I also take this opportunity to clear away any old mulch or debris around the rhizomes, which helps prevent rot and pests.
While you're at it, check the rhizomes themselves for any signs of rot or damage. Healthy rhizomes should feel firm and plump. If you find any that look soft or mushy, remove them immediately to prevent spreading disease to the rest of your plants. This is the perfect time to divide and replant any crowded rhizomes as well.
💧 Step 4: Apply a Light Mulch for Winter Protection
After trimming, spread a 1-2 inch layer of mulch around the base of the plants, being careful not to pile it directly against the rhizomes. I use shredded bark or straw because they break down slowly and provide good insulation. This helps protect the rhizomes from extreme temperature fluctuations during winter.
Water the area lightly after mulching to help settle everything in place. Avoid heavy watering at this stage—you want the soil to be slightly moist but not soggy. This final step sets your irises up for strong, healthy growth in the coming season. Mark the spot where you've planted them to avoid disturbing the rhizomes when it's time to trim again next year.
Tips & tricks for perfect iris leaf trimming timing
Timing is everything when it comes to reviving your irises—here's how to get it right every time.
Timing Secret: The 6-week waiting period after blooming is non-negotiable for irises. I've seen gardeners cut too early and end up with half as many blooms the next season. Think of it like giving your plant a final meal before winter—those leaves are storing energy in the rhizomes. If you cut too soon, you're basically starving your irises for next year's growth. Mark your calendar after blooming to remember this crucial deadline.
Visual Cues: Don't rely on dates—watch for the leaves to turn completely brown and crispy before cutting. In my zone 5 garden, this usually happens in late September, but it can vary by 2-3 weeks depending on your climate. The leaves should feel dry and brittle when you touch them, almost like straw. If they're still green or just yellowing, wait longer. I always do a final check after the first frost to be absolutely certain.
Clean Cuts Matter: When you finally trim those dead leaves back to within 2 inches of the rhizome, use sharp pruners and make clean cuts at a slight angle. This prevents tearing and makes the plant look much tidier. I've learned the hard way that dull shears can damage the rhizome, which can lead to rot. After cutting, I always run my fingers along the rhizome to check for any rough edges that might need smoothing. This is also your chance to inspect for pests—look for tiny holes or sawdust-like frass that might indicate iris borer.
Winter Prep: That 1-2 inch mulch layer isn't just decoration—it's insulation. I use shredded bark because it breaks down slowly and provides consistent protection. The key is to keep it loose around the rhizomes rather than piling it directly on top. This prevents rot while still insulating against winter temperature swings. After mulching, give everything a light watering to settle the mulch in place, but don't overdo it—soggy soil is just as bad as dry soil at this stage.
Pro Tips for When To Trim Iris Leaves After Blooming
- Timing is everything when it comes to reviving your irises—here's how to get it right every time.
- Timing Secret: The 6-week waiting period after blooming is non-negotiable for irises. I've seen gardeners cut too ear...
- Visual Cues: Don't rely on dates—watch for the leaves to turn completely brown and crispy before cutting. In my zone ...
Frequently asked questions
Got questions about trimming iris leaves after blooming? You’re not alone! Here are some of the most common concerns—and clear, expert-backed answers to help you keep your irises thriving.
When should I trim iris leaves after blooming if they’re still green and healthy?
Wait until the foliage turns completely brown (usually late summer or early fall). Trimming too soon removes nutrients the leaves store for next year’s blooms. If leaves are still green, leave them be—they’re hard at work feeding your irises!
What if I missed the window and trimmed iris leaves too early?
Don’t panic! If you cut back green leaves by accident, your irises can still recover. Just avoid trimming more than one-third of the foliage, and keep the plant well-watered. Next year, focus on timing it right—late summer is your best bet.
Should I cut iris leaves all the way to the ground, or leave some stubble?
Leave 2–3 inches of stubble above the rhizome (the thick, fleshy root). This protects the plant from frost and disease while allowing new growth to emerge in spring. Think of it as giving your irises a cozy blanket for winter!
Can I trim iris leaves after they’ve already bloomed but before they brown?
Yes, but with caution! You can lightly tidy up spent flower stalks (they’re called fans) right after blooming, but avoid touching the leaves. Save the major trim for when the foliage is fully dormant. This keeps your irises energized for next season.
What if my iris leaves turn brown and mushy after blooming—is it too late to trim?
Brown, mushy leaves could signal rot (often from overwatering or poor drainage). Trim the affected leaves immediately to prevent spread, but focus on improving soil drainage first. Healthy irises should only brown naturally in late summer—any earlier may need a closer look!
Wrapping up and next steps
Trimming iris leaves after blooming is all about timing and precision—wait until the foliage turns yellow or brown, then cut back only the dead or damaged parts to keep your plants healthy and vibrant.
This simple step ensures your irises thrive for next season while keeping your garden looking neat and intentional. Now that you’ve got the know-how, grab those shears and give your irises the care they deserve—your future blooms will thank you!
🌱 Next step: Mark your calendar for late summer or early fall and make trimming a quick, satisfying garden task. Happy gardening! 🌸