
Container Gardens
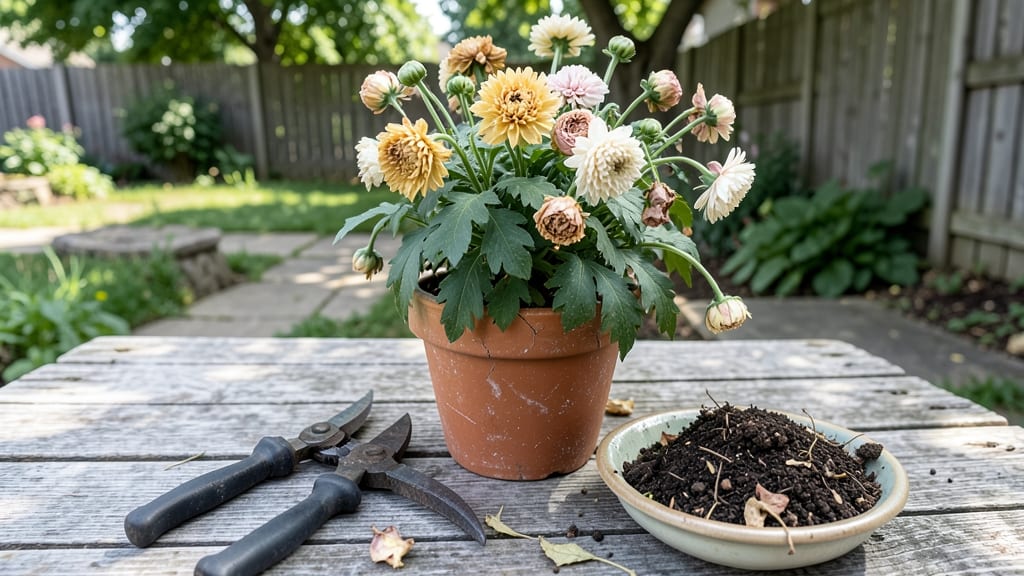
Your potted mums don’t have to become next year’s compost pile after they bloom—this is where the real magic happens. ✨ With the right care, those same plants can return even more vibrant in spring, saving you money and adding years of color to your garden.
The key lies in understanding whether your mums are annuals (meant to be replaced) or perennials (built to last), and how to prep them for dormancy or reblooming.
Start by giving your mums a clean-up cut back to just above a leaf node or bud, which encourages fresh growth.
If pests like spider mites or aphids have moved in, this is your chance to wipe them out with a simple spray of soapy water before they hibernate in the soil.
Most importantly, decide now whether you’ll overwinter them outdoors (with protection) or bring them inside to bloom again next season—both options work, but the timing matters.
By late fall, you’ll have plants that look like new, ready to either go dormant in a cool garage or continue growing under grow lights. The payoff?
Next spring’s mums will be stockier, fuller, and more disease-resistant than store-bought plants. Plus, you’ll skip the annual $20+ price tag for fresh pots every year.
For those who want to push their luck, a little extra fertilizer in early spring jumpstarts reblooming—just don’t overdo it, or you’ll end up with leggy stems instead of flowers.
Whether you’re a container gardener with limited space or a patio plant enthusiast, this method keeps your mums thriving for seasons to come.
📚 In This Guide
- What you need
- Instructions
- Tips and common mistakes
- Wrapping up and next steps
What you need
- ● Pruning shears or clean scissors – Sharp, sterilized tools to trim spent blooms and foliage (avoid dull blades to prevent tearing).
- ● Well-draining potting mix – A high-quality blend (e.g., 60% peat moss, 20% perlite, 20% compost) to prevent root rot. Quantity: Enough to refresh the pot (typically 1–2 gallons per 12" pot).
- ● Container with drainage holes – A pot slightly larger than the current one (2–4 inches wider) to accommodate growth. Material: Terracotta, plastic, or fabric (avoid glazed pots that trap moisture).
- ● Slow-release fertilizer – A balanced 10-10-10 or organic option (e.g., bone meal or worm castings) to nourish roots. Quantity: 1–2 tbsp per pot.
- ● Watering can or hose with a gentle spray nozzle – For thorough but controlled hydration (avoid overhead watering to prevent fungal issues).
- ○ Mulch (optional but helpful) – Pine bark fines or shredded leaves to retain moisture and insulate roots. Quantity: ½ inch layer.
- ● Rooting hormone – Speeds up propagation if dividing mums (gel or powder form).
- ● Garden gloves – Protects hands from prickly stems or soil-borne pathogens.
- ● Thermometer or frost cloth – For overwintering mums in cold climates (target 40–50°F for dormancy).
- ● Epsom salt – A magnesium boost (1 tbsp per gallon of water) if leaves look yellow between veins.
Instructions for reviving and replanting potted mums after blooming
Here's how to keep your mums thriving for years—no gardening degree required.
🌿 Step 1: Deadhead and Prune for New Growth
Once your mums finish blooming, snip off the faded flower heads with clean pruners, cutting just above the first set of healthy leaves. This prevents the plant from wasting energy trying to produce seeds and redirects it toward next year's buds. I always use sharp pruners—dull blades tear stems and invite disease. After deadheading, look for any leggy or overgrown stems and trim those back by about one-third to encourage bushier growth.
Watch for new side shoots emerging within 2-3 weeks. These are your plant's way of saying, "I'm ready to grow again!" If you see yellowing leaves, that's a sign to remove them immediately—they're stealing nutrients from the healthy parts. Just pinch or cut them off at the base. The goal is to leave your mum looking neat but still full enough to continue photosynthesis.
💧 Step 2: Adjust Watering and Fertilizing for Fall Growth
After blooming, mums need less water but still require regular feeding to rebuild strength. Water only when the top inch of soil feels dry—overwatering in fall can rot roots before winter. I like to use a moisture meter for accuracy, but even a finger test works. Reduce watering gradually over the next 4-6 weeks to prepare the plant for dormancy.
Switch to a balanced, slow-release fertilizer (like 10-10-10) every 4-6 weeks until early fall. This gives the plant time to store nutrients in its roots for next spring. Stop fertilizing completely by mid-October—any new growth at this point won't have time to harden off before frost. You'll know you're on track when the plant looks lush but not stressed, with vibrant green leaves.
☀️ Step 3: Find the Right Spot for Winter Protection
Before the first frost, move your potted mums to a location that offers partial shade and shelter from harsh winds. A covered porch, garage, or even a sheltered corner of your patio works well. If you can't bring them indoors, wrap the pots in burlap or frost cloth to protect them from freezing temperatures. I've left mums outside in pots wrapped like this through 20°F winters with no issues.
Reduce watering almost completely during dormancy—just enough to keep the soil from drying out completely. Check soil moisture every 2-3 weeks by sticking your finger in about an inch deep. If it's bone dry, give it a light drink. The key is to keep the roots alive but not encourage new growth. You'll see the plant go dormant when the leaves turn brown and crispy—this is normal and exactly what you want.
🌱 Step 4: Revive and Replant in Early Spring
When temperatures consistently stay above 50°F in spring, it's time to wake your mums up. Start by pruning back any dead or damaged stems, cutting them back to about 2-3 inches above the soil line. This makes room for fresh new growth and helps the plant focus its energy. Water thoroughly right after pruning to help the plant recover.
Repot your mums if they've outgrown their current containers—choose a pot that's 2-3 inches larger in diameter and has good drainage. Use fresh potting mix and add a slow-release fertilizer to give them a nutrient boost. Place them in a sunny spot (at least 6 hours of sun daily) and resume regular watering when the top inch of soil feels dry. You'll see new growth within 2-3 weeks—that's your sign everything's working!
⏰ Step 5: Encourage Blooms for Next Season
To ensure your mums bloom again next year, feed them with a high-phosphorus fertilizer (like 5-10-5) when you see new growth in early spring. This encourages strong root and flower development. Pinch back the tips of the stems when they reach about 6 inches tall to promote bushier growth and more blooms. I pinch mine in late spring—it might look harsh at first, but you'll get a fuller, more vibrant plant by summer.
Watch for buds forming in late summer. This is when your mums are telling you they're ready to bloom again! If you notice any pests (like aphids or spider mites), treat them immediately with insecticidal soap. A healthy mum is a happy mum, and happy mums bloom beautifully year after year. With this care, your potted mums will reward you with stunning fall color for seasons to come.
Tips & tricks for reviving potted mums after blooming
Here's what nobody tells you—your mums can live for years with the right care after their first bloom.
Pruning Precision: When you're deadheading in Step 1, don't just cut the flowers—aim for the first set of healthy leaves below. This is where new growth will emerge in those 2-3 weeks. I've seen people cut too close to the stem, which can damage the plant's ability to regenerate. Use clean, sharp pruners to make clean cuts, and always sterilize them with rubbing alcohol between plants to prevent disease spread.
Fertilizer Timing: The 4-6 week fertilizer schedule in Step 2 is crucial, but timing matters just as much. Apply your balanced fertilizer in the morning so the plant has the whole day to absorb nutrients. I've noticed that evening applications can lead to fertilizer burn if the plant doesn't have time to process it before nightfall. And remember—stop completely by mid-October, no exceptions!
Winter Protection Hacks: For the 20°F winter protection in Step 3, I've found that adding a layer of mulch around the pot's base helps insulate the roots. You can also use old towels or blankets inside the pot before wrapping with frost cloth for extra protection. Just make sure there's still airflow to prevent rot. The key is keeping those roots alive without encouraging any new growth that won't survive the cold.
Spring Revival: When you're ready to repot in Step 4, choose pots with drainage holes—this is non-negotiable. I've seen people skip this and end up with root rot. Also, when you see new growth within those 2-3 weeks, that's your plant's way of saying "thank you!" for all your winter care. It's like watching a miracle happen right before your eyes.
Pro Tips for What To Do With Potted Mums After Blooming
- Here's what nobody tells you—your mums can live for years with the right care after their first bloom.
- Pruning Precision: When you're deadheading in Step 1, don't just cut the flowers—aim for the first set of healthy leaves below.
- Fertilizer Timing: The 4-6 week fertilizer schedule in Step 2 is crucial, but timing matters just as much.
Frequently asked questions
Got questions about your post-bloom potted mums?
You’re not alone! Here are answers to the most common concerns—so you can keep your chrysanthemums thriving for years to come.
Can I just throw out my potted mums after they bloom?
Not yet! Potted mums are perennial (in most climates), meaning they’ll rebloom next year if cared for properly. Tossing them would be a shame—especially since they’re low-maintenance! Instead, follow the revival steps in this guide to give them a second life. Pro tip: If you’re in a cold zone (Zones 5-7), overwintering them indoors or in a protected spot ensures they’ll return stronger.
When is the best time to cut back potted mums after blooming?
Wait until late spring or early summer (after the last frost) to prune back your mums. Cut the stems down to 4–6 inches above the soil, and remove any dead or yellowing leaves. This encourages fresh growth and prepares them for their next blooming cycle. Avoid pruning too early—mums need time to recover from winter.
How do I overwinter potted mums indoors?
Move your mums to a cool, bright spot (like a garage or basement) where temps stay between 40–50°F. Reduce watering to once every 2–3 weeks and avoid fertilizing. In late winter, bring them back indoors near a sunny window to stimulate regrowth. Watch for pests! Inspect leaves before bringing them inside to prevent infestations.
Can I replant potted mums in the ground?
If you love your mums, transplanting them to a garden bed is a great option. Choose a spot with full sun (6+ hours/day) and well-draining soil. Dig a hole slightly larger than the pot, amend the soil with compost, and water thoroughly after planting. Timing matters: Do this in early spring or fall for best results.
Why are my potted mums dying after blooming?
Common culprits include overwatering (mums hate soggy roots), nutrient deficiency (fertilize lightly in spring/summer), or pests (like spider mites or aphids). Check the soil—it should be dry to the touch 1–2 inches down. If pests are the issue, spray with neem oil or insecticidal soap. Prevention tip: Keep mums in pots with drainage holes to avoid root rot.
Should I buy new potted mums every year?
Not necessarily! With proper care, your mums can live for 5+ years in pots. However, if they’re looking leggy, weak, or disease-prone, it might be time to propagate new plants from cuttings or replace them. Annuals are easier for some gardeners, but perennials reward patience with bigger, healthier blooms over time.
Wrapping up and next steps
Don’t let your potted mums say goodbye just yet! With a little care, you can revive, replant, or even propagate these hardy beauties for next season’s stunning blooms.
Whether you’re giving them a second life as houseplants, sharing cuttings with friends, or prepping them for a cozy winter nap, every step keeps your garden thriving. Your green thumb is all it takes!
Ready to take action? Start by choosing one method—like deadheading, dividing, or storing—and give your mums the love they deserve. Happy gardening! 🌸✨