
Blooming
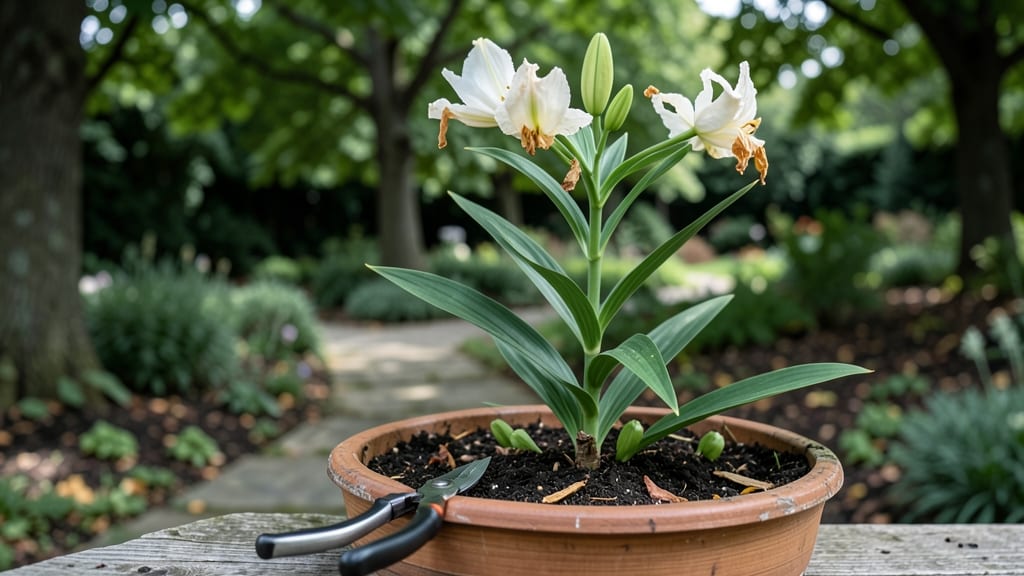
After your lilies finish their showstopping display, the real work begins—cutting back properly ensures next year’s blooms will be even more spectacular. 🌸 I’ve learned the hard way that leaving spent stems standing invites pests and weakens the bulbs, so here’s exactly what to do to keep your lilies thriving.
Start by removing the flower stalks at the base once they’ve fully faded, but leave the lower leaves intact—they’re feeding the bulb for next season. For hardy lilies like Asiatics or Trumpets, mulch around the base with 2-3 inches of compost to protect roots over winter.
If your lilies are in containers, move them to a sheltered spot before the first frost.
By spring, you’ll see fresh foliage pushing through the soil, signaling the bulb is storing energy for another round of blooms. The key is patience—lilies need 6-8 weeks of warm weather to fully recharge before they’ll put on their best show again.
A little care now means bold, healthy blooms next summer.
For established clumps, consider dividing them every 3-4 years to prevent overcrowding. Simply dig up the bulbs after the foliage yellows, separate the offsets, and replant them in fresh soil. This rejuvenates the plants and gives you more lilies for free—just don’t rush it, or you’ll stunt their growth.
📚 In This Guide
- What you need
- Instructions
- Tips and common mistakes
- Wrapping up and next steps
What you need
- ● Pruning shears or sharp garden scissors – Clean, sterilized tools (to avoid spreading disease).
- ○ Garden gloves – Optional but recommended for protection while handling thorns or soil.
- ● Compost or mulch – 2–3 inches of organic matter (e.g., shredded leaves, aged compost).
- ● Watering can or hose with a gentle spray nozzle – For hydration after trimming.
- ○ Fertilizer (optional but helpful) – Balanced, slow-release granular (10-10-10 ratio) or organic options like bone meal or worm castings.
- ● Epsom salt – 1 tablespoon per plant (for magnesium boost, especially for yellowing leaves).
- ● Plant food with iron – If lilies show chlorosis (yellowing between veins).
- ● Landscape fabric or cardboard – To suppress weeds around the base.
- ● Notebook or app – To track blooming cycles and care notes!
What to do with lilies after they bloom: Step-by-Step care for reblooming success
Here’s how I keep my lilies thriving year after year—simple steps that ensure next season’s flowers will be even more spectacular.
🌱 Step 1: Deadhead Properly to Preserve Energy
Once your lilies finish blooming, snip off the spent flower stalks about 1 inch above the nearest leaf node using clean, sharp pruners. This prevents the plant from wasting energy on seed production, redirecting it instead to root and bulb development for next year’s blooms.
I know it seems counterintuitive—after all, why remove the flowers?—but this is the moment that matters: leaving the stalks can weaken the bulb over time. If you’re unsure where the leaf node is, look for the small bump where leaves grow out from the stem. That’s your target.
✂️ Step 2: Prune Foliage Gradually to Avoid Shock
Never cut back lily leaves until they’ve turned completely yellow and crispy—this can take 6-8 weeks after blooming. The foliage is still feeding the bulb underground, so removing it too soon starves the plant. I wait until the leaves feel dry and brittle before trimming them down to 2-3 inches above the soil line.
Real talk: I’ve made the mistake of cutting too early, and the next year’s blooms were half the size. Patience here pays off in bigger, healthier flowers. If you’re in a hurry, just leave the foliage—it’ll die back naturally.
💧 Step 3: Water and Fertilize for Bulb Strength
Keep the soil evenly moist but not soggy for the next 4-6 weeks after blooming. Lilies need consistent moisture to rebuild their energy reserves. I water deeply once a week, checking that the top 2-3 inches of soil stay damp but not waterlogged.
Now’s also the time to fertilize lightly. Use a balanced, slow-release fertilizer (like 10-10-10) at half strength. This gives the bulbs a gentle nutrient boost without overstimulating new growth. Avoid high-nitrogen fertilizers—they encourage leafy growth at the expense of flower development.
☀️ Step 4: Mulch to Protect and Insulate the Bulbs
Spread a 2-3 inch layer of organic mulch (like shredded bark or straw) around the base of your lilies after the foliage has yellowed. This protects the bulbs from temperature swings and keeps the soil moist. I always mulch in early fall to give the bulbs a head start on winter.
Don’t pile mulch directly against the stems—leave a 1-inch gap to prevent rot. This is especially important in rainy climates. If you’re in a cold region, add an extra layer of mulch in late fall to insulate the bulbs through winter.
🌿 Step 5: Monitor for Pests and Diseases
After blooming, lilies are still vulnerable to lily beetles, aphids, and fungal diseases. Inspect the foliage weekly for signs of damage—chewed leaves, sticky residue, or black spots. If you spot beetles, handpick them or use neem oil as a natural deterrent.
I’ve found that lilies grown in well-draining soil with good airflow stay healthier. If your garden is humid, space plants 12-18 inches apart to improve air circulation. This simple step can prevent most fungal issues before they start.
Tips & tricks for perfect lily post-bloom care
A few simple strategies can transform your lilies from one-season wonders into multi-year stars. Here's what I've learned from years of trial and error.
Precision Pruning: When deadheading in Step 1, use sterilized pruners to avoid spreading disease between plants. I dip the blades in rubbing alcohol between cuts—this keeps your garden healthy and prevents infections that can weaken bulbs. The 1-inch cut above the leaf node is critical; any lower, and you risk damaging the plant's energy storage system.
Seasonal Timing: The 6-8 week wait in Step 2 is non-negotiable for most climates, but I've found that in hot, dry regions, you can safely trim foliage when it turns completely brown—sometimes as early as 4-5 weeks. The key is checking leaf crispiness rather than relying solely on the calendar. This adjustment works because the bulbs signal when they've finished storing energy.
Fertilizer Strategy: For Step 3, I've discovered that applying a second, lighter feeding in early fall (around 6 weeks after blooming) gives bulbs an extra boost before winter. Use the same balanced fertilizer at half strength again—this mimics the natural nutrient cycle and produces stronger stems for next year's blooms. The timing aligns perfectly with your 4-6 week post-bloom watering window.
Mulch Layering: In Step 4, I've learned that the thickness of your mulch layer matters more than the type. For cold winters, I double the 2-3 inch recommendation to 4-5 inches in late fall, creating a proper insulating blanket. The 1-inch gap from stems is just as important—it's the difference between healthy bulbs and potential rot during wet springs.
Pro Tips for What To Do With Lilies After They Bloom
- A few simple strategies can transform your lilies from one-season wonders into multi-year stars.
- Precision Pruning: When deadheading in Step 1, use sterilized pruners to avoid spreading disease between plants.
- Seasonal Timing: The 6-8 week wait in Step 2 is non-negotiable for most climates, but I've found that in hot, dry regions, you can safely trim foliage when it turns completely brown—sometimes as early as 4-5 weeks.
Frequently asked questions
Got questions about post-bloom lily care? Here are answers to the most common ones to keep your plants thriving!
Do I need to cut back lilies after they bloom?
Yes! Cutting back after the blooms fade prevents seed pods from forming, which saps energy from next year’s growth. Snip spent flower stalks down to the base or just above the first set of leaves. This redirects nutrients to the bulbs for a stronger rebloom.
When is the best time to deadhead lilies?
Deadhead lilies immediately after the blooms wilt—don’t wait for them to turn brown or drop. For tropical lilies, remove faded flowers every few days to encourage continuous blooming. For hardy lilies (like Asiatics or Martagons), wait until the entire stem browns before cutting it back.
Can I leave lily foliage until it dies back naturally?
Never cut back the leaves until they turn yellow and wither (usually late fall). The foliage photosynthesizes, feeding the bulb for next season. Only remove it after it’s completely crispy—this ensures robust blooms in spring.
Will lilies rebloom if I don’t deadhead them?
Maybe, but it’s unpredictable. Some lilies (like Stargazer or Casa Blanca) may rebloom with seed pods, but others (like Asiatics) often skip next year’s flowers. Deadheading guarantees stronger, more abundant blooms by focusing the plant’s energy on bulb storage.
What if my lilies don’t rebloom after deadheading?
Several factors could be at play:
- Age: Older bulbs (5+ years) may need dividing.
- Light: Lilies need 6+ hours of sun daily.
- Soil/Nutrients: Amend soil with compost or use a low-nitrogen bulb fertilizer in early spring.
- Variety: Some lilies (like Lilium longiflorum) are often single-bloomers.
Pro Tip:
Mark your calendar! Most lilies need 8–10 weeks of warm weather to store enough energy for reblooming. If summer is short in your zone, prioritize deadheading and foliage care to maximize bulb strength.
Wrapping up and next steps
Don’t let your lilies’ post-bloom phase go to waste—with just a little care, you’ll set the stage for next year’s showstopper blooms! 🌸 Whether you’re deadheading, dividing, or repurposing their beauty, each step keeps your garden thriving.
Now’s your chance to relax and enjoy the fruits of your labor—your lilies will thank you with even more vibrant flowers!
Ready to take action? Grab your pruners and get started! Your garden’s next masterpiece begins today.