
Blooming
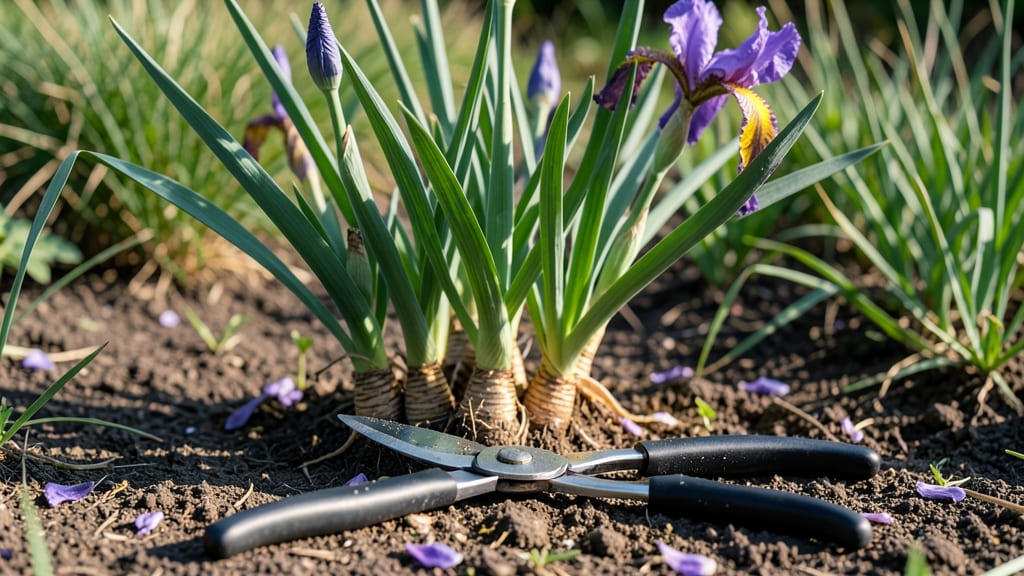
After those stunning purple swords fade, your irises aren’t done yet—this is where next year’s show begins. ✨ Late summer is the perfect time to give them a little care that pays off with bigger blooms in spring.
I’ve learned the hard way that skipping these steps means smaller flowers and weaker plants over time.
The key moves are simple: snip those spent blooms, feed the roots, and check if it’s time to divide crowded clumps.
Most people stop at deadheading, but the real magic happens when you give irises room to grow and the nutrients they need for stronger stems and more vibrant blooms. Think of it like giving them a spa day after all that flowering.
By early fall, your irises will be storing up energy for next spring’s display—bold, healthy, and ready to steal the show. The best part? This routine takes less than 30 minutes and makes your garden look effortlessly lush. Let’s get those irises prepped for their next performance.
Whether you’re a first-time iris grower or a seasoned gardener, these steps work for all varieties—bearded, Siberian, or even those rare heirlooms. The secret is consistency, not complexity. Here’s exactly how to do it right.
📚 In This Guide
- What you need
- Instructions
- Tips and common mistakes
- Wrapping up and next steps
What you need
- ● Pruning shears or sharp garden scissors – Sterilized (rubbing alcohol wipe works!), with clean, sharp blades to avoid crushing stems.
- ○ Gloves – Heavy-duty gardening gloves (optional but highly recommended—irises can be prickly!).
- ● Compost or mulch – 2–3 inches of well-aged compost or organic mulch (e.g., shredded bark, straw).
- ● Garden fork or trowel – For gently loosening soil around rhizomes (if dividing).
- ● Watering can or hose with a gentle spray nozzle – Irises hate soggy feet but need 1–2 inches of water per week.
- ○ Fertilizer (optional but helpful) – Balanced granular fertilizer (e.g., 10-10-10) – 1 tbsp per plant after blooming.
- ● Slow-release bulb fertilizer (e.g., 5-10-10) – Sprinkle ½ cup per 10 sq ft in early fall.
- ● Pruning paint or sealant – To cover cut stems and prevent disease (if you’re really into the details!).
- ● Rhizome divider – A serrated knife or clean hands work too, but a dedicated tool makes dividing easier.
- ● Plant labels – If you’re testing new varieties, label your divisions to track favorites!
- ● Epsom salt – 1 tbsp dissolved in a gallon of water for a magnesium boost (great for yellowing leaves).
How to care for irises after blooming for a stunning rebloom
Here’s the simple routine I use to keep my irises thriving—and blooming again next year.
✂️ Step 1: Deadhead Properly to Encourage Next Year’s Flowers
Once your irises fade, don’t cut the entire stem. Instead, snip off just the spent flower head, leaving the leafy stalk intact. This prevents seed formation while allowing the plant to redirect energy into next year’s blooms. Use clean, sharp pruners to avoid damaging the stem.
I like to make my cuts about 2 inches below the faded bloom, just above a leaf node. This ensures the plant retains its energy reserves without wasting them on seed production. If you see any brown or mushy stems, trim those back immediately—they’re signs of rot or disease.
🌿 Step 2: Leave the Foliage Until It Turns Yellow
Don’t cut back the leaves until they’ve fully yellowed and died back naturally. The foliage stores nutrients for next year’s growth, so removing it too soon weakens the rhizome. This is where many gardeners go wrong—they trim everything back after blooming, thinking it’s tidier.
Wait until late summer or early fall when the leaves turn golden and crispy. At that point, you can trim them back to 2-3 inches above the rhizome, but leave the roots in place. This ensures the plant has enough stored energy to push new growth in spring.
💧 Step 3: Water and Fertilize for Strong Fall Growth
After blooming, give your irises a deep watering every 1-2 weeks if rainfall is scarce. They need moisture to replenish their energy reserves, but avoid soggy soil—irises hate sitting in water. I use a soaker hose to deliver water directly to the base without wetting the leaves.
In early fall, apply a low-nitrogen fertilizer (like a 5-10-10 blend) to encourage root development. Skip high-nitrogen feeds—they promote leafy growth at the expense of blooms. A light application is all you need; irises are low-maintenance once established.
☀️ Step 4: Divide Overcrowded Clumps in Late Summer
If your iris patches look congested, now’s the time to divide them. Dig up the rhizomes in late summer, when the foliage has died back but before the first frost. Gently separate the clumps, ensuring each division has at least one healthy fan of leaves and a portion of the rhizome.
Replant the divisions 2-3 inches deep, with the tops exposed to sunlight. Space them 12-24 inches apart to allow for future growth. Water them in well, and they’ll establish roots before winter. This step keeps your irises vigorous and prevents blooms from fading over time.
⏰ Step 5: Mulch and Protect for Winter
Once the ground cools in fall, apply a 2-3 inch layer of mulch around the base of your irises. I use shredded leaves or straw—they insulate the rhizomes while allowing moisture to penetrate. Avoid heavy mulch piles, which can smother the plants or cause rot.
In cold climates, a light covering of burlap over the crowns can prevent winter dieback. Irises are hardy, but extra protection ensures they bounce back strong in spring. Remove mulch in early spring once new growth appears—this signals it’s time to let the soil warm up naturally.
Tips & tricks for perfect iris post-bloom care
Here's what nobody tells you about keeping your irises thriving after those stunning blooms fade.
Precision Deadheading: When you're ready to snip those spent blooms in Step 1, make your cuts at a clean 45-degree angle just above a leaf node. This angled cut prevents water from pooling on the stem, which could lead to rot. I've seen too many gardeners make straight cuts that end up trapping moisture—always angle those pruners!
Foliage Timing Secret: The key to Step 2 is patience—don't rush cutting back those leaves! Wait until they've turned completely golden and crispy, not just slightly yellow. I've learned this the hard way after ruining three batches of irises by cutting too soon. Those leaves are like nature's batteries, storing up energy for next year's spectacular show.
Fertilizer Strategy: For Step 3, when you're applying that low-nitrogen fertilizer, focus on the soil around the rhizomes—not the leaves. I like to use a spreader for even distribution, and I always water it in immediately. This prevents fertilizer burn while ensuring the roots get exactly what they need for strong fall growth. The 5-10-10 blend is perfect because it balances phosphorus for root development with potassium for overall plant health.
Division Rescue: If you're dividing clumps in Step 4 and notice some rhizomes looking unhealthy, don't use them! Healthy divisions should be firm and plump, not shriveled or soft. I've saved many a struggling iris patch by discarding the weak ones and focusing only on the vigorous rhizomes. This simple step makes all the difference in preventing future bloom failures.
Pro Tips for What To Do With Irises After They Bloom
- Here's what nobody tells you about keeping your irises thriving after those stunning blooms fade.
- Precision Deadheading: When you're ready to snip those spent blooms in Step 1, make your cuts at a clean 45-degree angle just above a leaf node.
- Foliage Timing Secret: The key to Step 2 is patience—don't rush cutting back those leaves!
Frequently asked questions
Got questions about post-bloom iris care? You’re not alone! Here are some of the most common concerns—and their solutions—to keep your irises thriving.
Do I really need to deadhead irises after they bloom?
Yes! Deadheading (removing spent blooms) redirects the plant’s energy toward next year’s flowers and bulb growth. Skip it, and you might see fewer—or weaker—blooms in spring. Just snip the flower stalk 1-2 inches above the base with clean pruners.
When is the best time to cut back iris foliage?
Wait until after the leaves turn yellow and crispy (usually late summer or early fall). Cutting too soon removes nutrients stored in the leaves, weakening the rhizomes. Leave 1/3 of the fan intact to ensure energy reserves for reblooming.
Can I divide my irises right after they bloom?
It’s possible, but not ideal. Dividing irises right after blooming stresses the plant. Instead, wait until 6-8 weeks post-bloom (late summer) when the foliage has fully matured. This gives rhizomes time to recover and establish before winter.
What do I do if my irises stop blooming after deadheading?
Several factors could be at play: over-fertilizing (too much nitrogen = leafy growth, no flowers), shady conditions (irises need full sun), or old rhizomes (divide every 3-4 years). Try moving them to sunnier soil and feeding with a low-nitrogen bloom booster in early spring.
Should I fertilize irises after they bloom?
Lightly, yes! Use a balanced fertilizer (10-10-10) or one high in phosphorus (for blooms) in early fall. Avoid heavy feeding in late summer—it encourages tender new growth that may not survive frost. Pro tip: A handful of bone meal or compost works too!
Wrapping up and next steps
After your irises have put on their stunning show, a little care goes a long way in ensuring they rebloom with even more drama next season! Deadheading spent blooms, trimming foliage, and dividing overcrowded clumps are simple but powerful steps to keep your irises thriving.
With these techniques in hand, you’re all set to enjoy years of vibrant color—so grab those shears and get gardening! 🌸✂️
Ready to level up your iris game? Start by marking your calendar for next spring’s planting season—that’s when you’ll want to dig up and divide those clumps for fresh, vigorous growth. Happy gardening! 🌱