
Blooming
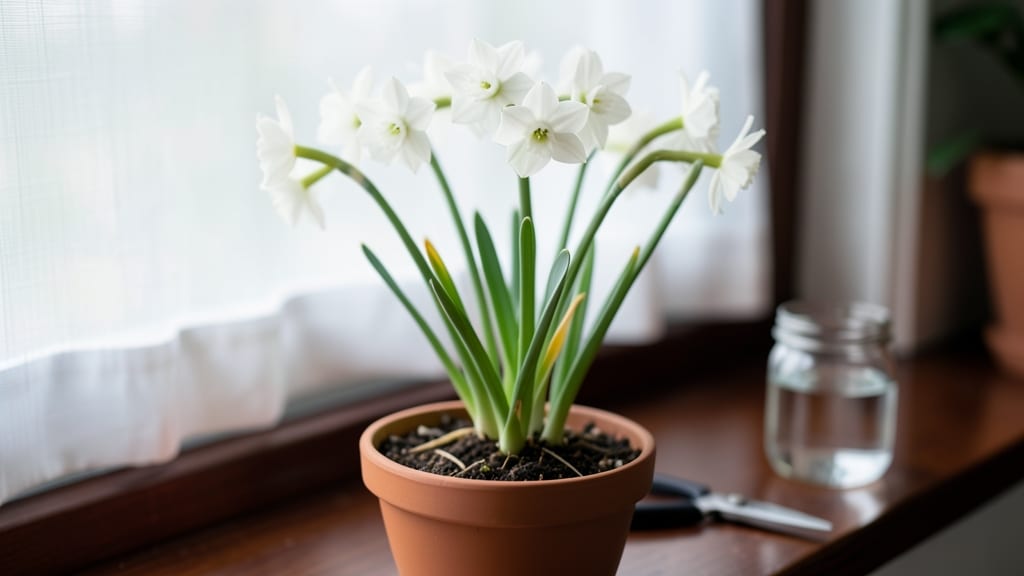
Your Paper White Narcissus bulbs don’t have to end up in the trash after blooming—this is where the magic happens. 🌱 I’ve turned last year’s spent-looking bulbs into next season’s showstopper displays by following a few key steps that most gardeners miss.
The secret lies in letting those leaves do their job while you prep for dormancy, then giving the bulbs the right conditions to recharge.
First, resist the urge to cut back the foliage immediately after blooms fade—those yellowing leaves are actually powering up next year’s flowers. Instead, trim them back only when they turn completely brown, about 6-8 weeks after blooming.
For indoor bulbs, move them to a sunny windowsill or bright spot to encourage photosynthesis, while outdoor varieties can stay in the ground or be lifted, dried, and stored.
With proper care, you’ll see strong, healthy regrowth in spring, ready to bloom again with even more vigor. The key is patience and understanding that bulbs need time to rebuild their energy stores.
Yellowing leaves? That’s normal—just don’t rush to remove them. Mold or soft bulbs? That’s a sign of overwatering or poor drainage, and we’ll fix that too.
Whether you’re growing Paper Whites indoors for winter cheer or outdoors for early spring color, these steps will transform your bulbs from "one-and-done" to reliable, year-after-year performers. Let’s get those blooms ready for an encore!
📚 In This Guide
- What you need
- Instructions
- Tips and common mistakes
- Wrapping up and next steps
What you need
- ● Paper white bulbs (after bloom): 5–20 bulbs (depending on your garden size)
- ● Pruning shears or clean scissors: 1 pair (sterilized with rubbing alcohol)
- ● Well-draining potting mix or garden soil: 1–2 bags (look for "bulb-specific" or "well-aerated" blends)
- ● Compost or organic fertilizer: 1 bag (balanced 10-10-10 or bulb-specific formula)
- ● Garden fork or trowel: 1 (for digging)
- ● Watering can or hose with gentle spray setting: 1
- ● Mulch (straw, pine needles, or shredded bark): 1–2 bags (for insulation)
- ● Bulb fertilizer (like bulb tone or liquid bloom booster): 1 bottle (for post-bloom feeding)
- ● Fungicide (copper-based or neem oil): 1 spray bottle (prevents rot)
- ● Garden gloves: 1 pair (to protect your hands)
- ● Label markers: 1 set (to track replanting dates)
- ● Container pots (10–12" deep): 1–2 (if overwintering indoors)
Paper white bulbs after bloom: how to extend their lifespan for future seasons
Here's how to turn this year's paper white blooms into next year's fragrant showstoppers.
✂️ Step 1: Deadhead and Allow Foliage to Yellow Naturally
Once the fragrant white flowers fade, snip the spent blooms at the base with clean pruners—but leave the 6-inch stems attached. The foliage must photosynthesize for 6-8 weeks after blooming to replenish the bulb's energy stores. I resist the urge to tidy up too soon; those yellowing leaves are the plant's lifeline for next season.
Watch for the leaves to turn completely yellow and limp before removing them. This signals the bulb has fully recharged. If you cut back too early, the bulb won't store enough nutrients to bloom again. Mark your calendar 8 weeks after flowering as your deadline for cleanup.
💧 Step 2: Reduce Watering Gradually as Foliage Dies Back
Once the leaves start yellowing, taper watering to every 2-3 weeks until they're completely brown and crisp. Overwatering at this stage causes rot and wastes stored energy. I use my finger to check moisture—if the top 2 inches of soil feel dry, that's your signal to water lightly.
Paper whites are drought-tolerant once their blooming cycle ends, but don't let the soil dry out completely. The goal is to keep the bulb alive while encouraging dormancy. If your home stays below 65°F during this period, reduce watering further to once a month.
🪴 Step 3: Store Bulbs in a Cool, Dry Place Until Replanting
After the foliage dies back completely, carefully dig up the bulbs using a fork to avoid damaging their papery skins. Gently brush off excess soil and let them air-dry in a shady spot for 2-3 days. Store them in a mesh bag or paper envelope in a cool (50-60°F), dry place like a basement or garage.
Check bulbs monthly for soft spots or mold—these indicate rot from improper storage. Healthy bulbs should feel firm and papery. I label each bag with the variety and planting date to avoid confusion next spring. This storage period mimics their natural dormancy cycle in Mediterranean climates.
🌱 Step 4: Replant in Fresh Soil for Next Season's Blooms
In early fall, about 6-8 weeks before your first frost, replant the bulbs in fresh, well-draining soil. Choose a container with drainage holes or a sunny garden bed. Plant them 2 inches deep, spacing them 3-4 inches apart to allow airflow and prevent rot.
Water lightly after planting to settle the soil, then maintain moderate moisture until shoots appear. The key to successful replanting is timing—planting too early causes premature growth, while planting too late may prevent flowering. Watch for green shoots in 4-6 weeks as your signal that the bulbs are waking up.
☀️ Step 5: Provide Optimal Conditions for Next Year's Blooms
Paper whites thrive in full sun to partial shade and need 60-70°F temperatures to bloom reliably. If growing indoors, place them near a south-facing window or under grow lights for 12-14 hours daily. I've found that bulbs planted in sandy or gritty soil mixes bloom more vigorously than in heavy clay.
Fertilize lightly with a balanced bulb fertilizer (10-10-10) in early spring as shoots emerge. Avoid high-nitrogen fertilizers, which promote leafy growth at the expense of flowers. With proper care, your paper whites will reward you with another stunning display in 8-10 months.
Tips & tricks for perfect paper white bulb revival
A few key insights will help you transform this year's paper whites into next season's most fragrant blooms.
Patience is Key in Step 1: Those 6-inch stems after deadheading aren't just decoration—they're the plant's energy pipeline. I've learned the hard way that cutting them too short starves the bulb. Use clean pruners and make your cut just above the bulb's base, leaving those stems intact until the leaves turn completely yellow and limp. This full 6-8 week photosynthesis period is non-negotiable for next year's performance.
Watering Wisdom for Step 2: The transition from blooming to dormancy is where most gardeners go wrong. Once leaves start yellowing, switch to your finger test—only water when the top 2 inches of soil feel dry. In homes below 65°F, you can extend this to monthly watering, but never let the soil dry out completely. Think of it as giving the bulb just enough moisture to stay alive while encouraging dormancy.
Storage Secrets for Step 3: When digging up bulbs, handle them like fragile artifacts—their papery skins protect against rot. After your 2-3 day drying period in shade, store them in mesh bags (not plastic) to allow airflow. I've had success using old onion bags from the grocery store—they're perfect for this purpose. The 50-60°F storage temp mimics their Mediterranean origins, where they naturally dry out between seasons.
Replanting Timing in Step 4: That 6-8 week window before frost is critical—plant too early and you risk premature growth, too late and the bulb may not bloom. I mark my calendar 8 weeks before first frost and set reminders. For container growers, place pots near a south-facing window during winter to maintain the 60-70°F range they need to stay dormant but alive.
Pro Tips for Paper White Bulbs After Bloom
- A few key insights will help you transform this year's paper whites into next season's most fragrant blooms.
- Patience is Key in Step 1: Those 6-inch stems after deadheading aren't just decoration—they're the plant's energy pipeline.
- Watering Wisdom for Step 2: The transition from blooming to dormancy is where most gardeners go wrong.
Frequently asked questions
Got questions about what to do with your paper white bulbs after they’ve finished blooming? You’re not alone! Here are some of the most common concerns—and their answers—to help you keep your garden thriving.
Can I cut back paper white bulbs after they bloom?
Yes! Once the foliage turns yellow and dies back naturally (about 6–8 weeks after blooming), you can trim it to the ground. Never cut it earlier—the leaves are essential for storing energy in the bulb for next year’s flowers.
When is the best time to replant or divide paper white bulbs?
Wait until the foliage has fully yellowed and died back (late summer or early fall). Dig up the bulbs, separate any offsets, and replant them in well-draining soil. Pro tip: Add a layer of mulch to protect them over winter.
How do I revive paper white bulbs that didn’t bloom this year?
If your bulbs didn’t flower, they may need more sunlight (6+ hours daily) or richer soil. Fertilize lightly in early spring with a bulb-specific food, and ensure they’re not overcrowded. Patience is key—some bulbs take 1–2 years to establish before blooming again!
What should I do with paper white bulbs if I don’t want them next year?
You can compost them (if disease-free) or discard them in your garden waste. But wait! If you loved their fragrance, consider sharing bulbs with fellow gardeners—they’re a prized (and free!) addition to any flower bed.
Why are my paper white bulbs rotting after blooming?
Overwatering or poor drainage are the usual culprits. Ensure your bulbs are planted in sandy, gritty soil with a slight slope for water runoff. If rot appears, remove affected bulbs immediately to prevent spreading. Drainage > drama!
Wrapping up and next steps
Transforming your paper white bulbs from a post-bloom slump into next year’s showstopper is totally doable—and rewarding! With the right care, you’re not just extending their life but setting the stage for even more stunning displays. 🌱
Ready to revive, replant, and repeat? Start by taking action this week—whether it’s dividing bulbs, fertilizing, or planning your next garden layout. Your future blooms will thank you!