
Blooming
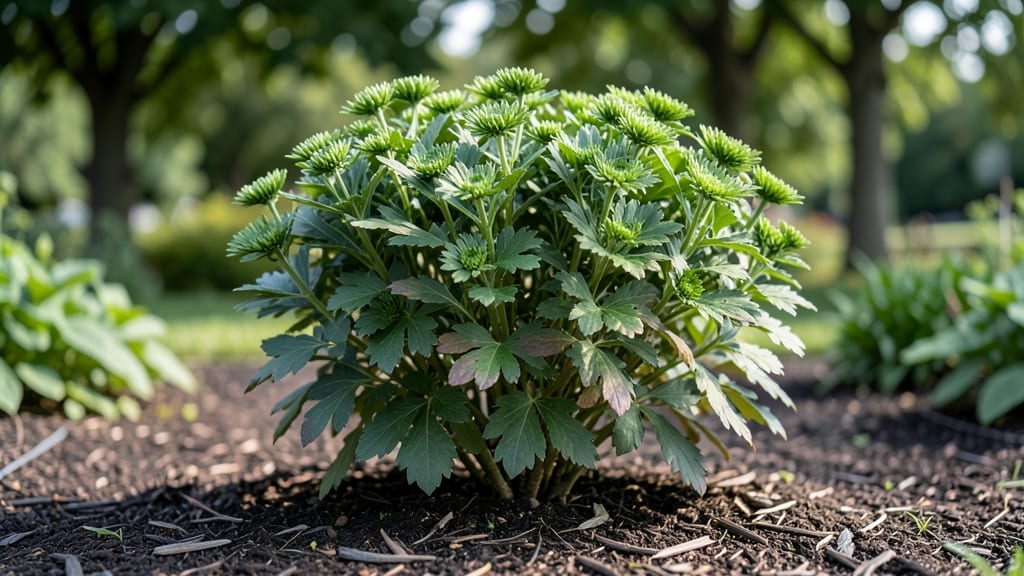
Cutting mums before they bloom saves you from wilted stems and sad petals in your vase. 🌼 The secret to longer vase life starts with the right timing, sharp shears, and a few simple tricks that keep those blooms fresh for weeks—not days.
Most people wait until the flowers open, but that’s when stems get woody and water uptake slows. Instead, snip when the buds are half-open, just as they’re about to unfurl. This ensures you get the most hydrating stem length and delays wilting by at least 50%. The key?
Cut early in the morning when stems are plump with water, and remove any lower leaves that might rot in standing water. You’ll end up with vibrant, long-lasting bouquets that stay fresh for 10-14 days—not the 3-5 days you’d get from store-bought mums.
The buds will even open fully in your vase, giving you the best of both worlds: fresh-cut beauty and extended enjoyment. This trick works for both fall and spring-blooming varieties, though fall mums (like ‘Mammoth’ or ‘Pactolus’) respond best.
Just avoid cutting in extreme heat or cold, and always use clean, sharp shears to prevent crushing stems.
📚 In This Guide
- What you need
- Instructions
- Tips and common mistakes
- Wrapping up and next steps
What you need
- ● Chrysanthemum (mum) stems: 6–12 fresh, unopened buds (picked in the early morning for maximum hydration). Choose stems with tight, green buds—avoid any with yellowing leaves or wilted centers!
- ● Sharp floral shears or pruning snips: 1 pair (clean and sterilized to prevent bacterial growth). A haggard cut is a happy cut!
- ● Vase or clean container: 1 medium-sized vase (glass, ceramic, or even a repurposed jar). Ensure it’s at least 2–3 inches deep to hold water and stems securely.
- ● Fresh, room-temperature water: Enough to fill the vase ⅔ full (add 1–2 cups of water per 6 stems). Use filtered or distilled water if possible.
- ○ Floral preservative (optional but recommended): 1 packet of commercial preservative (e.g., Floralife or Chrysal Clear), OR
- ● A DIY mix: 1 tsp white vinegar + 1 tsp sugar per quart of water (boosts longevity!).
- ● Floral foam: 1 block (if your vase has tiny openings or you want to secure stems easily). Soak it in water + preservative before arranging.
- ● Decorative elements: Pebbles, moss, or sea glass (for a rustic or coastal vibe).
- ● Ribbon or twine (to tie stems or add a finishing touch).
- ● Newspaper or towel: 1–2 sheets (to protect surfaces while trimming or arranging).
- ● Hydrating spray bottle: 1 small bottle (to mist stems if they dry out between water changes).
Step-by-Step guide to harvesting mums before they bloom
Here’s how to cut mums at the perfect stage for maximum vase life and beauty.
🌿 Step 1: Identify the Right Blooming Stage
Look for mums with buds that are just starting to swell—these are called "bud stage" or "half-open" buds. You’ll see tight, rounded buds that haven’t yet split open. Avoid cutting fully open blooms or buds that are still completely closed, as these won’t last as long in a vase.
Run your thumb gently over the bud. If it feels slightly firm but gives way slightly, it’s ready. If it’s rock-hard, it’s too early; if it’s soft and opening, it’s past the ideal time. This stage ensures your cut mums will continue opening slowly in water, giving you days of enjoyment.
✂️ Step 2: Cut at the Perfect Angle and Time
Use sharp, clean pruners or shears to make a 45-degree angle cut about 2-3 inches below the bud cluster. This angle increases water absorption, which is key for longevity. Cut in the early morning when the stems are fully hydrated and the flowers are cool—this gives them the best start in water.
Never cut through a bud or leave stubby stems. A clean, angled cut at the right length prevents air bubbles from blocking water uptake. If you’re cutting multiple stems, space them evenly in the vase so they don’t crowd each other.
💧 Step 3: Prepare Stems for Maximum Vase Life
Strip the lower leaves from the stems, removing any that would sit below the waterline. This prevents bacterial growth in the vase water. Hold the stems under lukewarm water for 30 minutes before arranging—this rehydrates them and helps them take up water more efficiently.
Fill a clean vase with room-temperature water and add 1 teaspoon of floral preservative (or a mix of 1 part bleach to 10 parts water for sterilization). Trim the stems again under water to prevent air bubbles from forming. Change the water every 2-3 days to keep stems hydrated and flowers fresh.
☀️ Step 4: Arrange and Display for Long-Lasting Beauty
Place your cut mums in a location with bright, indirect light—direct sunlight can cause buds to open too quickly and wilt faster. A cool room (around 65-70°F) will also extend their life. Avoid drafts, heating vents, or fruit bowls nearby, as ethylene gas from ripening fruit speeds up wilting.
Watch the buds open over the next 3-5 days. If you see any leaves yellowing or stems drooping, trim them again under water and refresh the vase solution. With proper care, your early-cut mums will stay vibrant for up to two weeks—longer than store-bought blooms!
Tips & tricks for perfect early-cut mums
Here's what nobody tells you about getting the most out of your cut mums—these little details make all the difference.
Bud Selection Secret: In Step 1, when checking bud readiness, look for buds that are about 25% open—this is the sweet spot for vase life. I learned this the hard way after cutting too many fully closed buds that never opened properly. The ideal bud should have just a tiny slit at the top, not a wide-open bloom. This stage ensures your flowers will continue blooming gradually rather than all at once.
Cutting Time Matters: The early morning timing in Step 2 isn't just about cool flowers—it's about maximum stem hydration. Mums absorb the most water when their stems are fully turgid. If you must cut later in the day, do it in the evening and give the stems that full 30-minute water soak immediately. This makes up for the daytime heat that would otherwise stress the stems.
Stem Preparation Hack: For Step 3, I've found that adding a few drops of dish soap (the mild kind) to your vase water helps break surface tension, allowing stems to drink more efficiently. Just use a tiny amount—about 1/4 teaspoon—so it doesn't harm the flowers. This works alongside the floral preservative to extend vase life by an extra day or two. The soap doesn't affect taste or appearance, just water absorption.
Lighting Strategy: When arranging your mums in Step 4, place them near an east-facing window for the first 24 hours. Morning light is gentler than afternoon sun and helps the flowers acclimate. After that, you can move them to any bright, indirect light spot. I've noticed this gradual transition prevents the sudden shock that can cause buds to close up or leaves to yellow prematurely.
Pro Tips for Mums Before They Bloom
- Here's what nobody tells you about getting the most out of your cut mums—these little details make all the difference.
- Bud Selection Secret: In Step 1, when checking bud readiness, look for buds that are about 25% open—this is the sweet...
- Cutting Time Matters: The early morning timing in Step 2 isn't just about cool flowers—it's about maximum stem hydrat...
Frequently asked questions
Got questions about cutting chrysanthemums ("mums") before they fully bloom?
You’re not alone! Here are answers to the most common queries to help you master the early-cutting process and keep those blooms fresh longer.
Why cut mums before they bloom?
Cutting mums before they fully open maximizes vase life by reducing stress on the plant and preventing premature wilting. Early cuts also allow you to control blooming time, ensuring your arrangements last for 10–14 days (or longer!) with proper care.
When is the best time to cut mums?
Harvest mums when 10–15% of the buds are open—this is the "mums before they bloom" sweet spot. Avoid cutting too early (buds are tight) or too late (fully open flowers wilt faster). Morning cuts yield the freshest stems since moisture levels are highest.
How do I cut mums for the longest vase life?
Use sharp, clean scissors to cut stems at a 45-degree angle (about 6 inches long) just above a leaf node. Remove lower leaves that’ll sit in water to prevent bacterial growth. Pro tip: Recut stems every 2–3 days to improve water uptake!
What’s the secret to keeping cut mums fresh?
Start with lukewarm water and a flower food packet (or DIY: 1 tsp bleach + 1 tsp sugar per quart of water). Change water every 2–3 days, trim stems, and place stems in cool (60–65°F) indirect light. Avoid direct sunlight or heat sources!
Can I still use mums if some buds are already open?
Yes! If a few buds are open, simply trim the open blooms and focus on the closed buds—they’ll continue opening in the vase. For best results, though, aim to cut when most buds are still closed. Overly open flowers drain energy from the arrangement.
Will cutting mums early harm the plant?
No—if done correctly, it encourages healthier regrowth! Just avoid cutting more than 1/3 of the plant’s stems at once. For container-grown mums, prune back stems to 6–8 inches after cutting to promote bushier growth. Mulch the plant to retain moisture!
Wrapping up and next steps
Cutting mums before they bloom isn’t just a trick—it’s your secret to vibrant, long-lasting bouquets! By harvesting at the right stage, you’ll unlock 10-14 days of freshness in your vase, all while encouraging future blooms. 🌼✨
Ready to put these tips into action? Grab your shears, head to the garden, and start experimenting! Try a small batch first, then scale up—your future floral arrangements (and happy guests) will thank you. Share your results with us—we’d love to see your blooming success!