
Blooming
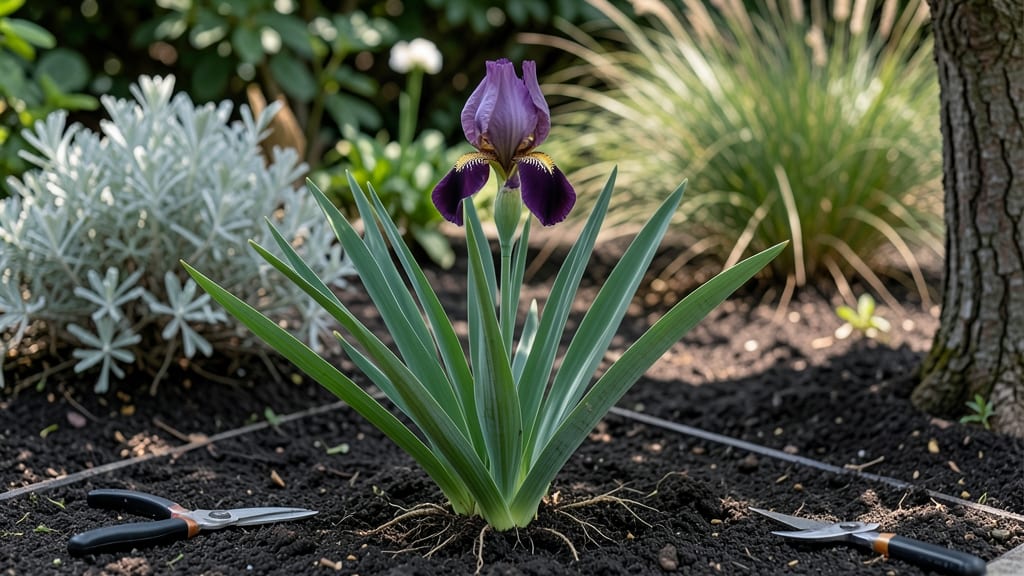
Forcing irises to bloom indoors before spring is like unlocking a secret garden treasure—satisfying and full of anticipation. 🌱 The key is timing: start in late winter when the foliage is still dormant but the roots are active, giving you a head start on the season.
I've found that patience and precision pay off with vibrant blooms weeks ahead of outdoor irises, transforming any sunny windowsill into a showstopper.
You'll need healthy rhizomes (the thick, fleshy roots), a well-draining potting mix, and a sunny spot—no fancy equipment required. The process is simple: plant the rhizomes in containers with just the tops exposed, water lightly, and place them in bright, indirect light.
Within 4-6 weeks, you'll see signs of new growth, and with proper care, those buds will open right in your home.
The payoff is worth the wait: fragrant, velvety petals that brighten your space and give you a taste of spring months early. You'll also learn to spot healthy growth—firm, plump rhizomes with no soft spots—and troubleshoot common issues like overcrowding or weak foliage before they become problems.
This method works for both bearded and Siberian irises, so you can experiment with different varieties.
Perfect for gardeners eager to beat the season or those with limited outdoor space. Once you've mastered the technique, you can even force multiple batches throughout winter for a continuous display. Here's how to get started without the guesswork!
📚 In This Guide
- What you need
- Instructions
- Tips and common mistakes
- Wrapping up and next steps
What you need
- ● Iris rhizomes: 3–5 healthy, dormant rhizomes (preferably Iris xiphium or Iris reticulata for best results). Choose firm, plump rhizomes with no signs of rot or damage.
- ● Well-draining potting mix: 1–2 gallons of a cactus/succulent blend (or regular potting soil mixed with 50% perlite or coarse sand to prevent sogginess). Avoid heavy, moisture-retentive soils!
- ● Containers: Shallow pots or trays (4–6 inches deep) with drainage holes. Pro tip: Terracotta or ceramic works best to wick away excess moisture! 💡
- ● Gravel or pebbles: A small handful for the bottom of pots to ensure drainage.
- ● Watering can or spray bottle: For gentle hydration—irises hate soggy roots!
- ● Grow lights or sunny windowsill: A south-facing window (6+ hours of direct light daily) or a full-spectrum LED grow light (12–14 hours/day if indoors year-round).
- ● Chilling period setup: A cool, dark space (35–45°F or 2–7°C) like a garage, basement, or refrigerator (with ventilation!).
- ● Slow-release balanced fertilizer (5-10-5 ratio) for a gentle nutrient boost after forcing.
- ● Humidity tray or pebble tray to maintain moisture levels in dry environments.
- ● Thermometer to monitor chilling temperatures accurately.
- ● Decorative pebbles or moss for aesthetic pots (once blooms are ready to showcase!).
Step-by-step guide to forcing irises indoors for early blooms
Here’s how to coax irises into blooming weeks ahead of schedule—no greenhouse needed.
🌱 Step 1: Select and Prepare Healthy Iris Rhizomes
Choose mature rhizomes with 3-5 fan-shaped leaves and no signs of rot or damage. I look for plump, firm rhizomes with at least one dormant bud—this is where the flower will emerge. If your rhizomes are old, soak them in lukewarm water for 24 hours to rehydrate before forcing.
Trim any dead or yellowed leaves with clean scissors, leaving only the healthy foliage. This ensures the plant directs energy toward root growth and bud development. Place the rhizomes in a shallow tray and cover them with 1-2 inches of moist potting mix, leaving the top half exposed—this mimics their natural growing conditions and prevents rot.
☀️ Step 2: Provide Controlled Light and Temperature
Irises need bright, indirect light to force blooms, but too much direct sun can scorch the leaves. Place your rhizomes near a south-facing window or under a grow light set to 12-14 hours of light daily. If your space is dim, supplement with a cool-white LED bulb—irises respond poorly to heat lamps, which can stress the buds.
Keep the temperature consistent at 60-65°F during the day and 55-60°F at night. A cool basement or unheated garage works well for this step. If your home runs warmer, move the rhizomes to a cooler spot—heat speeds up growth but can cause buds to open too quickly, shortening their vase life.
💧 Step 3: Water and Monitor for Bud Development
Water the rhizomes sparingly—just enough to keep the soil slightly moist but never soggy. Overwatering is the fastest way to rot rhizomes before they even bloom. I use a spray bottle to mist the soil lightly every 3-4 days, checking that the top inch of soil feels damp but not wet. Too much moisture triggers fungal issues, while too little stunts growth.
After 4-6 weeks, you’ll see small buds forming at the base of the leaves. This is your cue to adjust care—now’s the time to gradually increase water to encourage full bloom development. If buds appear but don’t swell, your rhizomes may need more light or a slightly warmer spot to kickstart flowering.
⏰ Step 4: Trigger Blooming with a Temperature Shift
Once buds are pea-sized (about 3-4 weeks into forcing), it’s time to shock the rhizomes into blooming. Move them to a warmer spot at 70-75°F for 7-10 days. This temperature jump mimics spring’s arrival and signals the plant to push flowers. Place them near a heat vent or under a grow light to maintain consistent warmth.
Continue watering lightly but keep the soil evenly moist—not dry, not soggy. Watch for buds to plump up and change color from green to purple or yellow. If buds open too slowly, a brief burst of warmth (like a sunny windowsill) can speed things up. Once flowers appear, move the rhizomes back to cooler conditions to extend their vase life.
🪴 Step 5: Harvest and Display Your Blooms
Cut stems when the first bud opens, leaving 2-3 inches of stem below the bloom. This prevents the plant from diverting energy back to the rhizome. Place stems in lukewarm water immediately—irises are sensitive to temperature shock, and cold water can cause buds to drop prematurely.
Change the water every 2 days and trim stems at a 45-degree angle to maximize water uptake. Display your irises in a cool room (65-70°F) away from direct sunlight—they’ll last 7-10 days with proper care. For longer vase life, add a drop of bleach to the water to prevent bacterial growth, which causes stems to wilt faster.
Tips & tricks for perfect indoor Iris forcing
A few simple adjustments can make all the difference when forcing irises indoors.
Rhizome Selection: Look for rhizomes with at least three plump, firm leaves and a visible dormant bud—this is your guarantee of blooms. I've learned the hard way that smaller or shriveled rhizomes often fail to produce flowers, no matter how carefully you follow the steps. If your rhizomes feel lightweight or have soft spots, they're not worth forcing.
Lighting Strategy: Position your rhizomes within 6-12 inches of a south-facing window to maximize that critical 12-14 hours of light daily. If natural light isn't sufficient, a cool-white LED grow light placed 12-18 inches above the rhizomes works perfectly. Avoid heat lamps—they can stress the buds and cause premature opening.
Temperature Transition: The 7-10 day warm-up period at 70-75°F is where the magic happens. I've found that using a small space heater with a thermostat set to 72°F creates consistent warmth without risking overheating. Place the rhizomes near (but not directly under) the vent to maintain even temperatures throughout the tray.
Harvest Timing: Cut stems precisely when the first bud opens—this is crucial for vase life. I use clean, sharp pruners and make the cut at a 45-degree angle about 2 inches below the bloom. This technique maximizes water uptake while preventing the plant from diverting energy back to the rhizome. The lukewarm water requirement is non-negotiable—cold water causes buds to drop almost instantly.
Pro Tips for Irises Before They Bloom
- A few simple adjustments can make all the difference when forcing irises indoors.
- Rhizome Selection: Look for rhizomes with at least three plump, firm leaves and a visible dormant bud—this is your guarantee of blooms.
- Lighting Strategy: Position your rhizomes within 6-12 inches of a south-facing window to maximize that critical 12-14 hours of light daily.
Frequently asked questions
Got questions about forcing irises to bloom indoors before their natural season? You’re not alone! Here are some of the most common queries—and their answers—to help you navigate the process with confidence.
When is the best time to start forcing irises indoors?
The ideal time is late summer or early fall, about 8–10 weeks before your target bloom date. This gives the rhizomes enough time to root and sprout before they’re exposed to indoor light. If you’re aiming for Valentine’s Day or Mother’s Day, start in September or October for best results.
Do I need to refrigerate iris rhizomes before forcing?
Yes! A 6–8 week cold treatment (40–50°F) mimics winter dormancy and triggers blooming. Store rhizomes in a paper bag with slightly damp peat moss or vermiculite in a cool, dark place (like a fridge crisper drawer). Skip this step, and you might end up with leaves but no flowers.
What if my irises only grow leaves and no buds?
This usually means insufficient light or cold treatment. Move your irises to a bright, south-facing window or under grow lights (12–14 hours/day). If buds still refuse to form, try reducing water slightly—overhydration can stress the rhizomes. Patience is key; some varieties take 2–3 weeks to show buds after forcing.
Can I force irises more than once?
Unfortunately, no. Forcing depletes the rhizome’s energy reserves, and most irises won’t rebloom after one cycle. However, you can plant them outdoors after blooming—they’ll return to their natural growth pattern and may flower again next spring. Think of it as a one-time indoor spectacle!
What’s the easiest alternative if forcing seems tricky?
If timing or conditions feel overwhelming, try pre-ordering potted blooming irises from nurseries in late winter. Many specialty growers sell “forced” irises (like Dutch or Japanese varieties) already in bloom. For DIYers, paperwhite narcissus or hyacinth bulbs are simpler indoor alternatives that still deliver stunning results!
Wrapping up and next steps
Forcing irises to bloom indoors before their natural season is a rewarding way to bring early color and life into your home. 🌸 With the right techniques—like chilling, proper lighting, and patience—you can enjoy their beauty months ahead of schedule.
Whether you're a seasoned gardener or just starting, this process connects you deeper to the magic of nature.
Now that you’re ready to try it, pick a few irises today and start your chilling process! Keep an eye on their progress, and soon, you’ll be greeted by stunning blooms that feel like a little gift from spring. Happy forcing! 🌱✨