
Blooming
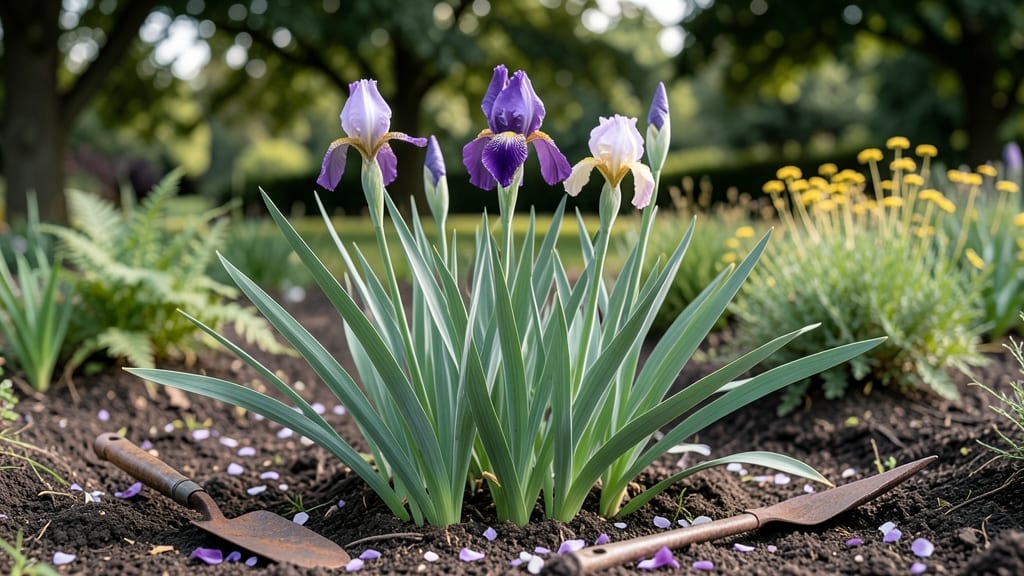
Your irises are hiding under last year’s leaves, but the secret to stunning pre-frost blooms starts now. 🌱 The difference between a few sad flowers and a riot of color comes down to a few simple winter tasks—like dividing crowded clumps, protecting roots from freeze-thaw cycles, and giving them a nutrient boost when they’re still dormant.
I’ve learned the hard way that skipping these steps means weaker stems and fewer blooms by spring. The key? Focus on the roots and soil right now—those green swords (the foliage) will handle themselves later.
A quick check for emerging spathes (those weird-looking sheaths) tells you it’s time to hold off on heavy work. By late winter, you’ll see those first shoots poking through the soil, and that’s your cue to step back.
The plants will reward you with bold, vibrant blooms that arrive weeks earlier than store-bought flowers. Just don’t wait until the ground thaws—some tasks need to happen while the soil is still cold but workable.
You’ll need basic tools: a garden fork for dividing, compost or aged manure, and maybe some mulch if your winters are harsh. The real magic happens when you time your work right—after the first hard freeze but before the ground starts to soften.
This gives the roots a chance to settle before the growing season kicks in. The payoff? Irises that burst into color earlier than ever, with stronger stems and bigger blooms. And the best part?
You’re not just preparing for pretty flowers—you’re setting up a healthy plant that will thrive for years. Now, let’s get those clumps turned and those roots protected.
📚 In This Guide
- What you need
- Instructions
- Tips and common mistakes
- Wrapping up and next steps
What you need
- ● Iris rhizomes: Healthy, dormant rhizomes (3–5 inches long, with at least 1–2 fan-like leaves). Choose German, Bearded, or Siberian varieties for best results.
- ● Well-draining soil: A mix of 50% garden soil, 30% perlite or coarse sand, and 20% compost (avoid heavy clay!).
- ● Garden fork or trowel: For planting rhizomes 2–4 inches deep (shallow is key!).
- ● Organic mulch: 2–3 inches of shredded bark, straw, or pine needles to insulate roots.
- ● Frost cloth or row covers: Lightweight fabric (rated for 20–30°F) to protect young shoots.
- ● Gloves: Heavy-duty gardening gloves to protect hands from rhizome sharpness.
- ● Watering can or hose with gentle spray: For deep but infrequent watering (avoid soggy soil!).
- ● Sunlight access: A full-sun location (6+ hours/day) or partial shade for Siberian iris.
- ○ pH test kit (optional but helpful): Aim for soil pH 6.0–7.0—iris loves slightly acidic to neutral soil.
- ● Slow-release fertilizer (5-10-10 or iris-specific): 1–2 tablespoons per rhizome at planting time.
- ● Bubble wrap or foam insulation: Wrap individual rhizomes for extra cold protection in sub-freezing temps.
- ● Cold-frame or mini greenhouse: For extending the growing season in Zone 5 or colder.
- ● Epsom salt (magnesium sulfate): 1 tablespoon per gallon of water for a post-planting boost (helps with blooms!).
- ● Drip irrigation kit: Automates watering and reduces frost risk by keeping soil moist.
Step-by-step guide to preparing irises for pre-frost bloom
Here's how to coax vibrant spring color from irises before the last frost—no fancy tricks, just smart timing and care.
🌱 Step 1: Assess and Divide Crowded Clumps
Dig up iris rhizomes in late summer or early fall—this gives them time to establish roots before winter. Look for clumps with 3-5 fans (leaf clusters) per rhizome. If you see more than that, it's time to divide. Use a sharp spade to lift the entire clump, then gently separate the rhizomes with your hands or a clean knife.
Discard any rhizomes that look soft, mushy, or have blackened spots—these are signs of rot or disease. Healthy rhizomes should feel firm with 1-2 inches of the top exposed above the soil line. This exposure is crucial for winter survival and spring blooming. If your climate gets very cold (below 10°F), mound 2-3 inches of mulch (like straw or shredded leaves) around the rhizomes to protect them.
☀️ Step 2: Choose the Right Planting Location
Irises thrive in full sun (at least 6 hours daily) and well-draining soil. If your garden has heavy clay, amend the soil with sand or grit before planting to prevent waterlogging, which can rot rhizomes. A slight mound or raised bed works well for areas with poor drainage.
Plant rhizomes with the top third exposed—this prevents rot and encourages strong root growth. Space them 12-24 inches apart in rows to allow airflow and reduce disease risk. Water lightly after planting to settle the soil, but avoid soaking the rhizomes. Overwatering now can lead to soft rot before winter sets in.
💧 Step 3: Feed and Water for Winter Hardiness
Apply a balanced, slow-release fertilizer (like 10-10-10) in early fall to give rhizomes a nutrient boost before dormancy. Follow the package rate—too much fertilizer can encourage tender new growth that won’t survive frost. Water deeply once a week until the ground freezes, but reduce watering as temperatures drop below 40°F to prevent winter rot.
Stop fertilizing 6-8 weeks before your first frost date. This allows rhizomes to harden off naturally. If your winter is particularly harsh (below 0°F), add an extra 1-2 inches of mulch around the base of the plants. Remove the mulch in early spring once the ground thaws to prevent smothering new shoots.
⏰ Step 4: Time Your Spring Care for Early Blooms
As soon as the ground thaws in early spring, remove any remaining mulch and water lightly to encourage root activity. Irises need consistent moisture but hate soggy soil—water when the top 2 inches of soil feel dry. Avoid wetting the leaves or rhizomes directly to prevent fungal issues like iris borer.
Apply a low-nitrogen fertilizer (like 5-10-10) in early spring to promote blooming. This shift in fertilizer ratio (lower nitrogen, higher phosphorus) signals the plant to focus energy on flower production rather than leaf growth. Watch for sword-shaped leaves emerging—this is your cue that the rhizomes are waking up and ready for bloom.
Tips & tricks for perfect iris pre-frost Preparation
These simple strategies will help you maximize your irises' winter hardiness and set the stage for stunning spring blooms.
Division Timing: Late summer or early fall is ideal for dividing iris clumps because the plants are still actively growing but haven't entered full dormancy. This timing gives the newly divided rhizomes several weeks to establish roots before winter sets in. I've found that dividing in August gives the best results—rhizomes have enough time to recover but aren't stressed by summer heat.
Healthy Rhizome Identification: When selecting rhizomes, look for firm, plump ones with a papery skin that's light tan in color. Avoid any that feel soft or have dark spots—these are signs of rot or disease that could spread to your healthy plants. The top third should be exposed above soil level, which prevents rot while allowing the rhizome to withstand winter temperatures down to 10°F. If your winter gets colder than that, add extra mulch.
Soil Preparation: Irises absolutely hate soggy soil, so if your garden has heavy clay, amend it with sand or grit before planting. I've had the most success with a mix that's about 20% sand by volume. This creates that perfect well-draining environment they need. For existing clay soil, consider planting on a slight mound or in a raised bed—this elevation helps water drain away more quickly.
Frost Timing: The 6-8 week window before your first frost is crucial for proper hardening off. This gradual reduction in watering and complete halt to fertilizing helps the rhizomes toughen up naturally. I've seen dramatic differences in survival rates when I follow this timing precisely—plants prepared this way handle winter temperatures down to 0°F without issue. Mark your calendar now to know exactly when to stop fertilizing!
Pro Tips for Iris Pre Bloom
- These simple strategies will help you maximize your irises' winter hardiness and set the stage for stunning spring blooms.
- Division Timing: Late summer or early fall is ideal for dividing iris clumps because the plants are still actively growing but haven't entered full dormancy.
- Healthy Rhizome Identification: When selecting rhizomes, look for firm, plump ones with a papery skin that's light tan in color.
Frequently asked questions
What does "iris pre bloom" mean?
Iris pre bloom refers to the critical phase when iris rhizomes (those thick, fleshy roots) are actively growing but haven’t yet sent up their signature sword-like foliage or blooms. This is the window—typically late winter to early spring—when they’re most vulnerable to frost damage but can still benefit from protective measures like mulching or covering.
How do I protect irises from late frosts during pre bloom?
Use a lightweight frost cloth (not plastic!) or a thick layer of straw mulch (4–6 inches) to insulate rhizomes. Avoid heavy mulch, which can smother emerging shoots. For extreme cold (<20°F), drape burlap over clumps and secure with bricks—just remove it during the day to prevent overheating.
When is the best time to mulch irises before blooming?
Mulch after the ground thaws but before new shoots appear (usually 2–4 weeks before your last frost date). This gives rhizomes time to warm up naturally while shielding them from sudden cold snaps. Pro tip: Wait until soil temps hover around 40–50°F—use a soil thermometer if you’re unsure!
Can I still plant irises in early spring before they bloom?
Yes! Plant rhizomes in late winter or early spring (as soon as the ground is workable) for pre-bloom establishment. Choose a sunny, well-draining spot and bury rhizomes shallowly (top should peek above soil). Water lightly after planting, but avoid soggy soil—irises hate wet feet!
What if my irises look mushy or rotten after frost?
Mushy rhizomes signal root rot, often from overwatering or poor drainage. Trim away damaged sections with sterilized shears, dust cuts with cinnamon or sulfur, and replant in amended soil. If the entire rhizome is compromised, compost it—don’t risk spreading disease to healthy plants.
Are there any low-maintenance alternatives to traditional irises for early color?
Try crocuses, winter aconites, or hellebores—they bloom earlier and tolerate frost better. For iris-like drama, Dutch irises (Iris x hollandica) are hardier and often bloom 2–3 weeks earlier than bearded irises. Just ensure they’re planted in full sun for best results!
Wrapping up and next steps
Watching your irises pre-bloom with vibrant early spring color is a rewarding experience—especially when you’ve mastered the art of frost-hardiness! By selecting the right varieties, preparing them with mulch and protective measures, and timing your care just right, you’re setting the stage for stunning displays year after year. 🌸
Now that you’re armed with these pre-bloom secrets, take the next step: mark your calendar for late winter checks and early spring adjustments. Your irises will thank you with bold, cheerful blooms that brighten up the season—and maybe even inspire your neighbors to try their own!