
Blooming
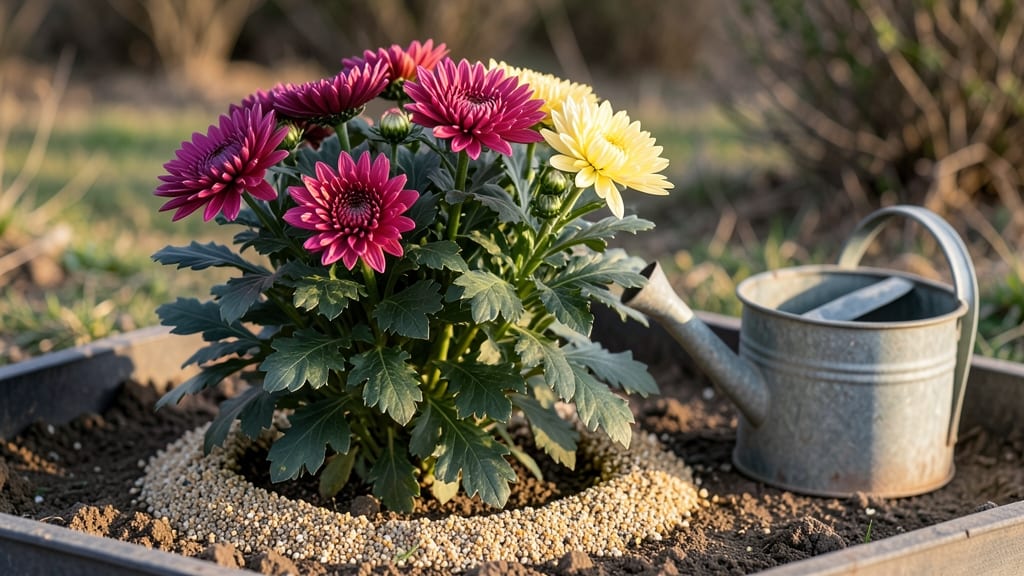
Your mums are throwing a tantrum—not blooming—because they're being ignored. 🌼 The secret to nonstop color lies in two simple habits: deadheading spent blooms and feeding them the right nutrients at the right time, not just once but all season long.
Most gardeners wait until late summer to fertilize, but that's too late. Start feeding in early June with a balanced, slow-release fertilizer, then repeat every 4-6 weeks through August. Cut back on watering after blooming to signal the plant it's time to rest for next year.
You'll see buds forming within 2-3 weeks of proper care, and the flowers will keep coming until frost. The key is consistency—no skipped deadheadings, no forgotten feedings, just steady encouragement. Works for both garden mums and container varieties. Let's get those blooms popping!
📚 In This Guide
- What you need
- Instructions
- Tips and common mistakes
- Wrapping up and next steps
What you need
- ● Chrysanthemum plants: Choose hardy, blooming varieties (e.g., 'Bright Lights,' 'Mammoth,' or 'Dwarf Bonanza'). Buy 3–6 plants per 10 sq. ft. for full coverage.
- ● Pruning shears: Sharp, bypass-style shears (4–6" blades) for clean cuts—sterilize with rubbing alcohol between cuts!
- ● Balanced fertilizer: 10-10-10 or 20-20-20 NPK ratio (granular or liquid). Use 1 tbsp per sq. ft. every 4–6 weeks.
- ● Slow-release fertilizer: Osmocote (14-14-14) or Milorganite (organic option) for steady nutrient release.
- ● Compost or aged manure: 2–3 inches mixed into soil at planting for organic matter.
- ● Mulch: 2–3 inches of shredded bark, straw, or pine needles to retain moisture and regulate soil temp.
- ● Watering can or hose: With a gentle spray nozzle to avoid damaging blooms.
- ● Gloves: Heavy-duty gardening gloves to protect hands from thorns and soil.
- ● Epsom salt: 1 tbsp per gallon of water (monthly spray for magnesium boost).
- ● Fish emulsion or seaweed extract: 1 tbsp per gallon for a natural growth kick.
- ● Floral wire or twist ties: For securing heavy blooms in windy areas.
- ● Soil pH test kit: Mums thrive in slightly acidic soil (pH 6.0–6.5)—adjust with lime or sulfur if needed.
- ● Drip irrigation system: For consistent moisture (especially in hot climates).
Step-by-Step guide to encourage chrysanthemum blooms
Here’s how I coax mums into their most vibrant, long-lasting displays—no shortcuts, just proven care.
🌿 Step 1: Deadhead Regularly to Stimulate New Flowers
Start the moment you see spent blooms. Use sharp pruners to cut back the flower stem to the first set of healthy leaves below the bloom—never leave stubs. This prevents the plant from wasting energy reseeding and redirects it toward producing new buds. I do this every morning after dew dries; consistency is key.
Watch for side buds forming at the stem base within 3-5 days. These indicate the plant is responding well. If you skip deadheading, you’ll end up with leggy stems and fewer flowers. Chrysanthemums are heavy bloomers, so they reward prompt attention.
☀️ Step 2: Provide Full Sun and Gradual Watering
Mums need 6-8 hours of direct sun daily for optimal blooming. If your plants start stretching toward light with pale leaves, they’re not getting enough. I rotate my containers weekly to ensure even exposure—you’ll notice stems growing straighter within a week.
Water deeply 2-3 times per week, letting the top 2 inches of soil dry out between sessions. Overwatering causes root rot, while underwatering stresses the plant and reduces blooms. Check soil moisture by sticking your finger in—if it feels dry past your first knuckle, it’s time to water.
💧 Step 3: Feed with Balanced Fertilizer Mid-Season
Apply a 10-10-10 or 20-20-20 fertilizer every 4-6 weeks starting in early summer. This gives mums the phosphorus they need for strong roots and blooms. I mix the fertilizer into the top inch of soil after watering to prevent root burn.
Stop fertilizing 6-8 weeks before your first frost—new growth won’t harden off in time. You’ll see a surge in flower production within 2-3 weeks of feeding, but only if the plants are already established and healthy. Weak or leggy mums won’t respond well.
✂️ Step 4: Prune for Bushier Growth and More Blooms
In late spring, cut back all stems by one-third to encourage branching. Use clean pruners and make cuts just above a leaf node. This might seem drastic, but the plant will rebound with thicker, more compact growth. You’ll notice new side shoots emerging within 7-10 days.
Remove any yellow or diseased leaves immediately—they sap energy. Avoid heavy pruning after mid-summer, as the plant needs to focus on blooming rather than regrowing foliage. A lightly pruned mum in late summer will still produce flowers, but they’ll be fewer and smaller.
⏰ Step 5: Time Your Care for Seasonal Blooms
For fall blooms, start withholding water 2 weeks before your first frost to harden off the plants. This helps them survive winter and rebloom in spring. I also stop fertilizing at this point to encourage dormancy. Mums are tough—they’ll look dormant but stay alive underground.
In spring, resume watering and fertilizing as soon as new growth appears. You’ll see fresh shoots within 2-3 weeks of warming temperatures. This annual cycle keeps mums blooming year after year with minimal effort.
Tips & tricks for encouraging chrysanthemum blooms
A few key tweaks can transform your mums from lackluster to show-stopping. Here's what I've learned after years of coaxing these hardy plants into their best display.
Precision Deadheading: When you're ready to deadhead in Step 1, look for the first set of healthy leaves below the spent bloom—this is your cutting point. I use a clean pair of pruners to make the cut at a 45-degree angle just above this leaf node. This angled cut prevents water from pooling on the stem, which reduces rot. The 3-5 day window for new side buds to appear is critical—if you see no buds after 7 days, your plant may need more sunlight or fertilizer.
Sunlight Strategy: The 6-8 hours of direct sun in Step 2 is non-negotiable for vibrant blooms. If your mums start stretching toward light with pale leaves, they're light-deprived. I rotate my containers weekly to ensure even exposure—this simple rotation prevents stems from growing lopsided. For container gardeners, consider placing plants on a rotating stand or simply turn them 180 degrees every few days. You'll notice straighter stems within a week if they're getting proper light.
Fertilizer Timing: When applying your 10-10-10 or 20-20-20 fertilizer every 4-6 weeks in Step 3, mix it into the top inch of moist soil rather than sprinkling on top. This prevents root burn and ensures even distribution. The 2-3 week surge in flower production after feeding is your reward for consistency—just make sure to stop fertilizing 6-8 weeks before frost to let the plants harden off properly. I always mark my calendar with the last feeding date to avoid this common mistake.
Pruning Insight: That one-third pruning in Step 4 might seem aggressive, but it works wonders for bushier growth. Make sure to cut just above a leaf node—this is where new growth will emerge. The 7-10 day window for new side shoots is your confirmation that the plant is responding well. For late-summer pruning, be gentle—focus on removing only yellow or diseased leaves rather than heavy cutting, as the plant needs to conserve energy for blooming.
Pro Tips for Get Mums To Bloom
- A few key tweaks can transform your mums from lackluster to show-stopping.
- Precision Deadheading: When you're ready to deadhead in Step 1, look for the first set of healthy leaves below the spent bloom—this is your cutting point.
- Sunlight Strategy: The 6-8 hours of direct sun in Step 2 is non-negotiable for vibrant blooms.
Frequently asked questions
Got questions about coaxing those vibrant chrysanthemum blooms? You’re not alone! Here are answers to the most common ones—so you can keep your mums looking fabulous all season.
When is the best time to start deadheading mums for blooms?
Start as soon as you see spent blooms—ideally in early summer (June–July). Deadheading 2–3 times a week removes faded flowers and signals the plant to focus energy on new buds. Pro tip: Use clean pruners or pinch blooms by hand to avoid damaging stems!
How long does it take for mums to rebloom after deadheading?
With proper care, you’ll see new buds in 4–6 weeks. Timing depends on variety (some rebloom faster than others) and conditions like sunlight (6+ hours/day) and soil moisture. Patience pays off! Over-fertilizing or inconsistent watering can delay blooms, so stick to a routine.
Why aren’t my mums blooming even after deadheading?
Common culprits:
- Lack of sunlight: Mums need full sun (6+ hours/day). Move them to a sunnier spot if possible.
- Overcrowding: Thin plants to 12–18 inches apart for better airflow and nutrient access.
- Poor soil: Amend with compost or a balanced fertilizer (10-10-10) every 4–6 weeks.
- Dormancy triggers: If temps drop below 50°F at night, blooming slows—wait until spring for new growth.
Can I use regular garden shears or do I need special tools?
Nope! Clean, sharp pruners or shears work perfectly—just sterilize them with rubbing alcohol between cuts to prevent disease. For large batches, gloves help avoid thorns and sap irritation. Bonus: Repurpose pruned blooms for bouquets or compost!
What’s the easiest way to keep mums blooming all season?
Follow this 3-step routine:
Step
Action
1
Deadhead weekly (remove spent blooms + yellow leaves).
2
Feed with high-phosphorus fertilizer (like 5-10-5) every 4 weeks.
3
Water deeply 1–2x/week (morning is best) and mulch to retain moisture.
Consistency is key—skip steps, and blooms may fizzle!
Pro Tip:
For extra-long blooms, try a second deadheading in late summer (August–September) to encourage a fall rebloom. Just be mindful of frost—mums won’t tolerate temps below 20°F!
Wrapping up and next steps
Getting your mums to bloom isn’t just about luck—it’s a mix of timing, care, and a little extra love! By deadheading early, feeding often, and staying consistent with water and sunlight, you’ll enjoy nonstop vibrant blooms all season long. 🌸
Now that you’re armed with the know-how, roll up your sleeves and give your mums the attention they deserve. Start with one small step today—whether it’s trimming spent blooms or adding a balanced fertilizer—and watch your garden transform into a colorful masterpiece! 💪
Ready to level up your gardening game? Try experimenting with new varieties or sharing your blooms with fellow plant lovers—your garden (and neighbors!) will thank you. Happy blooming! 🌻