
Blooming
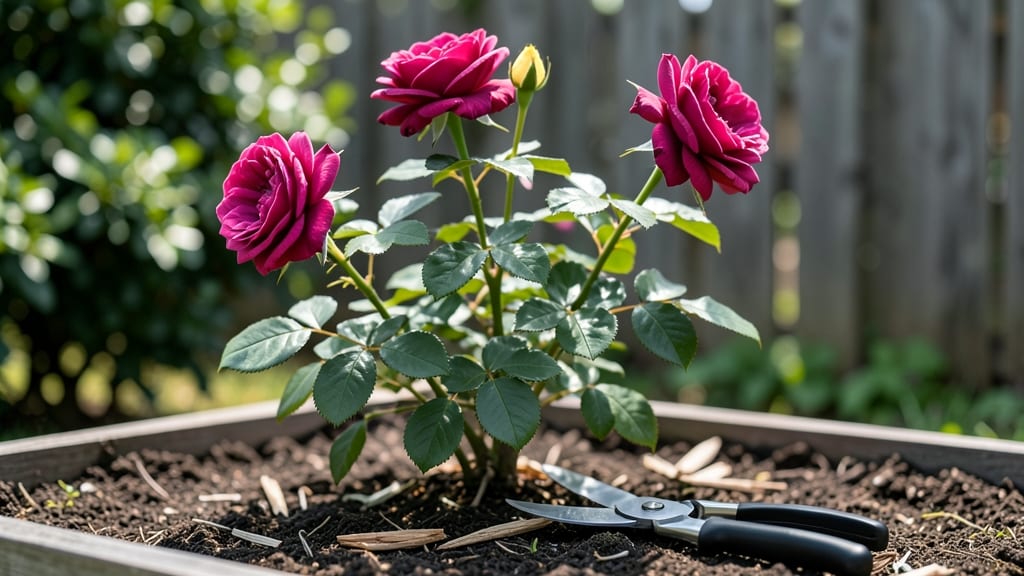
Getting a rose bush to bloom means understanding its secret language—light, pruning, and patience. ✂️ My first rose bush sat there for years, all leggy stems and no flowers, until I learned the right cuts and feeding schedule.
The difference between a bush full of buds and one that looks like a twiggy mess often comes down to three key factors: when you prune, how you feed it, and whether it gets enough morning sun without scorching afternoon heat.
Most gardeners overcomplicate this—you don’t need fancy tools or expensive fertilizers. Start with sharp pruners, a 5-2-5 rule (5 feet of space, 2 feet of height, 5 gallons of water weekly in summer), and a balanced fertilizer.
The real magic happens in late winter when you make those angled cuts just above an outward-facing bud. That’s when the bush wakes up and says, “Finally, someone’s listening.”
By mid-summer, you’ll see clusters of buds forming where there were none before. The blooms won’t just appear—they’ll arrive in waves, with some varieties like ‘Knock Out’ roses giving you near-continuous color from spring through frost if you keep deadheading spent blooms.
The secret? Treat your rose like a diva—give it what it wants, and it’ll perform like the star of the garden.
Here’s the thing—this works for all rose types, from climbers to hybrid teas. Whether you’re dealing with black spot, weak stems, or just stubborn non-blooming bushes, the same principles apply. Let’s turn that twiggy mess into a showstopper before next season.
📚 In This Guide
- What you need
- Instructions
- Tips and common mistakes
- Wrapping up and next steps
What you need
- ● Bypass pruners – Sharp, clean, and sterilized (1 pair). Avoid dull tools—they crush stems instead of cutting cleanly!
- ● Hand pruners or loppers – For thicker stems (¼”–1” diameter). Look for ergonomic handles for comfort during long sessions.
- ● Disinfectant (70% isopropyl alcohol or bleach solution) – 1 small spray bottle or wipe pack to sterilize tools between cuts.
- ● Gloves (heavy-duty gardening gloves) – 1 pair to protect against thorns and dirt.
- ○ Pruning saw (optional but helpful) – For stems thicker than 1” (1 small, lightweight saw).
- ● Rake or hoe – 1 to clear debris and mulch around the base of the bush.
- ● Compost or organic mulch – 2–3 gallons to replenish soil nutrients post-pruning.
- ● Fertilizer (balanced or rose-specific) – 1 bag (10–20 lbs) of 10-10-10 or 5-10-5 NPK ratio. Slow-release options work best!
- ● Watering can or hose with adjustable nozzle – To hydrate deeply after pruning.
- ● Healthy rose bush – Choose a bush that’s not diseased (check for black spots, powdery mildew, or wilted leaves).
- ● Right timing – Late winter/early spring (just before new growth starts).
- ● Late summer/early fall (for light shaping and deadheading).
- ● Sunlight access – At least 6–8 hours of direct sun daily. Move potted roses to sunnier spots if needed.
- ● Well-draining soil – Amend clay soil with compost or sand if drainage is poor.
- ● Patience & observation – Roses bloom best when pruned gradually. Monitor growth and adjust as needed!
- ● 🌡️ Check the weather – Prune on a dry, calm day to avoid spreading disease via wet tools or rain.
- ● ✂️ Sharpen your tools – Dull blades tear stems, inviting infections. Hone pruners with a file or oil stone before starting.
- ● 📊 Label your cuts – Use a small flag or twine to mark canes to keep (strong, outward-facing buds) vs. canes to remove (weak or inward-growing).
Step-by-Step instructions for encouraging rose bush blooms
Here's the method I've used to transform struggling rose bushes into vibrant bloomers—no fancy tools, just smart timing and attention.
☀️ Step 1: Maximize Sunlight Exposure
Roses need 6-8 hours of direct sunlight daily to produce buds. If your bush only gets partial sun, move it to a sunnier spot immediately—even an hour less sunlight can delay blooming. I watch for shadows cast by trees or buildings and adjust placement accordingly.
Morning sun is ideal because it warms the plant gradually without scorching. If your roses are in containers, rotate them every 2-3 weeks so they don't lean toward the light. You'll notice new growth straightening up within a week of better positioning.
✂️ Step 2: Prune Strategically for New Growth
Prune in early spring when new buds begin to swell. Cut back 1/3 of the oldest canes to the ground—these are the branches that produce fewer blooms. For remaining canes, trim just above an outward-facing bud, making cuts at a 45-degree angle to prevent water pooling.
I always sterilize my pruners with rubbing alcohol between cuts to avoid spreading disease. After pruning, look for fresh green growth within 2-3 weeks—this is your signal that the bush is responding. If you see no new shoots by then, you may have pruned too late or too aggressively.
💧 Step 3: Water Deeply and Consistently
Roses need 1-2 inches of water weekly, delivered deeply at the base rather than frequent shallow watering. I water in the early morning to reduce evaporation and fungal risks. Let the top 2 inches of soil dry out between waterings—this encourages deep root growth.
Mulch around the base with 2-3 inches of organic mulch (like shredded bark) to retain moisture and regulate soil temperature. Avoid piling mulch against the stem—keep it 3 inches away to prevent rot. You'll know your watering is right when leaves stay crisp and stems feel firm.
🌿 Step 4: Feed for Continuous Blooms
Apply a balanced rose fertilizer (10-10-10 or similar) in early spring and again in mid-summer. Follow package instructions for amounts—over-fertilizing burns roots and reduces blooms. I also sprinkle 1 tablespoon of Epsom salt around the base monthly for magnesium, which boosts bloom production.
Watch for new buds forming at the tips of canes. These are your reward for proper feeding! If you notice yellowing leaves, flush the soil with water to prevent salt buildup from fertilizer. Healthy foliage means more energy for blooms.
⏰ Step 5: Deadhead and Encourage Reblooming
Pinch off spent blooms just above a set of 5 leaves to redirect the plant's energy into new flowers. I use clean fingers or small pruners for this task—no need for heavy tools. Repeat this weekly during the blooming season to keep your rose bush producing.
For hybrid teas and floribundas, a second flush of blooms often appears in 6-8 weeks after the first wave. If your roses stop blooming, check for aphids or black spot—both sap energy from the plant. A spray of neem oil or fungicide can restore vigor quickly.
Tips & tricks for perfect rose bush blooms
Here’s what nobody tells you about keeping your rose bushes blooming like clockwork—these are the little details that make all the difference.
Sunlight Strategy: If your roses are in partial shade, don’t just move them—move them gradually. Shift the pot or plant 2-3 inches closer to full sun every 3-4 days. Sudden exposure can scorch leaves, but this slow transition lets them adapt without stress. I’ve seen roses that looked hopeless after a week of this adjustment start producing buds within 10 days.
Pruning Precision: When you’re cutting back those oldest canes in Step 2, look for canes that are thinner than a pencil—these are the ones producing the fewest blooms. Cut them all the way to the ground, not just halfway. The plant will redirect energy to the younger, more productive canes, and you’ll see that fresh green growth in as little as 7 days instead of the usual 2-3 weeks.
Watering Wisdom: The "1-2 inches weekly" rule works, but here’s the trick: use a rain gauge or tuna can to measure. Most people underestimate how much water they’re actually giving. If your soil feels damp just 1 inch below the surface, you’re overwatering—this is the #1 reason roses stop blooming. Let that top 2 inches dry out completely between waterings, and you’ll see a difference in just a few weeks.
Fertilizer Timing: That mid-summer feeding in Step 4 is non-negotiable, but here’s the secret: split the dose. Apply half the recommended amount in early summer (around June) and the other half in late summer (around August). This prevents a sudden flush of growth that can’t be supported before winter, and your roses will reward you with a second bloom cycle that lasts longer and looks fuller.
Pro Tips for Get A Rose Bush To Bloom
- Here’s what nobody tells you about keeping your rose bushes blooming like clockwork—these are the little details that make all the difference.
- Sunlight Strategy: If your roses are in partial shade, don’t just move them—move them gradually.
- Pruning Precision: When you’re cutting back those oldest canes in Step 2, look for canes that are thinner than a pencil—these are the ones producing the fewest blooms.
Frequently asked questions
Got questions about coaxing those stunning blooms from your rose bush? You’re not alone! Here are answers to the most common queries—because every gardener deserves a thriving, fragrant rose garden.
Why isn’t my rose bush blooming, even after pruning?
Lack of blooms often boils down to three key factors: insufficient sunlight (roses need 6+ hours daily), poor nutrition (low phosphorus or nitrogen), or over-pruning (cutting back too late in the season). Check your soil pH too—roses thrive in 6.0–6.5. If all else fails, inspect for pests or disease blocking growth.
When is the best time to prune roses for maximum blooms?
Timing is everything! For spring-blooming varieties, prune in late winter/early spring (just before new growth starts). Repeat-blooming roses get a light trim after the first flush to encourage more flowers. Avoid heavy pruning in fall—it stresses the plant before winter. Pro tip: Never prune when frost is forecast!
Can I force a rose bush to bloom out of season?
Yes, but it takes strategic tweaking. Start by moving potted roses indoors (near a sunny window) in late fall and provide 12+ hours of light with grow bulbs. Boost phosphorus (the "bloom" nutrient) with a balanced fertilizer (10-10-10 or 5-10-5). Just remember: Outdoor roses need dormancy—forcing blooms year-round can exhaust the plant.
How much should I cut back a rose bush for better blooms?
Pruning rules vary by type, but here’s a general guide:
Rose Type
Prune Back To
Climbing Roses
3–5 buds from the base (thinner canes = more blooms)
Bush Roses
1/3 of height (aim for an open center)
Hybrid Teas
1/2 of height (cut just above a 5-leaf node)
My rose bush has buds but they drop before opening—what’s wrong?
Bud drop is usually a stress signal. Common culprits:
- Temperature swings (too hot/cold during bud formation)
- Underwatering (roses need 1–2 inches of water weekly)
- Over-fertilizing (especially nitrogen-heavy feeds)
- Pests (aphids, spider mites, or rose slugs)
Try mulching to stabilize soil temps and spray buds with water in extreme heat. If pests are the issue, use neem oil as a natural remedy.
Wrapping up and next steps
Getting your rose bush to bloom is all about patience, precision, and a little love—just like nurturing any beautiful relationship! 🌹 With the right pruning techniques, sunlight, and care, you’ll soon be rewarded with vibrant blooms that brighten up your garden year-round.
Now that you’re armed with the knowledge, roll up your sleeves and give your rose bush the attention it deserves.
Ready to see those buds pop? Start by booking a quick check-in with your rose bush this weekend—trim those canes, adjust its spot, and watch the magic unfold! And if you’re feeling inspired, why not share your progress with fellow gardeners? Tag us in your blooming victories! 🌿