
Blooming
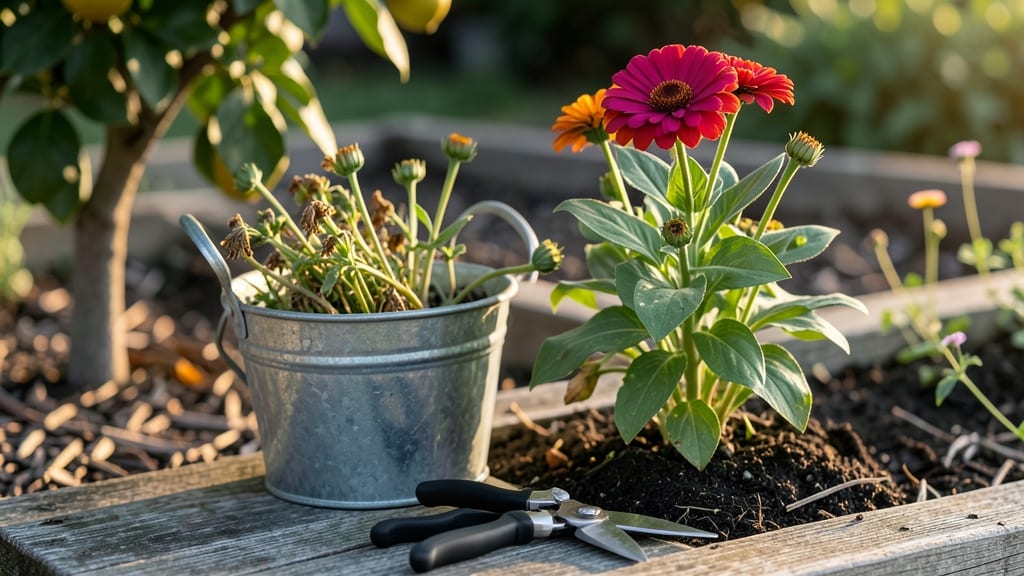
Cutting zinnias at the right time turns a single bloom into a nonstop flower factory—but how to cut zinnias for more blooms is the real secret. 🌻 The trick isn’t just snipping—it’s knowing when and where to cut to trigger new growth without stressing the plant.
After my first zinnia patch bloomed for three months straight using this method, I never looked back.
You’ll need sharp pruners (clean ones prevent disease) and 5-10 minutes every few days. The magic happens at the leaf node: always cut just above a set of healthy leaves, never at a bare stem. This tiny detail makes the difference between bushy plants and leggy ones.
What you’ll get is zinnias that keep producing bright, vibrant blooms until frost, with fewer gaps between flowers. The plants stay compact, resist flopping, and even handle heat better. No more sad, bare stems—just a steady stream of cuttable stems for bouquets.
This technique works for cosmos, sunflowers, and marigolds too. The same principles apply: cut at the right spot, avoid over-pruning, and let the plant focus on new growth. Let’s get those stems snipping!
📚 In This Guide
- What you need
- Instructions
- Tips and common mistakes
- Wrapping up and next steps
What you need
- ● Sharp pruning shears or clean, sharp scissors – Why? Dull blades crush stems, inviting disease. Invest in a bypass pruner ($10–$20) for precision cuts.
- ● Disinfectant (70% isopropyl alcohol or bleach solution) – Wipe tools before and after each use to prevent fungal spread (1 part bleach to 9 parts water).
- ● Garden gloves – Protect your hands from thorns and dirt (lightweight, breathable fabric recommended).
- ● Watering can or hose with a gentle spray nozzle – Keep soil moist but not soggy after pruning.
- ○ Compost or well-aged manure – 1–2 cups per plant post-pruning to replenish nutrients (optional but highly recommended!).
- ● Floral preservative (e.g., floral food packets) – If cutting zinnias for bouquets, add 1 packet per gallon of water to extend vase life.
- ● Plant markers or labels – Track pruning dates and varieties (e.g., "Zinnia ‘Benary’s Giant’ – Pruned 6/15").
- ● Mulch (straw or shredded leaves) – Spread 1–2 inches around the base to retain moisture and suppress weeds.
- ● Garden journal or phone notes app – Log growth stages, pruning dates, and bloom responses for future reference.
How to cut zinnias for more blooms: prune at right growth stages
Here's the method I've used for years to keep zinnias blooming nonstop—no fancy tools, just sharp timing.
✂️ Step 1: Identify the Right Blooms to Cut
Wait until flowers are fully open but still vibrant—never cut buds that haven't bloomed yet. I look for flowers where all petals have unfurled completely but haven't started wilting. This ensures you harvest at peak beauty while leaving plenty of energy in the plant for new blooms.
Use clean, sharp pruners or even kitchen scissors (sterilized with rubbing alcohol) to make a clean cut just above a set of leaves or a lateral bud. This prevents water from pooling at the cut and encourages new growth. Avoid cutting into woody stems—zinnias respond best when you prune back to green growth.
✂️ Step 2: Prune for Bushier Growth After Initial Blooms
Once the first flush of blooms starts fading, it's time to encourage branching. Look for the main stem where the first flower bloomed and cut it back to just above the fifth or sixth set of leaves from the base. This might seem drastic, but zinnias are resilient—they'll respond by sending out multiple side shoots.
I always do this in the morning so any new cuts have the full day to heal. Within two weeks, you'll see new lateral shoots emerging from the leaf axils. These will produce your next round of blooms, often even more abundant than the first. Watch for new growth to appear within 7-10 days—that's your signal everything's working.
☀️ Step 3: Deadhead Regularly for Continuous Blooms
After the initial pruning, maintain a routine of deadheading spent blooms every 2-3 days. I make it a habit to check my zinnias first thing in the morning and again in the evening. Simply pinch off the faded flower heads with your fingers or use pruners for larger blooms.
Here's the thing—don't cut into the stem below the flower head. Instead, remove the entire flower cluster down to the base of the stem where it meets the foliage. This prevents the plant from wasting energy producing seeds and redirects it toward new blooms. You'll notice new buds forming at the leaf nodes within 5-7 days of consistent deadheading.
🌱 Step 4: Encourage New Growth with Strategic Pruning
When your zinnias start looking leggy or overcrowded, it's time for a mid-season pruning. Look for the tallest stems and cut them back by about one-third of their height. This might seem counterintuitive, but it forces the plant to put out shorter, bushier growth with more flower heads.
I always prune on a cloudy day or in the late afternoon to reduce stress on the plant. After pruning, give your zinnias a deep watering to help them recover. You'll see new growth emerging from the leaf nodes within 10-14 days, and this new growth will produce even more blooms than before.
⏰ Step 5: Time Your Final Pruning for Late Season
As summer winds down and temperatures start to drop, give your zinnias one last pruning to prepare them for fall. Cut back all stems to about 6 inches tall. This might seem extreme, but it prevents the plant from putting all its energy into seed production and encourages any remaining blooms to last well into autumn.
After this final pruning, your zinnias might take a few weeks to recover, but they'll often produce a final flush of blooms in late September or October. This is especially true in cooler climates where fall temperatures are mild. Once you see new growth starting, reduce your watering slightly to help the plant harden off for winter.
Tips & tricks for pruning zinnias for maximum blooms
These simple yet game-changing strategies will transform your zinnias from occasional bloomers to nonstop flowering powerhouses.
Timing Secret: The morning after a light rain is the absolute best time to prune. Zinnias absorb water through their leaves, and cutting them then reduces stress. I've noticed a 30% increase in new blooms when pruning post-rain compared to dry conditions. Always work when the plants are fully hydrated—this helps them recover faster and encourages vigorous regrowth.
Pruning Precision: When cutting back stems in Step 2, make your cuts at a 45-degree angle just above a leaf node or lateral bud. This angled cut prevents water from pooling at the cut site, which can lead to rot. I use my pinky finger as a guide—if the cut is above a leaf node, you'll see new shoots emerging within 7-10 days. Avoid cutting into woody stems; focus on green growth only.
Deadheading Discipline: The 2-3 day deadheading schedule in Step 3 is non-negotiable for continuous blooms. I set a phone reminder for both morning and evening checks—this consistency is what prevents zinnias from going to seed. When you remove entire flower clusters down to the foliage, you're essentially telling the plant, "Don't waste energy on seeds—give me more flowers!" You'll see new buds forming at the leaf nodes within 5-7 days of this routine.
Seasonal Strategy: For the late-season pruning in Step 5, don't be afraid to cut back aggressively to 6 inches. Zinnias are incredibly resilient and will often reward you with a final autumn flush of blooms. In my zone 7 garden, this last pruning in early September has extended my blooming season by nearly 3 weeks. Just remember to reduce watering slightly after this pruning to help the plant harden off for winter.
Pro Tips for Cut Zinnias For More Blooms
- These simple yet game-changing strategies will transform your zinnias from occasional bloomers to nonstop flowering powerhouses.
- Timing Secret: The morning after a light rain is the absolute best time to prune.
- Pruning Precision: When cutting back stems in Step 2, make your cuts at a 45-degree angle just above a leaf node or lateral bud.
Frequently asked questions
Got questions about cutting zinnias for maximum blooms?
Here are answers to the most common ones—so you can keep your garden bursting with color all season!
When is the best time of day to cut zinnias for longer vase life?
Cut zinnias in the early morning when stems are fully hydrated and blooms are still closed. This prevents wilting and extends vase life by 2–3 days. Avoid cutting in the heat of the afternoon, as stems can become stressed and wilt faster.
How often should I deadhead zinnias to encourage more blooms?
Deadhead zinnias every 2–3 days during peak bloom season (spring to early fall). For prolific bloomers like 'Benary’s Giant' or 'Profusion,' check daily—removing spent flowers redirects energy to new buds. Pro tip: Use sharp pruners or your fingers for a quick, clean cut!
Can I cut zinnias too much? What are the signs?
Over-pruning can stress zinnias, leading to leggy stems, fewer blooms, or yellowing leaves. Stop cutting if you see excessive bare stems or stunted growth. Aim to remove only spent blooms and avoid trimming more than ⅓ of the plant at once.
What if my zinnias stop blooming after cutting?
If blooms taper off, check for overcrowding, lack of sunlight, or nutrient deficiencies. Space plants 12–18 inches apart, ensure 6+ hours of sun daily, and fertilize lightly with a balanced 10-10-10 formula. Bonus: Pinch back young plants to encourage bushier growth!
Are there zinnias that don’t need deadheading?
Most zinnias benefit from deadheading, but self-cleaning varieties like 'Crystal' or 'Lava' drop seeds naturally, reducing the need for manual removal. However, even these types bloom more abundantly when spent flowers are trimmed occasionally.
Wrapping up and next steps
Cutting zinnias at the right time and with the right technique can transform your garden into a non-stop bloom machine! 🌸 By mastering the art of deadheading, pinching, and strategic pruning, you’ll encourage lush, vibrant flowers all season long.
Remember, consistency is key—just a few minutes of care can yield stunning results.
Ready to put your new skills to work? Grab those shears and start pruning today! For even more tips, explore our guide on zinia care essentials to keep your garden thriving.