
Blooming
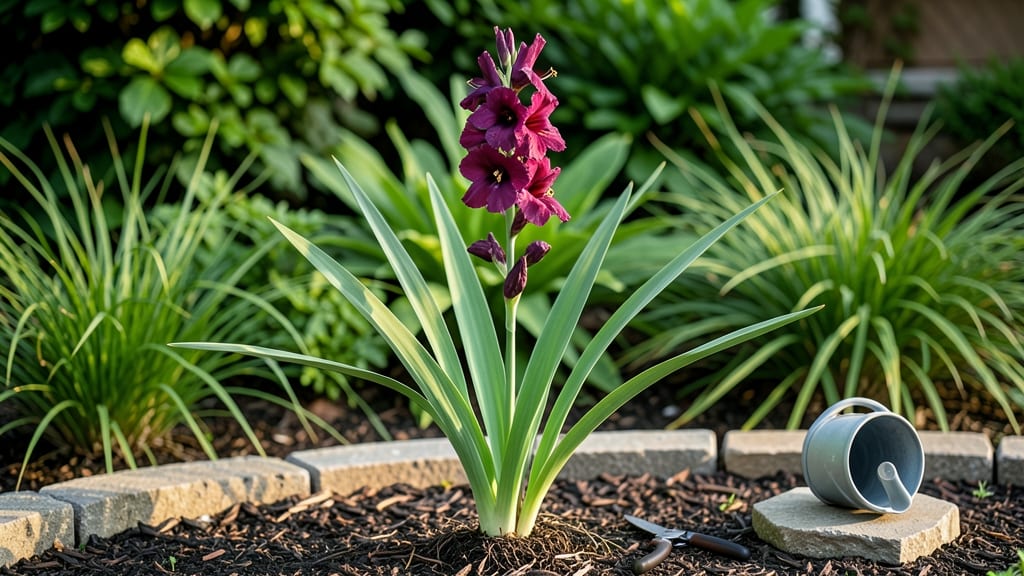
Timing your gladiolus blooms means summer-long color from July through September in Zones 3-11—if you plant corms at the right depth and temperature. 🌸 I learned the hard way that rushing spring planting in cold zones delays blooms, while waiting too long in warm climates means heat stress.
The secret lies in matching your zone to the corm's dormancy needs.
Most gardeners plant gladiolus corms 6-8 weeks before your last frost—but in Zones 9-11, that means fall planting for winter blooms. Full sun (6+ hours daily) and well-draining soil are non-negotiable: soggy roots = no flowers.
I've seen blooms arrive 4-6 weeks after shoots emerge, but only when conditions are perfect.
Precision pruning extends the show: snip spent spikes 2-3 days after blooms fade to encourage new side shoots. My Zone 7 garden now produces secondary blooms in late August that rival the first flush. The key is consistent moisture—never let corms dry out—and a balanced fertilizer at planting time.
Track your blooms with a garden journal: note when corms emerge, when first buds appear, and how long each spike lasts. This helps you rotate varieties for nonstop color.
Common mistakes? Planting too shallow (corms need 6 inches deep) or overcrowding (space them 6 inches apart). Fix these, and you'll have glads blooming reliably for decades.
📚 In This Guide
- What you need
- Instructions
- Tips and common mistakes
- Wrapping up and next steps
What you need
- ● Gladiolus corms: 10–20 corms per variety (choose early, mid-, and late-season types for staggered blooms). Pro tip: 💡 Opt for certified disease-free corms for healthier growth!
- ● Well-draining soil: Amend garden beds with 2–3 inches of compost or aged manure (per 10 sq. ft.). Aim for a pH of 6.0–6.8.
- ● Balanced fertilizer: 5-10-10 or 10-10-10 (apply 1 tbsp per corm at planting and mid-season).
- ○ Slow-release fertilizer: Optional but helpful for extended blooms (e.g., Osmocote 14-14-14).
- ● Hand trowel or bulb planter (for digging planting holes 4–6 inches deep).
- ● Pruning shears (sharp, bypass-style for clean cuts).
- ● Garden gloves (to protect hands from corm sap and thorns).
- ● Watering can or hose with gentle spray nozzle (avoid overhead watering post-pruning).
- ○ Stakes or trellis (optional, for tall varieties like ‘Green Star’ or ‘Black Star’).
- ● Sunlight: Full sun (6+ hours/day) for optimal bloom time.
- ● Temperature: Plant corms 2–4 weeks before last frost (Zone 3: mid-April; Zone 11: late winter).
- ● Watering schedule: Keep soil evenly moist (1 inch/week) but avoid waterlogging.
- ● Pest/disease watch: Monitor for thrips or botrytis (treat with neem oil if needed).
Precision pruning for months-long gladiolus blooms
Here’s how to coax your gladiolus into a 6-8 week display of color—no matter your hardiness zone.
🌱 Step 1: Select and Plant Bulbs for Staggered Bloom Times
Choose three varieties with different bloom periods—early (June), mid-season (July-August), and late (September). Plant the earliest bloomers 6 inches deep and 6 inches apart in well-draining soil with high organic matter. I like to plant mine in late spring, about 2-3 weeks before the last frost in my Zone 5 garden.
Here’s the trick: plant the mid-season variety 2 weeks later and the late bloomers 4 weeks after the first batch. This staggered approach ensures you get continuous blooms instead of one overwhelming flush. Water deeply after planting to encourage root establishment, then let the soil dry slightly between waterings.
✂️ Step 2: Prune for Extended Bloom with the "Third Spike" Method
Once your gladiolus sends up its first flower spike, let it bloom fully and enjoy those first flowers. But here’s where precision matters: when you see two additional side spikes forming at the base of the main stem, remove the main bloom stem entirely. This redirects the plant’s energy to the side spikes, giving you 3-4 weeks more blooms.
I always use clean, sharp pruners to avoid damaging the stem. Cut just above the next set of leaves to prevent disease entry. The plant will compensate by putting all its focus on developing those side spikes, which will mature into full, vibrant blooms. Watch for the first side spike to open—that’s your signal to repeat the process with the remaining stems.
💧 Step 3: Water and Fertilize for Continuous Growth
Gladiolus are heavy feeders, especially when you’re pruning to extend blooms. After the first flush, apply a balanced 10-10-10 fertilizer every 3-4 weeks to keep them producing. Water deeply twice weekly during active growth, ensuring the soil stays moist but not soggy. You’ll know you’re doing it right when the foliage stays deep green and crisp.
Here’s a pro tip: mulch around the base with 2-3 inches of straw or shredded leaves to retain moisture and regulate soil temperature. This keeps the roots happy and encourages the plant to keep sending up new spikes. Avoid overwatering after the first frost—gladiolus go dormant naturally, and too much moisture can rot the corms.
☀️ Step 4: Deadhead and Protect for Late-Season Blooms
As flowers fade, remove spent blooms immediately to prevent seed formation, which drains energy from the plant. I use my fingers to pinch off wilted blooms rather than cutting—it’s faster and keeps the stems intact. This encourages the plant to focus on developing the next set of buds rather than setting seed.
In late summer, when temperatures drop below 70°F, gladiolus often produce a final flush of blooms. To protect them, I stake the taller varieties with 3-foot bamboo stakes before they get too top-heavy. This prevents wind damage and keeps the blooms upright for easier viewing and cutting. Watch for the leaves to yellow and collapse—that’s your cue to stop watering and let the plant prepare for dormancy.
⏰ Step 5: Harvest and Store Corms for Next Year’s Display
After the first hard frost, cut the foliage back to 2 inches above the ground and carefully dig up the corms. Brush off excess soil and let them dry in a shady, well-ventilated area for 1-2 weeks. Store them in a paper bag or mesh container with dry peat moss or vermiculite in a cool (40-50°F) place until spring.
This is where the magic happens: by storing them properly, you’ll have the same corms producing even more blooms next season. Label each variety so you can repeat the staggered planting strategy. I’ve had the same gladiolus corms in my garden for 5 years—with the right care, they’ll keep giving you months of color for decades.
Tips & tricks for months-long gladiolus blooms
Real talk: extending gladiolus bloom time isn't just about patience—it's about strategic pruning and timing. Here's how to maximize every flower spike without sacrificing plant health.
Precision Timing for Staggered Planting: When planting your three varieties, mark each batch with labeled stakes or flags to track the 2-week and 4-week intervals precisely. I've found that using a small garden journal to record planting dates helps me avoid confusion when multiple batches are growing simultaneously. The key is maintaining those exact intervals—any deviation risks overlapping bloom periods instead of staggered displays.
The Third Spike Method Made Foolproof: In Step 2, when you spot those two side spikes forming, here's what nobody tells you—use your thumb and forefinger to gently squeeze the main stem just above where the side spikes emerge. This creates a clean break without tearing the stem. I've ruined more gladiolus stems than I care to admit by using dull pruners or pulling too hard. The plant will respond by focusing all its energy on developing those side spikes, which will produce blooms 3-4 weeks later than the original stem.
Fertilizer Application Strategy: That 10-10-10 fertilizer every 3-4 weeks is non-negotiable for extended blooms, but timing matters more than you'd think. Apply it right after you remove the first main bloom stem—not before. This gives the plant a nutrient boost precisely when it needs to redirect energy to the side spikes. I've also noticed that applying fertilizer in the early morning prevents leaf burn from the concentrated nutrients.
Late-Season Protection Secret: When temperatures drop below 70°F in Step 4, your gladiolus often surprise you with a final bloom flush. To maximize this, I've started using 4-foot stakes instead of 3-foot for taller varieties—the extra height prevents wind damage and keeps blooms accessible for cutting. The leaves turning yellow and collapsing is your definitive signal to stop watering, but don't dig up the corms just yet. Let them remain in the ground until the first hard frost for maximum dormancy preparation.
Pro Tips for Gladiolus Bloom Time
- Real talk: extending gladiolus bloom time isn't just about patience—it's about strategic pruning and timing.
- Precision Timing for Staggered Planting: When planting your three varieties, mark each batch with labeled stakes or flags to track the 2-week and 4-week intervals precisely.
- This creates a clean break without tearing the stem.
Frequently asked questions
When is the best time to plant gladiolus corms for summer blooms?
Plant corms 2-3 weeks after your last spring frost (typically mid-April to early May in Zones 3-11). For fall blooms, plant in late summer (August-September). This timing ensures roots establish before temperature shifts, maximizing bloom time. Pro tip: Use a soil thermometer—wait until soil hits 60°F (15°C)!
How long do gladiolus flowers last, and can I extend their bloom time?
Individual gladiolus spikes bloom for 2-3 weeks, but with precision pruning, you can stretch this to 4-6 weeks. Remove spent blooms daily (deadheading) and trim stems by 1/3 after flowering to encourage reblooming. For extra longevity, place cut stems in cool water with flower food—they’ll last 10-14 days indoors!
Why aren’t my gladiolus blooming, even though the foliage looks healthy?
Lack of blooms often stems from overcrowded corms, poor sunlight, or excessive nitrogen. Ensure corms are 3-4 inches apart and receive 6+ hours of direct sun daily. Switch to a low-nitrogen, high-phosphorus fertilizer (like 5-10-10) to encourage flowering. Watch out: If corms are older than 2 years, they may need dividing!
Can I grow gladiolus in containers, and what’s the ideal setup?
Yes! Use containers at least 12 inches deep with drainage holes. Plant 3-5 corms per 5-gallon pot in well-draining potting mix. Place containers in full sun and water deeply when the top inch of soil dries. For extended blooms, stagger planting dates every 2 weeks—this creates a cascading display!
How do I save gladiolus corms for next year’s blooms?
After foliage yellows and dies back (usually 6-8 weeks post-bloom), dig up corms and let them dry in a cool, dark, well-ventilated spot for 2 weeks. Store them in paper bags or mesh sacks (not plastic!) at 40-50°F (4-10°C) until replanting. Pro tip: Discard any corms that sprout early—they won’t survive replanting.
| Quick Fixes for Common Issues |
|---|
| Floppy stems? Stake plants at planting time (use 3-4 ft stakes per 5 corms). |
| Pests (thrips, aphids)? Spray with neem oil or introduce ladybugs. |
| Leggy growth? Thin seedlings to 1 per corm and ensure bright light. |
Wrapping up and next steps
Timing your gladiolus pruning just right can transform your garden into a vibrant, months-long color show—even in cooler zones! By mastering the post-bloom and seasonal cuts, you’ll encourage stronger reblooms and healthier corms for years. The key? Patience, precision, and a little seasonal strategy.
Ready to level up your gladiolus game? Start by marking your calendar for next year’s pruning schedule—spring, summer, and fall—and experiment with a few corms to refine your technique. Before you know it, your garden will be the talk of the neighborhood! 🌸✨