
Blooming
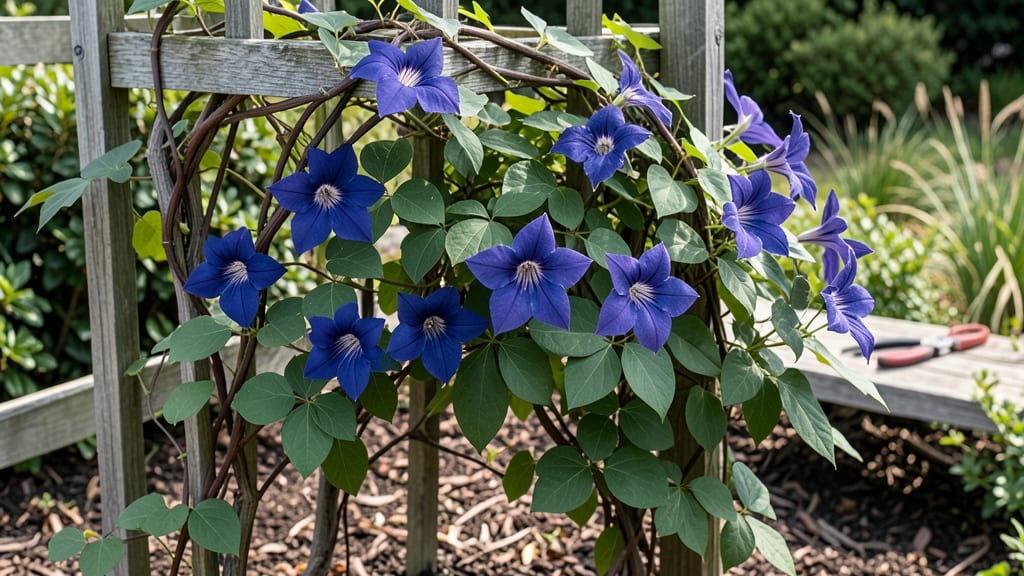
Your garden gate isn't just an entrance—it's the first blush of color that greets visitors all year. 🌸 Cottage-style blooms transform a simple gate into a seasonal statement, framing your space with fragrant climbers, cascading baskets, and border plants that bloom from spring through frost.
The magic happens when you layer plants that pick up where one leaves off, creating a never-ending parade of color.
Start with evergreen climbers like ivy or star jasmine for structure, then add seasonal stars: clematis for summer drama, wisteria for spring romance, and coral bells for autumn flair. Hanging baskets with petunias or fuchsias spill over the top, while border plants like roses or peony frame the sides.
The key? Mix heights and textures—spiky hydrangeas next to soft lamb's ear—so there's always something to catch the eye.
Low-maintenance is the real secret: choose drought-tolerant varieties like lavender or Russian sage, and group plants with similar water needs. A mulch layer keeps roots happy, and seasonal swaps (like swapping out spring bulbs for fall mums) keep the show going.
Before you know it, your gate becomes the garden's signature detail—welcoming, charming, and always in bloom.
Works for any gate style, from rustic wood to wrought iron, and scales from small cottage doors to grand estate entrances. Let's make your garden's welcome mat impossible to ignore.
📚 In This Guide
- What you need
- Instructions
- Tips and common mistakes
- Wrapping up and next steps
What you need
- ● Garden gate: 1 wooden or metal gate (4–6 ft wide, 6–7 ft tall; rustic styles with decorative cutouts or lattice work work best).
- ● Climbing plants: 1–2 Clematis vines (dwarf varieties like ‘Jackmanii’ or ‘Nelly Moser’ for manageable growth).
- ● 1 Rose bush (climbing or rambling, e.g., ‘New Dawn’ or ‘Blaze’).
- ● 1 Honeysuckle or Jasmine vine (for fragrant blooms).
- ● Annuals for color: 5–10 Petunias, Impatiens, or Nasturtiums (potted or in-grown).
- ● Perennials for structure: 3–5 Peonies (for lush, long-lasting blooms).
- ● 1–2 Delphiniums (tall, striking spikes).
- ● 1 Hydrangea (shrub or vine, for fullness).
- ● Soil amendments: 1 bag compost, 1 bag mulch (cedar or straw).
- ● 1 Garden trowel (for planting).
- ● 1 Pruning shears (sharp, for trimming vines).
- ● 1 Garden hose with spray nozzle (for watering).
- ● 1 Wheelbarrow (for hauling soil/mulch).
- ● 1 Measuring tape (to mark plant spacing).
- ○ Optional: Trellis or lattice panels (to reinforce gate structure).
- ○ Optional: Solar-powered garden lights (for evening ambiance).
- ● A sunny to partially shaded spot (6+ hours of sunlight for roses/peonies; dappled shade for delicate flowers).
- ● Well-draining soil (amend with compost if heavy clay is present).
- ● Access to water (garden hose or drip irrigation system).
- ○ Optional: Existing garden path or patio (for cohesive aesthetics).
Step-by-step instructions for creating a seasonal cottage garden entryway
Here's how to craft an inviting garden gate display that blooms from spring through frost.
🌱 Step 1: Select the Right Location and Gate
Choose a sunny to partially shaded spot near your entrance where the gate receives at least 4-6 hours of sunlight daily. I prefer wrought iron or wooden gates because they provide sturdy vertical space for climbing plants while maintaining that classic cottage aesthetic. The gate should be easily accessible for seasonal swaps of plants and decorations.
Test your location by observing how sunlight shifts throughout the day. Morning sun works well for moisture-loving plants, while afternoon sun suits drought-tolerant varieties. If your gate faces north, focus on shade-tolerant perennials like ferns and heucheras to anchor your design.
🌿 Step 2: Layer Plants by Height and Seasonal Interest
Start with a 3-foot-tall trellis or climbing frame attached to the top of your gate for vines like clematis or roses. These will create an immediate vertical impact. Below this, install 18-inch-tall stakes for medium-height perennials like delphiniums or hollyhocks, arranged in odd-numbered groupings for natural balance.
For the base layer, use 12-inch-tall shrubs or perennials like lavender, salvia, or dwarf boxwood. These create a lush foundation that frames the taller elements. I always include at least one fragrant plant—like roses or peonies—so visitors get a sensory welcome as they approach.
☀️ Step 3: Choose Seasonal Color Palettes
Spring should feature soft pastels—think pale pinks, lavenders, and whites—from plants like bleeding heart, hyacinths, and early tulips. Summer transitions to bold cottage colors: deep reds, sunny yellows, and purples from dahlias, coneflowers, and black-eyed Susans. For fall, incorporate warm oranges and golds with chrysanthemums and sedum.
Winter interest comes from evergreens like boxwood, holly, or pine, plus dried seed heads from grasses and perennials like Russian sage. I like to leave these seed heads on stems through winter—they add texture and movement even when bare of foliage.
🪴 Step 4: Incorporate Functional and Decorative Elements
Add 1-2 hanging baskets on either side of the gate for trailing plants like sweet alyssum or fuchsia. These soften the vertical lines and add color at eye level. For a whimsical touch, include a small vintage-style lantern or birdhouse—both serve practical purposes while enhancing charm.
I also recommend installing a small water feature nearby, like a bubbling stone fountain or even a simple birdbath. The sound of water creates a welcoming atmosphere, and birds will add life to your scene. Keep pathways clear and well-defined with stepping stones to maintain accessibility without sacrificing aesthetics.
⏰ Step 5: Maintain Through the Seasons
Deadhead spent blooms regularly to encourage continuous flowering, but leave some seed heads for winter interest. I prune perennials in early spring, removing dead foliage but leaving the base intact to protect emerging growth. For climbing plants, prune in late winter to shape the gate and encourage new growth.
Fertilize lightly in early spring with a balanced organic fertilizer, then again in midsummer. I always mulch with 2-3 inches of shredded bark or straw to retain moisture and suppress weeds. Water deeply in the morning to allow foliage to dry before evening, reducing disease risk.
Tips & tricks for perfect garden gate blooms
Here's what I've learned after designing these displays for years—little details that transform a simple gate into a year-round showstopper.
Sunlight Strategy: The 4-6 hours of sunlight mentioned is non-negotiable, but here's the secret: position your gate to catch the morning sun if you're using moisture-loving plants like ferns or hydrangeas. For drought-tolerant varieties like lavender or sedum, afternoon sun works better. I've found that north-facing gates actually work beautifully if you focus on shade-tolerant perennials—they create a lush, cool contrast to sunnier areas of the garden.
Plant Layering Secret: When arranging your 3-foot trellis, 18-inch stakes, and 12-inch base plants, think about the "rule of thirds" from photography. Place your tallest climbers slightly off-center to create visual interest. For the base layer, I always stagger the spacing between plants—this prevents them from competing for nutrients and creates that natural, organic look we all love in cottage gardens.
Seasonal Transition Hack: For that smooth color progression from spring to winter, I create "transition plants" that bridge seasons. For example, plant Russian sage (purple blooms in summer) alongside sedum (golden fall color) and boxwood (evergreen winter structure). This way, you're not scrambling to swap out plants every few months—they all play their part throughout the year.
Maintenance Shortcut: That 2-3 inches of mulch isn't just for looks—it's a game-changer for watering. I've found that mulched beds need watering only every 5-7 days in summer, compared to every 2-3 days for unmulched areas. Plus, the mulch keeps weeds down so you spend less time pulling them. Just remember to keep mulch 2-3 inches away from plant stems to prevent rot.
Pro Tips for Garden Gate Blooms
- Here's what I've learned after designing these displays for years—little details that transform a simple gate into a ...
- Sunlight Strategy: The 4-6 hours of sunlight mentioned is non-negotiable, but here's the secret: position your gate t...
- Plant Layering Secret: When arranging your 3-foot trellis, 18-inch stakes, and 12-inch base plants, think about the "...
Frequently asked questions
Got questions about bringing garden gate blooms into your cottage-style garden? You’re not alone! Here are some of the most common queries—and their easy, practical answers to help you create a blooming paradise year-round.
What’s the best time of year to plant garden gate blooms?
Most cottage garden favorites—like roses, peonies, and delphiniums—thrive when planted in early spring or fall. This gives roots time to establish before extreme heat or cold. Perennials like lavender and hydrangeas also love spring planting, while annuals (e.g., sweet peas) can go in as soon as soil is workable in spring.
Can I grow garden gate blooms in containers or small spaces?
Opt for compact varieties like miniature roses, dwarf hydrangeas, or climbing clematis in large pots. Mix in trailing plants (e.g., nasturtiums or sweet alyssum) for a lush, vertical display. Just ensure containers have drainage holes and use well-draining soil to prevent root rot.
How do I keep pests away from my blooms without chemicals?
Start with healthy soil—happy plants resist pests! Handpick aphids or slugs (try beer traps for slugs ). Introduce beneficial insects like ladybugs or lacewings. For tougher issues, spray neem oil or a soapy water mix (1 tsp mild soap per quart of water). Prevention tip: Mulch with straw to deter burrowing pests!
Which blooms are the easiest for beginners?
Start with low-maintenance stars like coneflowers, black-eyed Susans, or marigolds. They’re drought-tolerant, pest-resistant, and burst into color with minimal fuss. For climbing charm, try honeysuckle or morning glories—they’re fast-growing and fragrant. Pro tip: Deadhead spent blooms to encourage more flowers!
How do I protect my blooms in winter?
Most perennials survive winter with mulch (3–4 inches of straw or leaves) to insulate roots. For tender plants (e.g., geraniums), dig up tubers or cut back and cover with burlap. Evergreens like boxwoods need a light frost cloth in harsh winters. Prune dead foliage in early spring to reveal fresh growth.
How can I mix colors and textures for a cohesive look?
Stick to a 3-color palette (e.g., blush pink + sage green + cream) for harmony. Pair ruffled blooms (like peonies) with smooth leaves (e.g., hostas) for texture contrast. Add height with tall grasses or delphiniums, and fill gaps with trailing plants like fuchsia or lobelia.
Wrapping up and next steps
Transforming your garden into a whimsical, ever-blooming haven is easier than you think—and the rewards are endless! 🌸 From rustic gates to seasonal blooms, these cottage-style touches create a welcoming retreat that evolves with each passing season.
Whether you’re a seasoned gardener or just starting, your garden gate can be the heart of your outdoor charm.
Ready to take the next step? Sketch your vision, gather inspiration, and start small—one bloom at a time! 🌿 Grab your tools, and let your garden tell its own story.