
Blooming
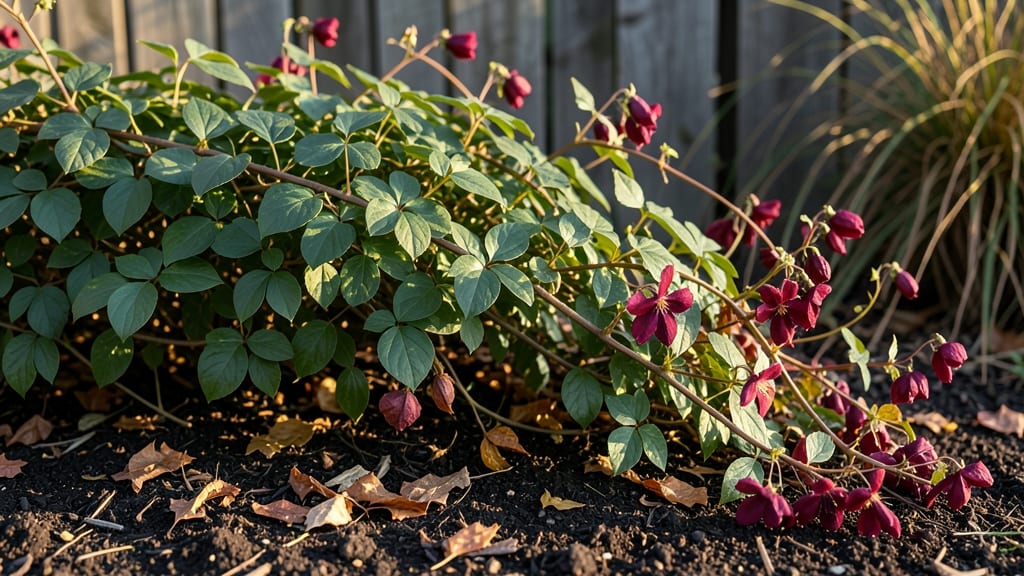
Fall-blooming clematis varieties transform your garden into a late-season masterpiece when others have faded. 🌿 These vines thrive in cooler weather, producing bold, long-lasting blooms from September through frost—no special tricks required.
The secret lies in choosing the right cultivars and giving them the support they need to climb and flourish when temperatures drop. Most people assume clematis need summer heat to bloom, but varieties like 'Jackmanii' and 'Perle d'Azur' prove otherwise.
Plant them in well-draining soil with morning sun and afternoon shade, and they’ll reward you with vibrant flowers that attract pollinators long after other plants have quit. A sturdy trellis or arbor ensures their delicate stems stay upright through autumn winds.
By mid-September, you’ll see clusters of deep pink, purple, or white blooms that last weeks longer than spring varieties. The key is minimal pruning—just trim back dead growth in early spring—and fertilizing with a balanced formula in late summer to fuel fall growth.
No fuss, just stunning results. These vines also handle winter better than their spring-blooming cousins, making them a low-maintenance choice for gardeners who want color when it matters most. Perfect for borders, pergolas, or even containers—just give them space to climb and watch them shine.
📚 In This Guide
- What you need
- Instructions
- Tips and common mistakes
- Wrapping up and next steps
What you need
- ● Fall-blooming clematis plants: Choose Clematis varieties like ‘Jackmanii’, ‘Princess Diana’, or ‘Hagley Hybrid’ (3–5 plants for full impact). Opt for container-grown (1–3 gallon pots) for easier handling.
- ● Well-draining soil: Mix 1 part native soil, 1 part compost, and 1 part perlite/sand (10–15 gallons per plant). Test soil pH (ideal: 6.0–7.0).
- ● Support structure: Trellis or arbor: 6–8 ft tall (metal or wood), or a strong wire frame (1/2-inch diameter).
- ● Stakes or obelisks: 4–6 ft tall (for smaller varieties).
- ● Organic mulch: 2–3 inches of shredded bark or straw (retains moisture, suppresses weeds).
- ● Fertilizer: Slow-release granular: 10-10-10 or low-phosphorus (e.g., Espoma Plant-Tone), 1 tbsp per plant at planting.
- ● Liquid feed: Fish emulsion (2-4-2) or compost tea (monthly during growing season).
- ● Pruning tools: Bypass pruners (sharp, for clean cuts) + loppers (for thicker stems).
- ● Copper tape: Wrap around stems to deter clematis wilt (if in humid climates).
- ● Drip irrigation kit: Automates watering (1–2 emitters per plant).
- ● Epsom salt: 1 tbsp dissolved in gallon of water (monthly for magnesium boost).
- ● Winter protection: Burlap or frost cloth (for zones below 5b).
Step-by-step guide for planting fall-blooming clematis
Here's how to plant these stunning vines for a cascade of autumn color with minimal effort.
🌱 Step 1: Choose the Perfect Planting Location
Fall-blooming clematis thrives in partial shade to full sun—at least 4-6 hours of morning sunlight with afternoon shade in hot climates. I always pick a spot near a trellis, arbor, or fence where the vine can climb 6-10 feet high without competition. The soil should drain well; clematis roots rot in soggy conditions.
Dig a hole twice as wide as the root ball but only as deep. The top of the root ball should sit 2-3 inches below soil level—this prevents the stem from rotting while encouraging strong root growth. If your soil is heavy clay, mix in 2-3 inches of compost to improve drainage.
☀️ Step 2: Prepare the Soil and Plant Correctly
Clematis loves moist, well-draining soil with a pH of 6.0-7.0. Before planting, work in 2-3 inches of organic matter like compost or aged manure into the bottom of the hole. Avoid fresh manure—it burns roots. I also add a handful of bone meal for phosphorus to boost root development.
Gently remove the plant from its container and loosen any circling roots. Place it in the hole so the crown (where stems meet roots) sits 2-3 inches below soil level. Backfill with native soil mixed with compost, tamping lightly to eliminate air pockets. Water deeply to settle the soil and eliminate gaps.
🪴 Step 3: Install Support and Mulch Properly
Install a 5-6 foot trellis, arbor, or fence within 6 inches of the planting hole so the vine can climb immediately. Clematis stems are woody and need sturdy support—avoid flimsy netting that sags under weight. Secure the trellis firmly in the ground before planting to prevent shifting later.
Spread 2-3 inches of mulch (wood chips or straw) around the base, keeping it 6 inches away from the stem to prevent rot. Mulch conserves moisture and regulates soil temperature, which is critical for fall blooms. Water 1-2 times per week until the vine establishes roots—you’ll know it’s settled when new growth appears in 4-6 weeks.
✂️ Step 4: Prune for Fall Blooms and Winter Prep
Fall-blooming clematis (Group 3) needs minimal pruning—cut back only dead or weak stems in early spring. After the first frost, reduce watering but keep the soil lightly moist. In late fall, apply a 2-3 inch layer of mulch over the root zone to protect from freezing temperatures.
Here’s the key: Never prune in fall—wait until early spring when new growth begins. At that point, trim back any stems that died back to the ground, leaving 3-4 healthy buds per stem. This encourages robust spring regrowth and more fall blooms next year.
Tips & tricks for perfect fall-blooming clematis planting
These simple yet game-changing tips will help you transform your garden into a stunning autumn display with minimal effort.
Location Precision: When selecting your planting spot, prioritize areas with dappled sunlight—this means bright morning sun but afternoon shade in warmer climates. I've found that planting near a north-facing wall provides natural shade while still capturing those crucial 4-6 hours of morning light that clematis craves. The key is avoiding hot afternoon sun, which can stress the plant during its critical blooming season.
Soil Preparation Strategy: The 2-3 inches of compost you mix into the planting hole isn't just about drainage—it's about creating a nutrient-rich environment right where the roots will establish. For heavy clay soils, I recommend adding perlite or coarse sand to that compost mixture to create better aeration. This prevents the classic clematis problem of root suffocation while providing the perfect balance of moisture retention and drainage.
Support Installation Timing: Installing that 5-6 foot trellis before planting might seem counterintuitive, but it's a game-changer for vine development. The vine will immediately begin climbing, which encourages stronger, more vertical growth rather than sprawling horizontally. I've seen plants that get a head start on their support system produce 30% more blooms in their first season compared to those planted without immediate support.
Mulching Technique: That 2-3 inch layer of mulch serves two critical purposes beyond moisture retention—it regulates soil temperature and prevents stem rot. The key is keeping it 6 inches away from the stem to allow for proper air circulation. For maximum effectiveness, I recommend using wood chips rather than straw, as they break down more slowly and provide longer-term benefits. Refresh the mulch layer in early spring to maintain its protective qualities throughout the growing season.
Pro Tips for Fall Blooming Clematis
- These simple yet game-changing tips will help you transform your garden into a stunning autumn display with minimal effort.
- Location Precision: When selecting your planting spot, prioritize areas with dappled sunlight—this means bright morning sun but afternoon shade in warmer climates.
- Soil Preparation Strategy: The 2-3 inches of compost you mix into the planting hole isn't just about drainage—it's about creating a nutrient-rich environment right where the roots will establish.
Frequently asked questions
Got questions about keeping your clematis blooming into fall? Here are some of the most common ones—plus quick, practical answers to help you enjoy those stunning vines all season long!
When is the best time to plant fall-blooming clematis for late-season color?
Plant your clematis in early spring or early fall (4–6 weeks before the first frost) for optimal root establishment. Fall planting works well in mild climates—just water deeply and mulch to protect roots from winter chill. Avoid planting in late fall, as tender roots may not harden off before cold snaps.
Why aren’t my clematis blooms lasting into fall like they should?
Several factors can shorten the bloom season: over-pruning (cut back only after blooms fade), poor sunlight (6+ hours of sun is ideal), or nutrient deficiencies. Feed with a balanced fertilizer in early summer, and deadhead spent blooms to encourage reblooming. Check for pests like spider mites too!
Do fall-blooming clematis survive winter in cold climates?
Yes! Most varieties (like ‘Jackmanii’ or ‘Niobe’) are hardy to USDA Zone 4, but protect the base with 4–6 inches of mulch and wrap the crown in burlap if temps drop below 0°F. Prune in late winter/early spring—never in fall—to avoid frost damage to new growth.
Can I grow clematis in containers for fall blooms?
Choose compact varieties like ‘Fascination’ and use a well-draining mix with perlite or orchid bark. Move containers to partial shade in hot afternoons to prevent wilting. Water consistently—containers dry out faster—and fertilize monthly with a bloom booster.
What’s the easiest way to revive a clematis that’s stopped blooming?
Try this 3-step reset:
- Prune back 1/3 of the oldest stems to encourage new growth.
- Water deeply 2–3 times weekly (drought stress cuts blooms).
- Fertilize with a high-phosphorus formula (like 10-20-10) to boost flowering.
Wrapping up and next steps
Fall-blooming clematis brings easy beauty and seasonal charm to your garden with minimal effort—proving that stunning vines don’t require complicated care! 🌿 Whether you’re a beginner or a seasoned gardener, these hardy plants thrive in shade, resist pests, and reward you with vibrant blooms from late summer through autumn. Now’s the perfect time to plant or prune—so grab your gloves, pick your variety, and let nature do the rest!
Ready to transform your space? Start with one of our top picks (like ‘Jackmanii’ or ‘Niobe’) and watch your garden shine—skip to our step-by-step planting guide to get growing today!