
Blooming
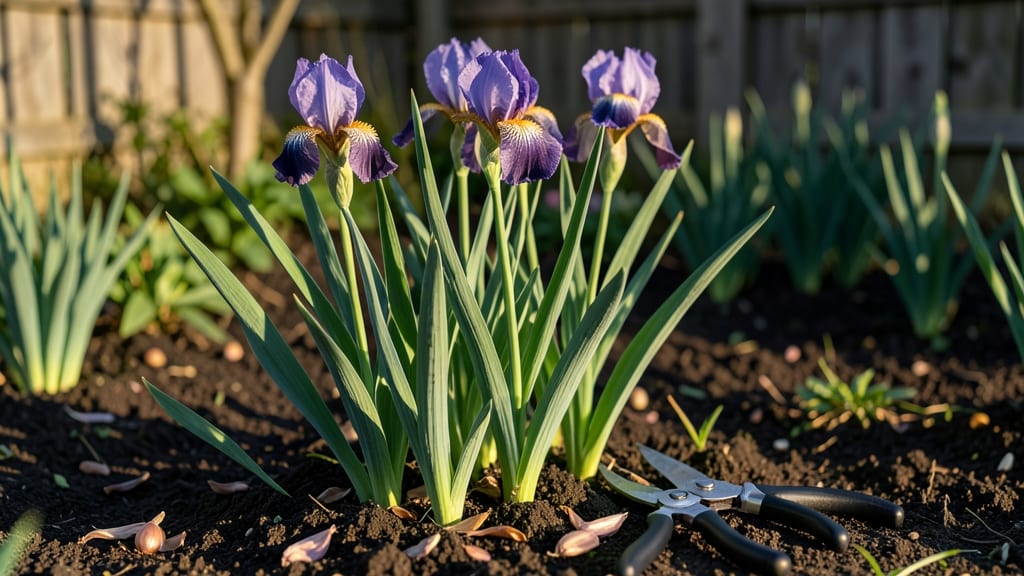
Your iris plants just finished their stunning spring show—but the real work starts now. 🌸 Proper care after blooming determines whether you’ll see next year’s bold purple, blue, or yellow spikes. I’ve learned the hard way that skipping these steps leads to weak regrowth or no blooms at all.
The first move is deadheading—snip off the faded flower stalks at the base, but leave the fan of leaves untouched. This redirects energy to the rhizomes, not seed production.
Follow up with a balanced fertilizer in late summer to rebuild strength for dormancy. Watering shifts too: cut back to just keeping the soil lightly moist, never soggy.
By late summer, you’ll notice new growth emerging from the rhizomes—this is your plant preparing for next spring. If your clumps are crowded (more than 3-4 fans per rhizome), now’s the time to divide them.
Each section needs at least one healthy fan and part of the rhizome’s base for strong regrowth.
With these steps, your irises will return bigger and more vibrant than ever. The key is patience: proper care now means fewer surprises next season. Let’s get those rhizomes ready for their comeback!
📚 In This Guide
- What you need
- Instructions
- Tips and common mistakes
- Wrapping up and next steps
What you need
- ● Pruning shears or sharp garden scissors – Look for bypass pruners (not anvil-style) to avoid crushing stems.
- ○ Gloves (optional but recommended) – Heavy-duty gardening gloves protect against thorns and soil-borne pathogens.
- ● Disinfectant (70% isopropyl alcohol or diluted bleach solution) – 1 part bleach to 9 parts water to sterilize tools between cuts.
- ● Compost or well-aged manure – About 1–2 gallons per plant to replenish nutrients post-bloom.
- ● Slow-release fertilizer (10-10-10 or iris-specific formula) – 1–2 tbsp per plant for a nutrient boost.
- ● Mulch (straw, pine needles, or shredded bark) – 2–3 inches thick to retain moisture and suppress weeds.
- ● Plant support stakes or rings – For tall or floppy iris varieties after deadheading.
- ● Soil test kit – To check pH (ideal range: 6.0–7.0 for irises).
- ● Organic fungicide (copper-based or neem oil) – For preventive care against fungal diseases.
- ● Watering can with a fine rose nozzle – For gentle hydration without disturbing roots.
Instructions: how to care for iris plants after blooming
Here’s the simple routine I follow to keep my irises thriving year after year.
✂️ Step 1: Deadhead Properly for Next Season’s Blooms
Once your irises finish blooming, snip off the spent flower stalks 1-2 inches below the base using clean pruners. This prevents seed pods from forming, which saps energy from the rhizomes. I always use sterilized tools to avoid fungal infections—just wipe blades with rubbing alcohol between cuts.
Don’t cut into the fan of leaves. The rhizome stores nutrients there for next year’s blooms. If you accidentally nick a leaf, it’s not the end of the world, but keep it to a minimum. You’ll know you’ve done it right when the foliage stays lush and green while the flower stalks disappear completely.
💧 Step 2: Water Deeply but Sparingly After Blooming
After deadheading, water the irises deeply once a week until the foliage turns yellow and dies back naturally—usually by late summer. This encourages the rhizomes to store energy for next spring. I use a soaker hose to deliver moisture directly to the roots without wetting the leaves, which helps prevent fungal diseases like iris borer.
Stop watering entirely once the leaves yellow and flop over. This signals the plant is entering dormancy. Overwatering at this stage can rot the rhizomes before they’ve had a chance to recharge. You’ll see the difference next year in stronger, more abundant blooms.
🌱 Step 3: Divide and Replant Rhizomes Every 3-4 Years
In early fall or late winter, dig up the rhizomes to divide them if they’ve crowded. Look for rhizomes that are 2-3 inches wide and have at least one healthy fan of leaves. Cut them apart with a clean knife, ensuring each piece has a growth point. Discard any that look mushy or diseased.
Replant the divisions in well-draining soil with the tops exposed—never bury them. Space them 12-18 inches apart in full sun. This prevents overcrowding, which leads to fewer blooms. You’ll notice new, vigorous growth within a season, and your iris beds will look fuller and more vibrant.
☀️ Step 4: Apply Mulch and Fertilizer Strategically
After replanting, spread a 1-inch layer of organic mulch around the base, keeping it away from the rhizomes themselves. This helps retain moisture and suppress weeds without smothering the plants. I use shredded bark or straw, which breaks down slowly and adds nutrients to the soil.
Wait until spring to fertilize—irises don’t need much. A light application of 5-10-10 fertilizer in early spring, just as new growth appears, gives them a gentle boost. Too much fertilizer can lead to lush foliage but fewer blooms, so keep it minimal. You’ll see the best results when the plants get just enough to encourage strong roots and flowers.
⏰ Step 5: Monitor for Pests and Diseases Year-Round
Keep an eye out for iris borers, which lay eggs in the leaf bases. If you spot sawdust-like frass or chewed leaves, treat immediately with neem oil or insecticidal soap. I check my plants every two weeks during growing season—early detection makes all the difference.
Also watch for fungal spots on the leaves. If you see purple or brown patches, remove the affected leaves and improve airflow by spacing plants properly. Healthy irises are resilient, but prevention is easier than cleanup. A little vigilance now means stunning blooms for years to come.
Tips & tricks for perfect iris care after blooming
Your irises deserve a little extra attention after their stunning display—here's how to set them up for next year's showstopper blooms without the guesswork.
Precision Deadheading: In Step 1, when you're snipping those spent flower stalks, aim for that 1-2 inch mark below the base. I've learned the hard way that cutting too close to the leaves—even just a little—can weaken the rhizome's nutrient storage. Use a ruler or your fingers as a guide: about the width of your thumb from the base. This small detail makes all the difference in next spring's bloom count.
Watering Wisdom: That once-a-week watering in Step 2 isn't just about quantity—it's about technique. I use a simple test: stick your finger 2 inches into the soil. If it feels dry, water deeply until moisture reaches 6 inches down. The goal is to encourage deep root growth, not just surface hydration. And remember, the soaker hose is your best friend—it delivers water right where the roots are thirsting.
Rhizome Rescue Strategy: When dividing in Step 3, look for rhizomes that feel firm and plump, not soft or shriveled. I've made the mistake of replanting less-than-perfect rhizomes, only to have them fail. If you find any with dark spots or a foul smell, toss them—they won't recover. Healthy divisions should have that papery texture and a single growth point. This simple check saves hours of disappointment later.
Fertilizer Finesse: That 5-10-10 recommendation in Step 4 isn't a suggestion to go wild with chemicals. Think of it as a gentle nudge rather than a feeding frenzy. I measure out just 1 teaspoon per plant—about what fits on a nickel—and sprinkle it lightly around the base, not on top of the rhizomes. This minimal approach prevents the "too much fertilizer, too few blooms" trap that catches so many gardeners.
Pro Tips for Care Of Iris Plants After Blooming
- Your irises deserve a little extra attention after their stunning display—here's how to set them up for next year's showstopper blooms without the guesswork.
- Precision Deadheading: In Step 1, when you're snipping those spent flower stalks, aim for that 1-2 inch mark below the base.
- Watering Wisdom: That once-a-week watering in Step 2 isn't just about quantity—it's about technique.
Frequently asked questions
Got questions about keeping your irises thriving after their stunning show? Here are some of the most common concerns—and straightforward answers to help you nail post-bloom care!
Do I need to cut back iris flowers after they bloom?
Yes!
Deadheading (removing spent blooms) redirects energy to the rhizomes, ensuring stronger growth and bigger blooms next year. Snip the flower stalks just above the leaf fan—never cut into the leaves. Use clean, sharp shears to avoid disease. Pro tip: Wear gloves—iris sap can irritate skin!
When is the best time to trim iris foliage?
Wait until late summer or early fall (after foliage yellows and dies back naturally). Cutting too early removes nutrients the leaves store for next year’s blooms. If you must tidy earlier, leave at least half the leaves intact. Never trim in spring!
Can I fertilize irises right after blooming?
Apply a low-nitrogen, high-phosphorus fertilizer (like 5-10-10) 4–6 weeks after blooming to boost root and flower development. Avoid high-nitrogen feeds—it encourages leafy growth at the expense of blooms. Bonus: A light mulch (1–2 inches) helps retain moisture without smothering rhizomes.
My iris leaves turned brown—is it dead or just dormant?
Brown foliage in late summer/fall is normal dormancy—don’t panic! Healthy rhizomes will sprout fresh leaves in spring. If leaves mushy or moldy, it’s likely iris borer damage or rot. Dig up affected rhizomes, trim blackened parts, and replant in fresh soil. Prevent future issues: Treat early with neem oil.
Will deadheading stop irises from blooming next year?
No! Deadheading encourages more blooms by preventing seed production (which drains energy). Just ensure you’re cutting only the flower stalks, not the leaves. Consistent care—like dividing overcrowded clumps every 3–4 years—keeps irises blooming like champs. Fun fact: Some varieties bloom twice if given the right care!
Wrapping up and next steps
Caring for your iris plants after blooming doesn’t have to be complicated—just a little attention goes a long way!
By deadheading spent blooms, dividing clumps, and fertilizing wisely, you’ll set the stage for a stunning comeback next season. 🌸 With these simple steps, your irises will reward you with vibrant, healthy growth year after year.
Ready to give your irises the love they deserve? Grab your gardening tools and start today! Your future blooms will thank you.