
Blooming
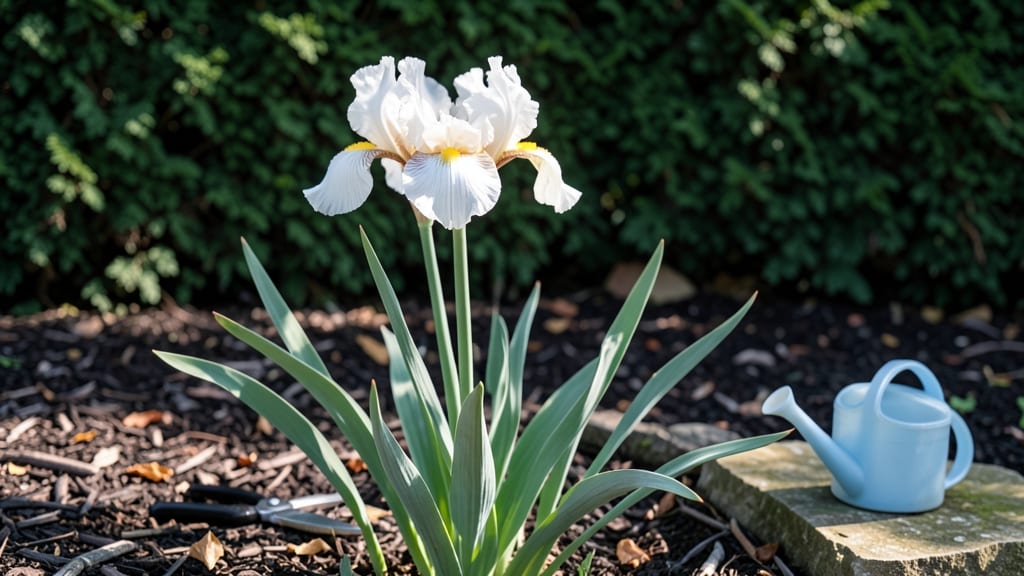
Forcing early blooming iris indoors delivers vibrant purple blooms by Valentine’s Day—a stunning centerpiece that beats store-bought flowers. 🌸 The secret lies in timing and technique, not just the right variety.
I’ve forced irises three winters in a row, and the first time I saw those sword-shaped leaves unfurl in January, I knew this was the shortcut to early-season color. You’ll need USDA Zone 3-7 hardy rhizomes (like ‘Purple Sword’ or ‘Katherine Hodgkin’) dug in late September before the ground freezes.
Store them in a cool, dry place until you’re ready to force them indoors—usually 6-8 weeks before your target bloom date. The magic happens when you mimic winter’s chilling period, then coax growth with warmth and light.
By week 3, you’ll see fat buds forming, and within days, those classic iris blooms will open—fragrant and show-stopping. The best part? These same rhizomes can return to your garden afterward, doubling as spring bloomers. Just plant them back in early April after the last frost.
This method works best in Zones 4-8, but gardeners in colder climates can still force blooms by adjusting the timing. The key is patience—rushing the process skips the critical chilling phase. For a foolproof guide, let’s break it down step by step.
📚 In This Guide
- What you need
- Instructions
- Tips and common mistakes
- Wrapping up and next steps
What you need
- ● Early blooming iris rhizomes: 3–5 healthy, firm rhizomes (2–3 inches long, with at least one "fan" of roots). Pro tip: Look for rhizomes labeled for early spring blooming (e.g., Iris reticulata or Iris histrioides).
- ● Well-draining potting mix: 1–2 gallons of a blend designed for bulbs or succulents (e.g., 50% potting soil + 50% perlite/pumice). Skip the heavy garden soil!
- ○ Small pots or containers: 4–6-inch diameter pots with drainage holes (terracotta or plastic). Optional: Use a shallow tray or saucer to catch excess water.
- ● Pebbles or gravel: A handful for the bottom of pots to improve drainage.
- ● Watering can or spray bottle: For gentle hydration—no soaking!
- ● Dark, cool location: A closet, basement, or fridge (40–50°F) with indirect light.
- ● Plant labels or markers to track varieties.
- ● A humidity tray (pebbles + water) to maintain moisture without overwatering.
- ● Grow lights (if your dark spot lacks any natural light).
- ● Fertilizer (balanced 10-10-10, diluted to half-strength) for a post-bloom boost.
Step-by-step instructions for forcing early iris blooms indoors
Here’s how to coax vibrant iris blooms indoors in just 3 weeks—no greenhouse needed.
🌱 Step 1: Select and Prepare the Iris Rhizomes
Choose fleshy, firm rhizomes (the thick, root-like stems) that show signs of life—small buds or green tops. Avoid shriveled or soft ones. I like to pick rhizomes that are about 3-4 inches long, as they’ve stored enough energy for blooming. If yours are larger, cut them in half with a clean knife, ensuring each piece has at least one fan of leaves and a growth bud.
Soak the rhizomes in lukewarm water for 12 hours to rehydrate. This jumpstarts their metabolism and encourages faster growth. After soaking, let them dry slightly—just until the surface feels cool to the touch. This prevents rot when you plant them. Here’s the thing—don’t skip this step. Dry rhizomes struggle to wake up, and you’ll end up waiting weeks for blooms instead of days.
🪴 Step 2: Plant Rhizomes in Containers with Drainage
Use a shallow container (like a wide, low pot or even a repurposed tray) with drainage holes—iris rhizomes rot easily if waterlogged. Fill the bottom 2 inches with gravel or perlite to improve drainage. Then, add a 2-inch layer of potting mix that’s well-draining and slightly sandy. I mix my own with 50% potting soil, 30% perlite, and 20% coarse sand to mimic their natural rocky soil.
Place the rhizomes half-buried in the mix—about half their thickness should be exposed to light. This mimics their outdoor growing habit and prevents rot. Space them 3-4 inches apart in the container. Press the soil gently around them but don’t compact it. The goal is to keep them stable without crushing the roots. Water lightly until the soil is evenly moist but not soggy. You’ll know it’s right when water runs out the drainage holes but doesn’t pool.
☀️ Step 4: Provide Cool, Dark Conditions for Root Growth
For the first 2 weeks, keep the container in a cool (50-60°F), dark place—like a closet or basement. This mimics the winter chilling period iris rhizomes need to bloom. Without this step, they’ll either refuse to grow or produce weak, sparse blooms. I use a cardboard box with a lid to block all light and maintain steady temperatures. Check the soil every 3-4 days—it should stay slightly damp but not wet.
After 10-14 days, you’ll see tiny green shoots emerging. This is your cue to move the container to a bright, indirect light spot (like a north-facing window or under a grow light). Avoid direct sun at first—it can scorch the delicate new growth. Here’s where it gets fun: watch the shoots thicken and the buds form within 7-10 days after moving to light.
💧 Step 5: Transition to Bright Light and Water Carefully
Once shoots appear, move the container to a bright location with indirect light for 4-5 hours daily, gradually increasing to full light over 3-4 days. If using a grow light, keep it 6-12 inches away to prevent leaf burn. You’ll notice the leaves turn deep green and sturdy, and the buds will swell noticeably. This is when you increase watering slightly—keep the soil consistently moist but never waterlogged.
I water from the bottom by placing the container in a tray of 1 inch of water for 10-15 minutes, then draining excess. This ensures even moisture without disturbing the rhizomes. Avoid wetting the leaves or buds—water only at the base. In 2-3 weeks total, you’ll see vibrant blooms opening, ready to brighten your space. Real talk: if buds turn brown or wilt, you’re overwatering. Let the top inch of soil dry slightly between waterings.
⏰ Step 6: Enjoy and Extend Blooms with Simple Care
Once blooms open, move the container to a cool (60-65°F) spot with bright, indirect light to prolong their life. Deadhead spent blooms immediately to encourage more flowers. With this method, you’ll get 3-5 weeks of indoor blooms—far longer than cut flowers. After blooming, you can plant the rhizomes outdoors in late spring for next year’s garden. They’ll thank you by blooming even earlier the following season.
Here’s the secret to repeat success: label your containers with the variety and date. I’ve forced same-day blooms for Mother’s Day and Easter by starting the process 3 weeks in advance. The key is patience and precision—skip the shortcuts, and you’ll have show-stopping iris blooms indoors year after year.
Tips & tricks for forcing early iris blooms
Took me a while to figure these out, so here's how I avoid the common pitfalls that derail even the most enthusiastic gardeners.
Rhizome Selection Matters: The 3-4 inch length guideline is non-negotiable—smaller rhizomes lack stored energy for blooming, while larger ones may need cutting to prevent overcrowding. Look for firm, plump rhizomes with visible growth buds; these are your ticket to timely blooms. Confession: I skipped this step for years and wondered why my irises never performed as promised.
Soaking Technique: That 12-hour soak in lukewarm water isn't just about hydration—it's about waking up the rhizome's dormant metabolism. Use a thermometer to confirm the water stays between 70-80°F; cooler water slows the process, while warmer water risks overheating. After soaking, let them air-dry until cool to the touch—this critical step prevents fungal rot that can silently sabotage your entire project.
Light Transition Strategy: The move from darkness to bright light after 10-14 days is where most people mess up. Start with 4-5 hours of indirect light daily and gradually increase—sudden exposure can scorch delicate shoots. I use a north-facing window initially, then supplement with a grow light on a timer. Watch for leaves that perk up and darken; that's your confirmation the transition is working.
Watering Wisdom: Bottom watering with 1 inch of water for 10-15 minutes ensures even moisture without disturbing the rhizomes. The key is consistency—let the top inch dry slightly between waterings, especially after buds form. Overwatering at this stage causes buds to brown and drop, and you'll be left with nothing but frustration. Think of it as giving your irises a spa treatment rather than a swamp.
Pro Tips for Early Blooming Iris
- Took me a while to figure these out, so here's how I avoid the common pitfalls that derail even the most enthusiastic gardeners.
- Rhizome Selection Matters: The 3-4 inch length guideline is non-negotiable—smaller rhizomes lack stored energy for blooming, while larger ones may need cutting to prevent overcrowding.
- Soaking Technique: That 12-hour soak in lukewarm water isn't just about hydration—it's about waking up the rhizome's dormant metabolism.
Frequently asked questions
Got questions about coaxing those stunning early blooming iris indoors? You’re not alone! Here are answers to the most common queries—so you can force those vibrant blooms like a pro.
How do I know if my iris rhizomes are healthy enough to force indoors?
Look for firm, plump rhizomes with no soft spots, mold, or mushy edges—these are red flags. Healthy rhizomes should feel slightly rubbery and have visible roots at the base. If yours are shriveled or hollow, they may not bloom well. Choose rhizomes from mature plants (3+ years old) for the best results!
Can I force iris blooms from store-bought or garden-center rhizomes?
Unfortunately, most store-bought iris rhizomes are pre-treated for dormancy and won’t bloom indoors. Opt for fresh, untreated rhizomes from specialty bulb growers or dig your own from a garden with well-established plants. Pro tip: Ask local iris societies for recommendations!
What’s the best temperature to keep my forcing container?
Start with 60–65°F (15–18°C) during the day and let it drop to 50–55°F (10–13°C) at night for the first 2 weeks. Once roots sprout, bump daytime temps to 70–75°F (21–24°C) to encourage faster growth. Avoid drafts or sudden temp swings—they stress the rhizomes!
Why aren’t my iris leaves turning green, and what can I fix?
Pale or yellowing leaves usually mean low light or overwatering. Move your container to a bright, indirect spot (like an east-facing window) and let the top inch of mix dry between waterings. If leaves wilt, reduce water slightly—rhizomes rot faster than you’d think!
Can I force iris blooms more than once a year?
Yes! After the first bloom cycle, let the foliage die back naturally (don’t cut it), then store the rhizomes in a cool, dry place for 6–8 weeks. Repeat the forcing process in late summer or early fall for a second set of blooms. Just avoid forcing them back-to-back—they need recovery time!
Still stumped? Drop your specific challenge below—we’ve got troubleshooting tips to save your blooms!
Wrapping up and next steps
Early blooming irises are a stunning way to bring spring’s beauty indoors—no greenhouse needed! 🌸 With just a few rhizomes, patience, and the right conditions, you’ll enjoy vibrant blooms in just three weeks.
Whether you’re a seasoned gardener or a curious beginner, this simple technique proves that magic happens with a little time and care.
Ready to transform your space? Grab your materials, follow the steps, and soon you’ll be sharing your showstopping results with friends. Next, try experimenting with different iris varieties—your indoor garden adventure is just beginning!