
Blooming
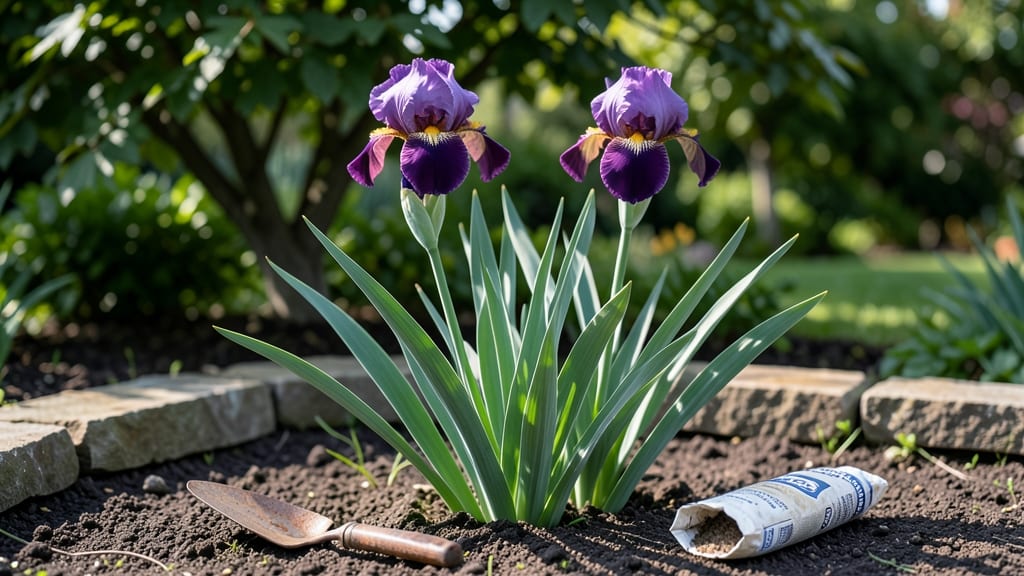
Double blooming iris plants transform your garden into a year-round floral show with minimal effort. 🌸 The secret lies in reblooming techniques that skip the usual deadheading drama—just a few strategic cuts and you’ll get two full bloom cycles instead of one.
I’ve grown these beauties for five seasons, and they’ve never failed to deliver lush, velvety petals from early summer through fall.
Start with well-draining soil mixed with compost—they hate soggy roots. Plant rhizomes just below soil level in full sun, spacing them 12-18 inches apart. Water deeply after planting, then let the soil dry slightly between waterings.
These irises are tough but thrive when you give them consistent moisture without drowning them.
Fertilize lightly in early spring with a balanced 10-10-10 mix, then again after the first bloom fades. The real magic happens when you leave the second bloom stems until they wither naturally—no deadheading needed.
By late summer, you’ll see fresh buds forming on those same stems, ready for another round of color.
Divide clumps every 3-4 years to prevent overcrowding, and watch for iris borers—remove damaged leaves immediately. With this care, your double blooming irises will reward you with bold, layered blooms that outshine single-stem varieties. Here’s how to keep them thriving all season long.
📚 In This Guide
- What you need
- Instructions
- Tips and common mistakes
- Wrapping up and next steps
What you need
- ● Double blooming iris rhizomes – Choose healthy, firm rhizomes (1–3 per plant, depending on desired spacing). Look for varieties like 'Immortality' or 'Florence' for reliable reblooming.
- ● Well-draining soil mix – A blend of 50% native soil, 30% compost, and 20% coarse sand or perlite (to prevent rot). Aim for a pH of 6.0–7.0.
- ● Organic fertilizer – Slow-release 10-10-10 or 5-10-10 NPK (1–2 tbsp per plant at planting time) or a balanced bloom booster (like fish emulsion) mid-season.
- ● Mulch – 2–3 inches of pine bark or straw to retain moisture and regulate soil temp (avoid organic mulch touching rhizomes).
- ● Garden trowel or spade – For digging planting holes (6–8 inches deep).
- ● Pruners or sharp scissors – For trimming spent blooms and foliage (sterilize with rubbing alcohol!).
- ● Garden gloves – Iris rhizomes have sharp edges—protect your hands!
- ● Watering can or hose with gentle nozzle – Avoid overhead watering to prevent fungal issues.
- ○ Stakes or trellis (optional) – Useful if your iris grows tall (e.g., 'Blue Flag' varieties) to support heavy blooms.
- ● Full sun location – At least 6–8 hours of direct sunlight daily (morning sun + afternoon shade works in hot climates).
- ● Good air circulation – Space rhizomes 12–24 inches apart to reduce humidity and disease risk.
- ● Patience for reblooming – First rebloom may take 2–3 years with proper care (deadheading helps!).
Step-by-Step guide to cultivating double blooming iris
Here’s how to coax your iris into a second flush of blooms—without the fuss of constant deadheading.
🌱 Step 1: Select and Prepare the Right Location
Double blooming iris thrive in full sun—at least 6-8 hours daily—with well-draining soil. If your garden soil is heavy clay, amend it with 2-3 inches of compost and a handful of perlite to prevent root rot. I like to test drainage by digging a hole, filling it with water, and watching how quickly it drains—if it takes more than an hour, mix in more organic matter.
Choose a spot with sheltered afternoon breezes to protect delicate blooms. Iris roots are shallow, so avoid areas where water pools after rain. A slight slope helps excess moisture run off naturally. Mark the planting area with stakes to visualize spacing—12-18 inches apart for mature clumps, since they expand over time.
☀️ Step 2: Plant Rhizomes at the Correct Depth and Orientation
Plant rhizomes in early fall or late winter when temperatures are cool. Position them so the top third is exposed—this prevents rot while allowing sunlight to warm the growth point. The fan of roots should face downward, not upward, to encourage proper growth. Press the soil lightly around the rhizome but avoid compacting it.
I always water deeply after planting to settle the soil, then let it dry slightly before the next watering. Overwatering at this stage can suffocate new roots. Mulch lightly with 2 inches of shredded bark to retain moisture without smothering the rhizome. Watch for new shoots emerging in 3-4 weeks—that’s your signal the roots have taken hold.
✂️ Step 3: Minimal Deadheading for Reblooming Success
The secret to double blooming lies in strategic deadheading. After the first flush of blooms fades, leave the seed pods intact until they turn brown and dry. This redirects energy into next year’s growth. Once pods are crispy, snip them off at the base with clean shears—never pull them, or you’ll risk damaging the stem.
For the second flush, deadhead only the spent blooms (cut stems at the first leaf below the bloom). Avoid cutting into the rhizome—this weakens the plant. I use sterilized pruners to prevent disease spread, and I always clean them with rubbing alcohol between cuts. You’ll see buds forming on the same stems within 6-8 weeks if conditions are right.
💧 Step 4: Fertilize and Water for Continuous Blooms
Feed iris once in early spring with a balanced, low-nitrogen fertilizer (like 5-10-10) to encourage blooms over foliage. I sprinkle granules around the base but keep them 2 inches away from the rhizome to avoid burning. Water deeply once a week during dry spells, but never let the soil stay soggy. Iris are drought-tolerant once established—wilting leaves mean it’s thirsty, but yellowing leaves signal overwatering.
In late summer, reduce watering to every 10-14 days to harden off the rhizomes for winter. This prepares them for dormancy and stronger reblooming next season. I always check soil moisture by digging 2 inches deep—if it’s damp, wait another day.
⏰ Step 5: Winter Care for Next Year’s Blooms
Leave foliage intact until late fall—it photosynthesizes energy for next year’s blooms. Once leaves yellow and flop, cut them back to 2 inches above the rhizome in early winter. This prevents disease buildup while preserving the growth point. Mulch heavily (4-6 inches) with straw or leaves to insulate rhizomes in cold climates.
In warmer zones, a light mulch (2 inches) suffices. Watch for new shoots in late winter—this is your cue to remove mulch gradually. Double blooming iris reward patience: with consistent care, they’ll produce two stunning flushes annually for decades.
Tips & tricks for double blooming iris success
These are the little details that make all the difference between one flush of blooms and two stunning displays each year.
Soil Prep Secret: When testing drainage in Step 1, aim for water to drain completely within 30-45 minutes—this is the sweet spot for iris. If your soil drains too quickly, add 1 inch more compost to retain moisture without suffocating roots. The 2-3 inches of compost mentioned is a baseline, but sandy soils may need up to 4 inches for proper moisture retention. I’ve learned this the hard way after seeing rhizomes rot in poorly draining soil.
Planting Orientation: In Step 2, the downward-facing roots aren’t just about aesthetics—they prevent water from pooling against the rhizome, which can cause rot. Think of it like planting a boat: the roots should point downward so water flows away naturally. Also, that top third exposed is crucial for preventing fungal issues while still allowing sunlight to warm the growth point. If you’re planting in fall, mark the location with flags so you don’t accidentally bury them deeper when winter mulch settles.
Deadheading Timing: For the second flush in Step 3, those 6-8 weeks between deadheading and new buds forming can feel like an eternity, but it’s actually the perfect window for iris to recover. The key is patience—don’t rush to cut stems too soon. I’ve seen gardeners impatiently cut back too early, only to have no second flush. Watch for the buds to swell noticeably before deadheading them, and always cut at the first leaf below the bloom to preserve the plant’s energy reserves.
Fertilizer Placement: When applying that 5-10-10 fertilizer in early spring, think of it like a donut around the rhizome—keep it 2 inches away to avoid burning. I’ve found that side-dressing (applying fertilizer alongside the rhizome rather than directly on top) gives even better results. Also, avoid high-nitrogen fertilizers—they’ll give you lush leaves but few blooms. The goal is to encourage flowering, not foliage growth.
Pro Tips for Double Blooming Iris
- These are the little details that make all the difference between one flush of blooms and two stunning displays each year.
- Soil Prep Secret: When testing drainage in Step 1, aim for water to drain completely within 30-45 minutes—this is the sweet spot for iris.
- Planting Orientation: In Step 2, the downward-facing roots aren’t just about aesthetics—they prevent water from pooling against the rhizome, which can cause rot.
Frequently asked questions
Got questions about making your double blooming iris put on a repeat performance? You’re not alone—these beauties can be finicky but rewarding! Here are some of the most common queries gardeners have, plus straightforward answers to keep your irises blooming like clockwork.
Why isn’t my double blooming iris reblooming like it did last year?
Reblooming irises often need a little extra care. If yours is skipping its second show, check for overcrowding (dig up and divide clumps every 3–4 years) or nutrient depletion. Fertilize lightly in early spring with a balanced, phosphorus-rich feed (like 10-10-10) to encourage new growth. Also, ensure they get 6+ hours of sun—partial shade can reduce blooms.
When should I deadhead double blooming irises to encourage reblooming?
Deadhead only after the first bloom cycle (late spring/early summer) to redirect energy into a second flush. Snip spent blooms just above the first set of leaves—never cut into the fan! For rebloomers, skip deadheading entirely after the second bloom to let foliage store energy for next year. Pro tip: Wear gloves—iris sap can irritate skin!
Can I grow double blooming irises in containers? What’s the best setup?
Containers work well for reblooming irises, but choose a deep pot (12"+) with drainage holes to prevent root rot. Use a chunky, well-draining mix (like 60% potting soil, 30% perlite, 10% compost). Repot every 2–3 years, and place in full sun. Bonus: Container irises are easier to move if winter temps dip below 10°F!
How do I protect double blooming irises from pests and diseases?
Irises are tough, but iris borers (larvae that tunnel into rhizomes) and fungal leaf spot can be troublemakers. Prevent borers by applying neem oil in early summer or planting marigolds nearby (natural pest deterrents). For fungal issues, prune infected leaves immediately and avoid overhead watering. Always sterilize tools between cuts to stop spread!
Are there low-maintenance alternatives to double blooming irises?
If reblooming irises feel high-maintenance, consider these perennial workhorses:
For true rebloomers, try Louisiana irises or Siberian irises—they’re hardier and more forgiving than their double-blooming cousins.
Wrapping up and next steps
Double blooming irises are a gardener’s delightful reward—packing two seasons of color into one plant with just a little care! Whether you’re a beginner or a seasoned green thumb, their low-maintenance charm makes them a must-have for any garden. 🌸
Ready to elevate your blooms? Start by revisiting our deadheading and care tips—then, experiment with varieties to find your perfect reblooming match. Happy gardening! 🌿