
Blooming
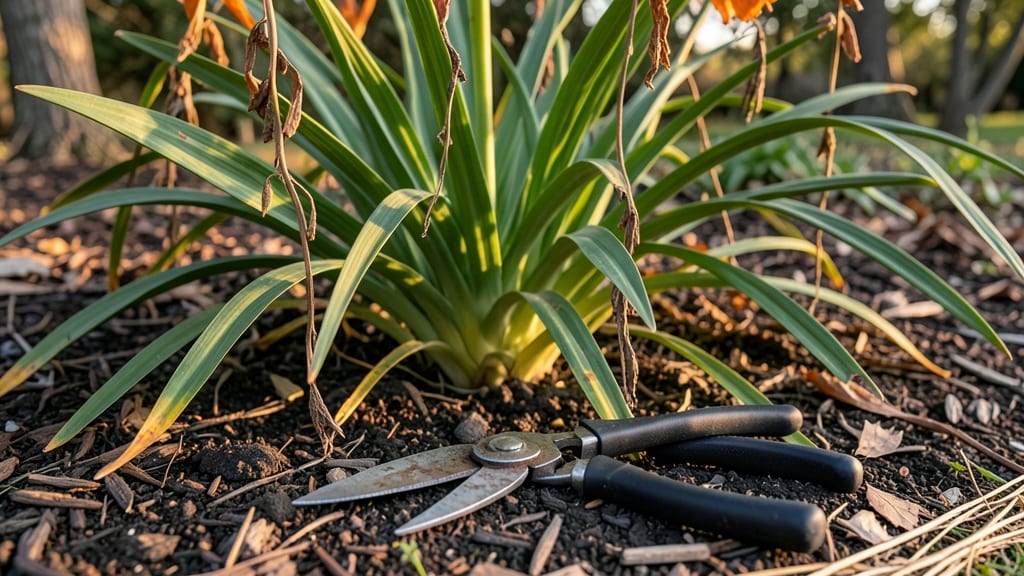
Your daylilies just put on a dazzling show, but the real work begins now. 🌸 Proper care after blooming turns those summer stars into next year's garden superstars—with fewer weeds, stronger growth, and even more dramatic flowers. The secret? Timing everything right from late summer through fall.
Start by deadheading spent blooms—snip them back to the first healthy set of leaves to redirect energy into root growth. Then, when those leaves turn brown, cut them back by half to keep the plant tidy.
This isn’t just about looks; it’s how you prep for division, which should happen every 3-4 years to keep plants vigorous. The best time? Late summer or early fall, when the soil is still warm but the heat has passed.
You’ll end up with a garden full of lush, healthy daylilies that bloom even more prolifically next season. The plants will spread naturally, filling in gaps and crowding out weeds.
Plus, you’ll have extra divisions to share—or keep for your own expanding borders. It’s the kind of care that pays off in bold, reliable color year after year.
Works for both sunny borders and mixed containers, and the same principles apply whether you have one plant or a dozen. Let’s get those daylilies ready for their next big performance!
📚 In This Guide
- What you need
- Instructions
- Tips and common mistakes
- Wrapping up and next steps
What you need
- ● Pruning shears or sharp garden scissors – Clean, sharp blades (sterilize with rubbing alcohol before use).
- ● Gloves – Heavy-duty garden gloves (to protect hands from thorns and soil).
- ● Garden fork or spading fork – Long-handled, sturdy fork (for dividing clumps).
- ● Watering can or hose with a gentle nozzle – For post-care hydration.
- ● Compost or well-aged manure – 2–3 gallons per divided clump (for enriching soil).
- ○ Mulch (optional but recommended) – 2–3 inches of shredded bark or straw (to retain moisture and suppress weeds).
- ● Hand trowel – For precision when replanting divisions.
- ● Wheelbarrow or bucket – For transporting soil, compost, or divisions.
- ● Fertilizer (balanced, 10-10-10 or slow-release) – Apply sparingly after replanting.
- ● Plant tags or markers – To label new divisions if saving for future planting.
- ● Disinfectant spray (e.g., 1-part bleach to 9 parts water) – To clean tools between plants and prevent disease.
Step-by-Step instructions for daylily post-bloom care
Here’s how to keep your daylilies thriving after their showy summer display.
✂️ Step 1: Deadhead Spent Blooms Promptly
As soon as blooms fade, snip the spent flower stalks back to the first set of healthy leaves below the bloom. This redirects the plant’s energy from seed production to next year’s growth instead of wasting it on unnecessary seed heads. I like to use clean pruners for a sharp cut—ragged cuts invite disease.
Don’t cut too low, though. Stopping just above a leaf node (where leaves attach to the stem) ensures the plant retains its energy reserves. You’ll notice new side shoots emerging from these nodes within a few weeks, signaling the plant’s recovery. For large clumps, I work in sections to avoid overwhelming myself.
🌱 Step 2: Fertilize for Fall Growth and Winter Hardiness
After deadheading, apply a balanced 10-10-10 fertilizer at half strength to encourage root development before winter. Daylilies store nutrients in their rhizomes, and this feeding boosts their reserves. I scatter the granules around the base, then water deeply to help them dissolve into the soil.
Wait until late summer or early fall—after the first frost but before hard freezes—to apply fertilizer. This timing ensures the plant has time to absorb nutrients before dormancy. You’ll see stronger, more vigorous growth in spring if you time it right. Avoid high-nitrogen fertilizers now; they promote leafy growth at the expense of root health.
💧 Step 3: Reduce Watering Gradually as Temperatures Drop
Once daytime temperatures dip below 70°F, taper back on watering. Daylilies are drought-tolerant once established, but they still need moisture during their transition into dormancy. I water deeply every 10-14 days until the soil feels dry 2 inches below the surface.
Overwatering in fall can lead to rot, especially in heavy clay soils. If your area gets heavy rain, skip watering entirely. You’ll know you’re on track when the leaves turn a dull yellow-green and begin to wither naturally—this is the plant’s way of preparing for winter. Mulch lightly with 2-3 inches of shredded leaves or straw to insulate the rhizomes.
🪴 Step 4: Divide Established Clumps Every 3-4 Years
Spring is the best time to divide daylilies, but if your clumps are crowded now, you can do a partial division in early fall. Dig around the perimeter of the clump with a spade, lifting the entire root mass. Gently separate the rhizomes with your hands—each division should have at least 3-5 healthy fans (leaf clusters) and a portion of the root system.
Replant divisions immediately in well-draining soil, spacing them 18-24 inches apart. Water thoroughly after planting to help them establish. You’ll see new growth emerging within 2-3 weeks if conditions are right. Dividing keeps plants vigorous and prevents overcrowding, which weakens blooms over time.
⏰ Step 5: Monitor for Pests and Diseases Over Winter
Check your daylilies occasionally during winter for signs of slugs, snails, or fungal issues like leaf spot. Slugs love the tender new growth that emerges early, so I set out beer traps or diatomaceous earth as a preventive measure. If you spot chewed leaves, address it immediately—daylilies recover quickly but hate being stressed.
Remove any dead or diseased foliage as you see it. Healthy daylilies are resilient, but debris left over winter can harbor pests or pathogens. By spring, your plants should be ready to burst into bloom again with minimal intervention. The key is consistency—just a little care now ensures next year’s showstopper display.
Tips & tricks for perfect daylily post-bloom care
A few simple tricks that'll keep your daylilies thriving for years to come.
Pruning Precision: When deadheading in Step 1, look for the first set of healthy leaves below the bloom—this is your target cut point. I always use clean pruners and make a sharp cut at a 45-degree angle to prevent water from pooling on the stem, which can lead to disease. This small detail makes all the difference in preventing future problems.
Fertilizer Timing: The late summer/early fall window for Step 2 is critical. I wait until after the first frost but before hard freezes to apply that half-strength 10-10-10 fertilizer. This timing ensures the nutrients have time to be absorbed before dormancy begins, giving your plants a strong foundation for next year's blooms. Think of it as giving your daylilies a winter coat made of nutrients!
Watering Wisdom: In Step 3, the 10-14 day watering schedule is perfect for established daylilies. I check soil moisture by sticking my finger 2 inches down—if it feels dry, it's time to water. This gradual reduction prevents shock to the plant as it prepares for winter. Overwatering now can actually harm your plants more than underwatering.
Division Strategy: For Step 4, I recommend doing a partial division in early fall if your clumps are crowded. This gives the newly divided plants time to establish roots before winter sets in. When separating rhizomes, aim for divisions with at least 3-5 healthy fans—this ensures each new plant has enough energy to thrive. It's like giving each plant its own starter home!
Pro Tips for Care Of Daylilies After Blooming
- A few simple tricks that'll keep your daylilies thriving for years to come.
- Pruning Precision: When deadheading in Step 1, look for the first set of healthy leaves below the bloom—this is your target cut point.
- Fertilizer Timing: The late summer/early fall window for Step 2 is critical.
Frequently asked questions
Got questions about keeping your daylilies thriving after their big bloom?
Here are answers to the most common ones—so you can enjoy those stunning flowers year after year!
Should I cut back daylilies after they finish blooming?
Yes! Once blooming is done, trim spent flower stalks down to the base (about 6 inches above the ground) to redirect energy to the roots. This keeps your plant healthy and encourages stronger growth for next season. Avoid cutting the fan-shaped leaves—they’re hard at work feeding the plant!
When is the best time to divide daylilies?
Divide daylilies in early spring or fall (before or after peak blooming). Avoid dividing in summer—it stresses the plant when it’s already working hard to produce flowers. Choose a mild, overcast day to reduce transplant shock, and replant divisions at the same depth they were growing.
What do I do if my daylilies stop blooming?
Fewer blooms often mean the plant needs a reset. Try these fixes:
- Too much nitrogen: Switch to a balanced fertilizer (like 10-10-10) to encourage blooms over leafy growth.
- Overcrowding: Divide clumps every 3–4 years to improve airflow and nutrient access.
- Insufficient sunlight: Daylilies thrive in full sun (6+ hours/day)—move them if they’re in shade.
Can I leave daylily foliage over winter?
In mild climates (Zones 7–10), leave foliage intact to protect the crown. In colder zones (below Zone 6), trim back brown, dead leaves in late winter to prevent rot, but leave green growth until spring. Mulch lightly (2–3 inches) for extra insulation!
How often should I fertilize daylilies after blooming?
Feed lightly once in early spring (before new growth) and once in early summer (after deadheading) with a low-nitrogen, high-phosphorus fertilizer (like 5-10-10). Over-fertilizing leads to lush leaves but fewer blooms. Skip fall feeding—let the plant rest!
Wrapping up and next steps
Caring for your daylilies after they bloom is all about simple, strategic steps that pay off big time—think lush foliage, vibrant blooms next season, and a thriving garden! 🌿 By deadheading spent flowers, dividing overcrowded clumps, and feeding the soil, you’re setting the stage for even more stunning displays in the years ahead.
Ready to level up your gardening game? Grab your gloves and start with just one of these tasks this weekend—your future blooms will thank you! For extra inspiration, explore our guide on daylily varieties to pick your next star performer.