
Blooming
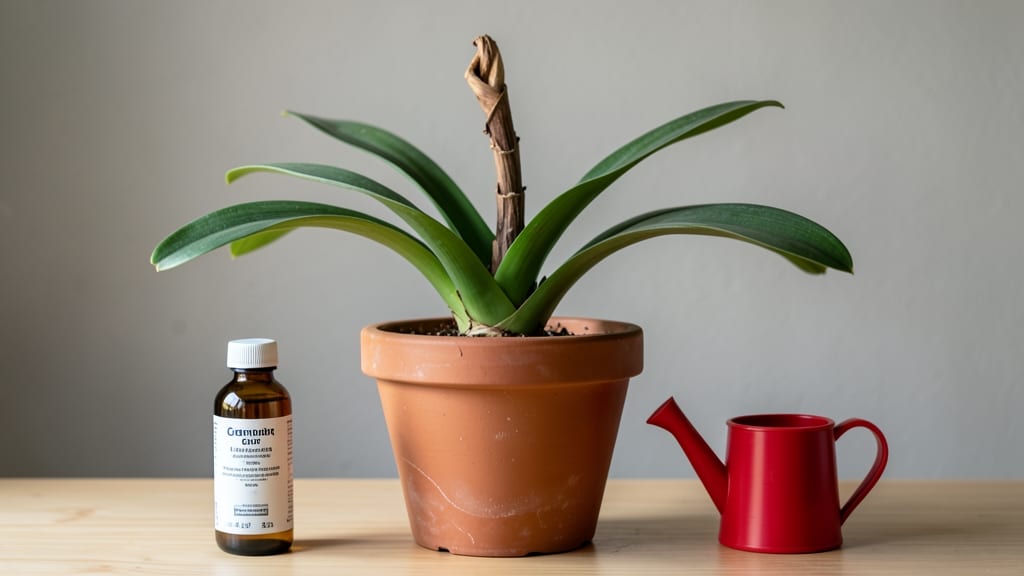
Once the last petal falls, care for amaryllis after bloom becomes your secret to another dazzling display—because those roots hold the promise of next year’s showstopper. 🌱 blooms.
I’ve nursed my own amaryllis through three reblooms, and the secret isn’t complicated: it’s about light, water, and patience during the dormancy phase.
First, trim those spent flower stalks at the base but leave the leaves—those green ribbons are solar panels, feeding energy back into the bulb. Reduce watering to once every 2-3 weeks, letting the soil dry completely between drinks.
Keep it in bright, indirect light (no direct sun yet) and maintain 60-70°F temperatures. The goal? Mimic the bulb’s natural rest period without letting it stress.
When new growth appears—usually in late summer or early fall—that’s your signal to repot if needed (every 2-3 years) and restart fertilizing. A well-draining mix with perlite keeps roots happy, and a balanced fertilizer every 2 weeks until blooming season kicks back in.
The payoff? A second showstopper bloom cycle, sometimes even two years in a row if you nail the dormancy.
Troubleshooting is simple: no rebloom? Check your light (they need 6+ hours of bright light daily). Yellow leaves? Too much water or poor drainage. And yes, outdoor amaryllis?
Dig them up after frost, let them dry, then store in a cool, dark spot until spring. Next season’s blooms start with the care you give them now.
📚 In This Guide
- What you need
- Instructions
- Tips and common mistakes
- Wrapping up and next steps
What you need
- ● Well-draining potting mix: 1 bag (1–2 gallons) of cactus/succulent mix or a blend with perlite/vermiculite (50% potting soil, 50% amendments).
- ● Pot with drainage holes: 1 container 1–2 inches wider than the bulb’s diameter (terracotta or ceramic preferred).
- ● Pruning shears or sharp scissors: 1 pair (sterilized with rubbing alcohol).
- ● Watering can with a narrow spout: 1 (to avoid overwatering).
- ● Balanced liquid fertilizer: 1 bottle (e.g., 10-10-10 or 20-20-20, diluted to half-strength).
- ● Houseplant stakes or bamboo skewers: 2–4 (for support if stems are leggy).
- ● Grow lights: 1–2 LED bulbs (full-spectrum, 12–14 hours/day if natural light is <7 hours/day).
- ● Humidity tray: 1 (pebble tray + water for dry climates).
- ● Epsom salt: 1 small bag (for magnesium boost; 1 tsp per gallon of water, monthly).
- ● Mulch (orchid bark or coconut coir): 1–2 cups (to retain moisture and deter pests).
- ● Insecticidal soap or neem oil: 1 bottle (preventative for aphids/mealybugs).
Instructions for reviving your amaryllis after the bloom
Here’s how to transform last season’s spent amaryllis into next year’s showstopper—no black magic, just smart care.
🌱 Step 1: Let the Flower Stem Die Back Naturally
After your amaryllis blooms fade, resist the urge to cut the stem immediately. Instead, allow it to wither and dry out completely on its own. This process can take 4-6 weeks—you’ll know it’s ready when the stem turns brown and crispy, almost like autumn leaves. This natural drying signals the plant to redirect energy from the spent bloom back into the bulb.
Gently twist the dead stem at its base to remove it. Never cut it—this prevents sap from oozing and potentially rotting the bulb. I always leave the bulb in its pot during this phase; moving it risks disturbing the roots before they’ve fully recovered. Place the pot in a spot with bright, indirect light—a sunny windowsill works perfectly.
💧 Step 2: Adjust Watering and Fertilizing for Bulb Recovery
Once the stem is fully brown and removed, cut back on watering dramatically. Water only when the top 2 inches of soil feel completely dry to the touch—this mimics the bulb’s natural dormancy period. Overwatering now is the fastest way to rot a bulb that’s already stressed. I use my finger to check moisture; if the soil feels damp past the first inch, wait another day.
Begin fertilizing again 6-8 weeks after the last bloom using a balanced, water-soluble fertilizer (like 10-10-10) diluted to half strength. Apply it every 2-3 weeks during the growing season. The goal is to encourage new leaf growth without overwhelming the bulb. You’ll see the first signs of revival when new green shoots emerge from the top of the bulb—this is your cue that the plant is waking up.
☀️ Step 3: Provide Ideal Light and Temperature for Leaf Growth
Move your amaryllis to a location with bright, indirect light—think east or west-facing windows, or a few feet back from a south window. Direct midday sun can scorch the new leaves, while too little light leads to weak, leggy growth. If your space lacks natural light, supplement with a grow light positioned 6-12 inches above the plant for 12-14 hours daily. You’ll notice the leaves develop a deep, glossy green when they’re happy.
Keep the temperature between 65-75°F during the day and no lower than 55°F at night. Amaryllis bulbs are sensitive to cold drafts, so avoid placing them near doors, windows, or air vents. If your home runs cooler, a heat mat under the pot can help maintain consistent warmth. The key here is patience—strong leaf growth takes 4-6 weeks and sets the stage for next season’s blooms.
✂️ Step 4: Encourage Bulb Strength for Next Season’s Blooms
As the leaves grow, continue fertilizing every 2-3 weeks until they reach 8-12 inches in length. This is when the bulb is storing energy for next year’s flowers. If you notice the leaves yellowing or browning at the tips, it’s usually a sign of overwatering or low light—adjust accordingly. Healthy leaves should be firm, upright, and vibrant, not floppy or pale.
In late summer or early fall, reduce watering gradually to prepare the bulb for its next dormancy phase. Stop fertilizing entirely 6-8 weeks before you plan to force blooms again. This mimics the plant’s natural cycle and ensures the bulb has stored enough energy. If you’re not forcing blooms immediately, you can let the plant rest until spring, then repeat the cycle.
Tips & tricks for perfect amaryllis revival
Reviving your amaryllis after bloom isn't rocket science—just a few key tricks to keep it thriving. Here's what I've learned from years of growing these showstoppers.
Patience Pays Off in Step 1: The 4-6 week drying period for the flower stem is non-negotiable. I've seen people impatiently cut stems too soon, and their bulbs never bounced back. Mark your calendar when you notice the first bloom fade—this is your starting point. The crispy, brown stem signals the bulb is ready to redirect energy, but don't rush it. Think of it like letting a bruise heal completely before working out again.
Watering Wisdom: That 2-inch soil dryness rule in Step 2 is crucial, but here's the secret: use your finger to check moisture at the same time each day. I've found that amaryllis bulbs in terracotta pots dry out faster than plastic ones, so adjust your watering schedule accordingly. The key visual cue is when the soil pulls away slightly from the pot edges—this tells me it's truly dry enough. Overwatering here is the #1 killer of recovering bulbs.
Lighting Secrets: For the 12-14 hours of grow light mentioned in Step 3, I recommend using a full-spectrum LED bulb—it mimics natural sunlight better than cheap white bulbs. Position it so the leaves don't touch it (they'll burn if they do), and rotate the pot daily for even growth. You'll notice the leaves develop that perfect glossy green when they're getting ideal light. If your space is truly dark, consider moving the plant to a brighter location during the day and supplementing only in the evenings.
Temperature Troubleshooting: Maintaining that 65-75°F range during the day can be tricky in summer. If your home gets too hot, move the plant to a cooler room or even outdoors in partial shade during heatwaves. The nighttime 55°F minimum is often the bigger challenge in cooler climates—never place the plant near drafty windows or doors. I've had success using a small space heater on low near the plant (safely!) when nighttime temps dip below 55°F, creating a microclimate that keeps the bulb happy.
Pro Tips for Care For Amaryllis After Bloom
- Reviving your amaryllis after bloom isn't rocket science—just a few key tricks to keep it thriving.
- Patience Pays Off in Step 1: The 4-6 week drying period for the flower stem is non-negotiable.
- Watering Wisdom: That 2-inch soil dryness rule in Step 2 is crucial, but here's the secret: use your finger to check moisture at the same time each day.
Frequently asked questions
Got questions about keeping your amaryllis thriving after its stunning bloom? You’re not alone! Here are some of the most common concerns—and their easy solutions.
Why did my amaryllis stop growing after blooming?
This is totally normal! After flowering, amaryllis bulbs enter a resting phase to recharge. Reduce watering and move it to a cooler spot (around 55–60°F) for 6–8 weeks. Once the leaves yellow, it’s time to prep for dormancy.
How long should I wait before fertilizing again?
Hold off until new growth appears in spring (usually 6–8 weeks post-bloom). Use a balanced bulb fertilizer (like 10-10-10) diluted to half-strength every 4–6 weeks. Avoid overdoing it—amaryllis bulbs are sensitive to excess salts!
Can I cut the flower stalk right after blooming?
Yes! Trim the flower stalk at the base once it wilts, but leave the leaves—they photosynthesize to feed the bulb for next year. If you’re impatient, you can also cut it earlier to redirect energy to the bulb’s storage.
What if my amaryllis leaves turn yellow or brown?
Yellowing leaves are often normal as the bulb rests, but brown, mushy spots signal overwatering or rot. Let the soil dry completely between waterings, and ensure the pot has drainage holes. If only the tips brown, it’s likely dry air—mist occasionally or use a pebble tray.
Should I repot my amaryllis after it blooms?
Only if it’s crowded (bulb peeking above soil) or the potting mix breaks down. Repot in spring after dormancy, using a pot just 1–2 inches larger. Refresh the soil with a well-draining mix (cactus/succulent blend works great).
Wrapping up and next steps
Caring for your amaryllis after bloom isn’t just about survival—it’s about preparing for a dazzling comeback next season!
With the right balance of patience, light, and care, you’ll turn those dormant bulbs into showstopping blooms again. 🌱✨ Now’s the perfect time to adjust their routine—trim, repot, and nurture—so they’ll reward you with vibrant flowers in no time.
Ready to level up your amaryllis game? Start by reviewing your care plan and giving your plant the TLC it deserves. Your future floral masterpiece starts today!