
Propagation
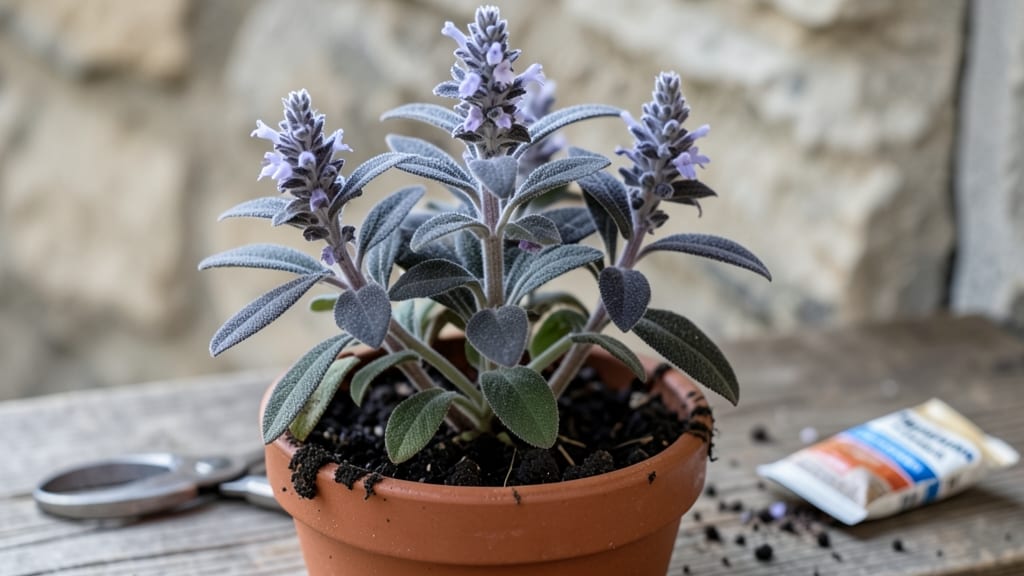
The propagation of Black and Bloom salvias from layered stems is the easiest way to double your plants—no greenhouse or fancy tools required. 🌱 I’ve rooted dozens of cuttings this way, and the secret lies in patience and the right timing: late spring when new growth is vigorous but not yet flowering.
The magic happens in 3-4 weeks with just a sharp pair of shears, rooting hormone (optional but helpful), and a clear plastic bag to trap humidity. You’ll watch roots form right through the plastic, proving the plant is ready for its new home.
These salvias thrive in drought once established, making them perfect for pollinators and low-maintenance gardens. What you’ll end up with are lush, velvety-black stems bursting with purple blooms that hummingbirds can’t resist.
The layered method works even better than traditional cuttings because the stem stays connected to the mother plant, ensuring steady water and nutrient flow while roots develop. Perfect for gardeners who want foolproof propagation without the fuss. Let’s get those stems rooted!
📚 In This Guide
- What you need
- Instructions
- Tips and common mistakes
- Wrapping up and next steps
What you need
- ● Mature Black and Bloom Salvia plant – Choose a healthy, well-established plant with flexible, semi-woody stems (at least 12–18 inches tall).
- ● Sharp, clean pruning shears or bypass pruners – Sterilize with rubbing alcohol to prevent disease.
- ○ Rooting hormone (optional but recommended) – A gel or powder (e.g., Clonex or Rootone) to boost success rates.
- ● Plastic or metal plant ties – 1–2 per stem, or use soft wire for a secure hold.
- ● Sphagnum moss or coconut coir – Moist but not soggy (1 small bag, ~1–2 lbs).
- ● Clear plastic wrap or a humidity dome – To retain moisture (e.g., zip-top bags or plastic cups).
- ● Small pots or containers – 4–6 inch diameter, with drainage holes (1–2 per cutting).
- ● Well-draining potting mix – Cactus/succulent blend (avoid heavy garden soil).
- ○ Gloves (optional) – To protect hands from prickly stems.
- ● Spray bottle with water – For misting layers and maintaining humidity.
- ● Patience (3–8 weeks!) – Root growth varies by climate and conditions.
- ● Bright, indirect light – A south-facing window or grow light works best.
- ○ Thermometer (optional) – Ideal rooting temps: 70–75°F (21–24°C).
Step-by-step instructions for propagating Black and Bloom salvias
Here's how I double my salvias every year using simple layered stems—no fancy tools needed.
🌱 Step 1: Select Healthy Stems for Layering
Choose 4-6 inch long stems from your Black and Bloom plants that are wooden but still green at the base. These stems should have at least two sets of leaves—you'll use the lower pair for rooting. Avoid flowering stems, as they focus energy on blooms instead of new roots. I always pick stems that are slightly flexible but not brittle, which means they're young enough to root but mature enough to support growth.
Use clean, sharp pruning shears to make a 45-degree cut just above a leaf node. This angled cut gives you more surface area for callusing, which helps the stem heal and root. If you have multiple plants, take 2-3 stems per plant to maximize your chances. The more stems you layer, the more new plants you'll end up with—just don't overdo it, or you'll weaken the mother plant.
💧 Step 2: Create the Layering Setup
Find a spot where the stem can touch moist soil without being buried. I like to use a small pot (about 4 inches wide) filled with well-draining potting mix—the same mix you'd use for salvias, but mixed with 20% perlite for extra airflow. Water the mix until it's evenly moist but not soggy, then make a small slit or mound in the soil about 2 inches from the base of the stem.
Gently bend the stem down so the lower leaf node touches the soil. Secure it in place with a small U-shaped wire or a plastic clip—just enough to hold it without crushing the stem. The goal is to keep that leaf node in contact with the soil while the rest of the plant stays upright. If you're working with multiple stems, space them 2-3 inches apart in the pot to avoid crowding. This setup mimics how salvias grow in their native habitats, where stems naturally root at leaf nodes.
☀️ Step 3: Maintain Moisture and Light for Root Development
Keep the soil consistently moist—not wet, but never dry. I water lightly every 2-3 days, checking the top inch of soil with my finger. If it feels dry, it's time to water. Too much moisture causes rot, while too little slows root growth. Place the pot in a spot with bright, indirect light—think morning sun or filtered afternoon light. Direct midday sun can scorch the leaves while they're still establishing roots, so I always shield mine with a sheer curtain if needed.
After 4-6 weeks, gently tug on the stem near the layered node. If you feel light resistance, roots are forming. If it pulls out easily, wait another week and check again. You'll see new growth at the tip of the stem and possibly tiny leaves emerging at the layered node—both signs that rooting is underway. This is the moment that matters: patience here means stronger, more established plants later.
✂️ Step 4: Separate and Pot Up New Plants
Once roots are confirmed (usually 6-8 weeks after layering), use your pruning shears to cut the stem just below the new roots. Be careful not to damage the delicate root system—it's fragile but strong enough to support a new plant. Remove any lower leaves that would be buried in the soil, as they'll rot and attract pests. I like to dip the cut end in rooting hormone (optional but helpful) before potting up to encourage faster establishment.
Plant each new cutting in its own 4-inch pot filled with the same well-draining mix. Water lightly to settle the soil, then place the pots in a shady spot for a week to reduce stress. After that, gradually reintroduce them to full sun over 7-10 days. This hardening-off period prevents shock and gives the roots time to adjust to their new environment. Your Black and Bloom salvias will thrive in their new homes, and you'll have 4-6 identical plants ready to fill your garden or share with friends.
🌿 Step 5: Care for New Plants Through Establishment
Water your new salvias once a week, letting the top 1-2 inches of soil dry out between waterings. Overwatering is the biggest mistake here—it causes root rot and kills young plants. After 4-6 weeks, when the plants show new growth and look healthy, you can transplant them to the garden or larger containers. They'll need full sun (at least 6 hours daily) and well-draining soil to flourish, just like their parent plants.
Here's the thing—these propagated salvias will bloom just as vigorously as their mothers, often even more so because they're stress-free and well-established. Watch for those familiar black-and-purple blooms in their first season, and you'll know your efforts paid off. Real talk: once you master layering, you'll never buy salvias again. Just save a few stems each year, and you'll have a never-ending supply of these stunning plants.
Tips & tricks for propagating Black and Bloom salvias
These simple tricks will help you turn your salvia stems into thriving plants with minimal fuss.
Stem Selection is Everything: Look for stems that are 4-6 inches long with that perfect "slightly flexible but not brittle" feel—this is your golden zone for successful propagation. I've learned the hard way that stems with flowers won't root properly, so always skip those blooming branches. The key is finding stems that are mature enough to support growth but young enough to still root. Think of it like choosing the right wood for a fire—too green and it won't catch, too old and it burns too fast.
The 45-Degree Cut Matters More Than You Think: When making that initial cut just above a leaf node, the angle isn't just for looks—it creates more surface area for callusing, which is how the stem heals and starts rooting. Use clean pruning shears and make that cut at a sharp angle. I like to visualize slicing off the corner of a square cookie—this gives you the maximum surface for new growth to emerge. This small detail makes all the difference between successful rooting and disappointed stems.
Lighting Makes or Breaks Your Success: While the instructions mention bright indirect light, I've found that morning sun is actually ideal for the first few weeks. The cooler morning light prevents scorching while still providing enough energy for photosynthesis. If you don't have morning sun, a grow light on a timer for 12-14 hours daily works perfectly. The goal is to keep those leaves happy without stressing the plant—think of it like giving your salvias a gentle sunbath rather than a harsh tanning session.
Root Development Timeline: The 4-6 week window for root development can feel like forever, but trust the process. I've seen roots form as early as 3 weeks in perfect conditions, but don't rush it—patience here leads to stronger plants. After that 6-8 week mark when you're ready to separate, I recommend doing a final tug test one more time. If you feel even the slightest resistance, those roots are ready to support their own plant. This final check ensures you're not pulling too soon and stressing your new babies.
Pro Tips for Black And Bloom Salvias Propagation
- These simple tricks will help you turn your salvia stems into thriving plants with minimal fuss.
- Stem Selection is Everything: Look for stems that are 4-6 inches long with that perfect "slightly flexible but not br...
- The 45-Degree Cut Matters More Than You Think: When making that initial cut just above a leaf node, the angle isn't j...
Frequently asked questions
Got questions about propagating Black and Bloom Salvias? You’re not alone! Here are some of the most common queries—and their straightforward answers—to help you succeed with layered stems and root growth.
When is the best time to propagate Black and Bloom Salvias?
The ideal window is late spring to early summer (May–June in most climates), when temperatures are warm but not scorching. This gives new roots time to establish before winter. If you miss the season, fall propagation (September) can work too—just use a heated mat to encourage rooting.
Can I propagate Black and Bloom Salvias from cuttings instead of layering?
While layering is foolproof, stem cuttings (4–6 inches long) dipped in rooting hormone and placed in moist perlite or water also work. Keep humidity high (use a plastic bag) and maintain 70–75°F for best results. Roots typically appear in 3–6 weeks.
Why aren’t my layered stems rooting?
Check these culprits:
- Dampness: Overwatering causes rot—keep soil moist but not soggy.
- Light: Too much shade slows growth; aim for bright, indirect light.
- Hormone: Skip rooting powder? Try a natural boost like willow water or cinnamon dust.
How do I know when a layered stem is ready to separate?
Your stem is ready when it develops 2–3 inches of healthy roots and new leaves at the base. Gently tug—if resistance meets you, it’s time to snip below the roots with clean shears. Pro tip: Water the parent plant 24 hours before to reduce shock.
Can I propagate Black and Bloom Salvias in containers or only in the ground?
Both work! For containers, use well-draining pots (terracotta is ideal) and a mix of 50% perlite/50% potting soil. Layering in-ground is easier for large plants, but containers let you control moisture and light better. Just ensure pots have drainage holes to prevent root rot.
Wrapping up and next steps
Growing Black and Bloom Salvias through layered stems is a rewarding way to expand your garden without breaking the bank! With patience and the right techniques—like proper moisture balance, gentle root encouragement, and timely separation—you’ll soon enjoy lush, thriving plants ready to brighten up your space. 🌱
Now that you’re armed with the know-how, roll up your sleeves and give it a try! Start with just one stem, and before you know it, you’ll have a whole collection of these stunning salvias to share with fellow plant lovers. Happy propagating! 🌿