
Blooming
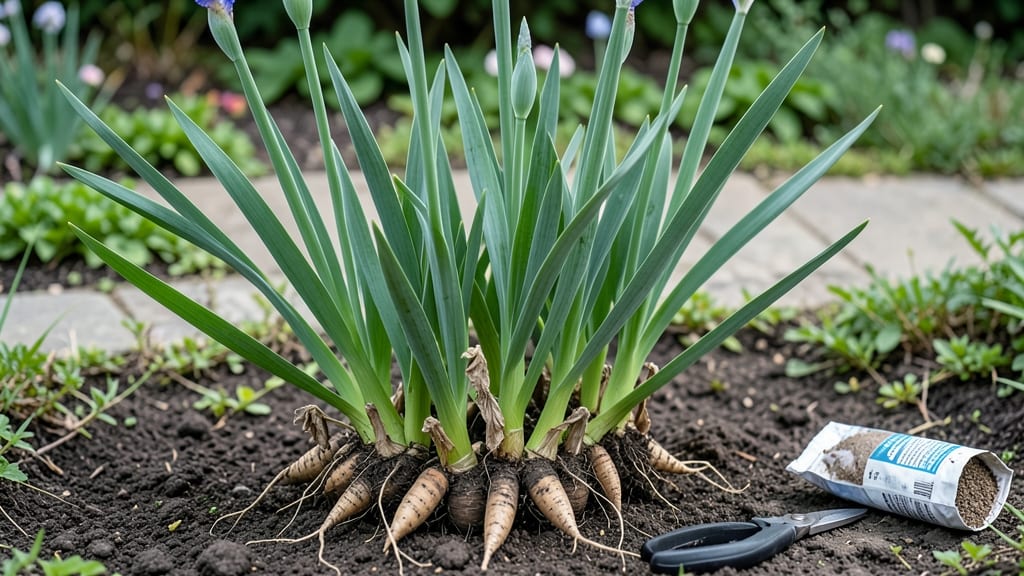
After iris bloom, then what happens next? Your garden’s drama isn’t over—it’s just shifting into high gear. ✨ The spent blooms might look tired, but deadheading them now unlocks next season’s showstopper reblooms, especially for bearded irises.
I’ve watched my own clumps go from a single summer flush to multiple waves of color by mastering this one step.
Here’s the secret: timing matters. Snip those faded blooms at the base once they droop, but leave the leaves—those sword-like blades are the plant’s energy factory for next year’s blooms. After they yellow naturally, you can trim them back by a third, but never more than that.
The rhizomes (those thick roots) also need attention—divide them every 3-4 years to keep blooms bold and prevent overcrowding.
Feed them lightly after blooming with a balanced fertilizer or compost, and watch how they reward you: stronger stems, more buds, and blooms that arrive earlier each year. My irises now put on a second show in late summer, and the foliage stays lush all season long.
The key is patience—what you do now sets up next year’s performance.
Works for bearded irises in zones 3-9, whether in borders, containers, or along driveways. The same rules apply to reblooming varieties like ‘Immortality’ or ‘Florence.’ Here’s how to make it happen without the guesswork.
📚 In This Guide
- What you need
- Instructions
- Tips and common mistakes
- Wrapping up and next steps
What you need
- ● Pruning shears or clean, sharp scissors – Opt for bypass pruners (not anvil-type) to avoid crushing stems. Disinfect with rubbing alcohol before and after use!
- ○ Gloves (optional but recommended) – Protect your hands from thorns and sap. Nitrile or leather garden gloves work best.
- ● Compost bin or bag – Collect spent blooms to enrich your soil later.
- ● Watering can or hose (with a gentle spray nozzle) – Irises need 1–2 inches of water per week, especially after pruning.
- ● Fertilizer (low-nitrogen, phosphorus-rich) – A 5-10-10 or 10-20-20 formula encourages root and bloom development. 2–3 tablespoons per plant is plenty!
- ● Mulch (straw, pine needles, or shredded bark) – Helps retain moisture and suppress weeds. Apply 2–3 inches around the base, avoiding the crown.
- ● Plant stakes or labels – Keep track of varieties and deadheading schedules.
- ● Pest control (neem oil or insecticidal soap) – Irises can attract iris borers. Spray foliage in early summer if needed.
- ● Knee pad or stool – Saves your back for those low-growing varieties!
Instructions for deadheading irises to encourage reblooms
Once those dramatic iris blooms fade, a little pruning keeps your clumps thriving—and even brings back more flowers next season.
✂️ Step 1: Identify and Remove Spent Blooms
Wait until the flower stalk completely wilts and browns before cutting. This ensures the plant has finished its energy transfer back to the rhizome. Use clean, sharp pruners to snip the stalk about 1 inch above the first healthy leaf—never cut into the leaves themselves, as they feed the plant.
I know it seems counterintuitive, but don’t remove the entire stalk yet. The seed pod (if any) can form, but if you notice it drying out before the leaves yellow, you can trim it off early. Just avoid cutting into the rhizome—it’s the thick, fleshy base that stores energy for next year’s blooms.
✂️ Step 2: Cut Back Only After Full Leaf Yellowing
Leave the foliage alone until it turns completely yellow and flops over naturally. This process, called "leaf dieback," takes 6-8 weeks after blooming. The leaves are hard at work converting sunlight into stored energy for next year’s flowers.
When about half the leaves have yellowed, you can start cutting back the dead foliage. Trim it down to about 6 inches tall, leaving a few healthy leaves if possible. This keeps the rhizome area dry and reduces disease risk while still allowing some photosynthesis.
💧 Step 3: Water and Fertilize for Strong Reblooms
After cutting back, give your irises a deep watering to 12 inches deep to encourage root growth. Irises are drought-tolerant, but they need moisture after pruning to recover. I like to water in the early morning so the foliage dries quickly and prevents fungal issues.
Apply a low-nitrogen, high-phosphorus fertilizer (like a 5-10-10 blend) about 4-6 weeks after blooming. This helps the rhizomes store energy for next year’s flowers. Avoid high-nitrogen fertilizers—they promote leaf growth at the expense of blooms. A light application is all you need.
☀️ Step 4: Mulch and Monitor for Next Season
Spread a 2-inch layer of organic mulch around the base, keeping it 6 inches away from the rhizomes to prevent rot. I use shredded bark or straw—it keeps weeds down while allowing water to penetrate. Avoid heavy mulch that smothers the rhizomes or holds too much moisture.
Watch for new growth in early spring. Healthy iris rhizomes will produce fan-shaped leaves first, followed by flower stalks in 4-6 weeks. If you see no new growth by late spring, it might be time to divide your clump—irises bloom best when they’re not overcrowded.
Tips & tricks for perfect iris deadheading
Here's what nobody tells you about keeping your iris clumps thriving after those stunning blooms fade.
Timing is Everything: The 6-8 week leaf dieback period in Step 2 is non-negotiable for reblooms. I've seen gardeners rush this process and end up with sparse flowering the next season. Mark your calendar 6-8 weeks after blooming begins—this is when your irises are storing energy for next year's showstopper flowers. If you're in a cooler climate, this period might extend to 10 weeks, so be patient.
Tool Precision Matters: Using clean, sharp pruners in Step 1 isn't just about clean cuts—it's about preventing disease transmission between plants. I sterilize my pruners with rubbing alcohol between each iris clump. Dull blades crush stems and create entry points for fungal infections. For large clumps, consider using hedge shears instead of hand pruners to maintain precision while covering more ground.
Fertilizer Timing Secret: The 4-6 week window for applying low-nitrogen fertilizer in Step 3 is critical. I've found that applying it too early (before leaf dieback completes) can actually reduce next year's blooms. The key is waiting until after you've cut back the foliage but before new growth appears in spring. A light application—about half what you'd use for leafy greens—is all you need to encourage rhizome development.
Mulch Placement Hack: When spreading that 2-inch layer of organic mulch in Step 4, resist the urge to pile it directly against the rhizomes. I've seen many gardeners make this mistake, leading to rot. Keep that 6-inch clearance—it allows air circulation while still suppressing weeds. For extra protection against winter dieback, add a thin layer of straw on top of your regular mulch in late fall.
Pro Tips for After Iris Bloom Then What
- Here's what nobody tells you about keeping your iris clumps thriving after those stunning blooms fade.
- Timing is Everything: The 6-8 week leaf dieback period in Step 2 is non-negotiable for reblooms. I've seen gardeners ...
- Tool Precision Matters: Using clean, sharp pruners in Step 1 isn't just about clean cuts—it's about preventing diseas...
Frequently asked questions
Got questions about what to do after your iris blooms?
You’re not alone! Here are the most common concerns—and straightforward answers—to keep your irises thriving and blooming season after season.
Why does deadheading iris flowers matter?
Deadheading (removing spent blooms) redirects the plant’s energy from seed production to stronger roots and future blooms. Without it, irises may skip reblooming or produce fewer flowers. Plus, it keeps your garden looking tidy! Just snip the flower stalk below the first healthy leaf to avoid damaging the plant.
How soon after blooming should I deadhead irises?
Deadhead iris blooms immediately after they fade—usually within 1–2 days. If you wait too long, the seed pod may form, draining energy from reblooming. For bearded irises, wait until the petals fully drop; for sibiritas or Louisiana irises, trim as soon as they wilt. Pro tip: Use sharp pruners to avoid crushing stems.
Will deadheading encourage more blooms next year?
Deadheading boosts reblooming potential by preventing seed formation, which saps nutrients. Pair it with fertilizing in early spring and fall (use a low-phosphorus, high-potassium blend) and watering deeply but infrequently to stress roots slightly—this triggers more robust blooms. Patience pays off: some irises take 2–3 years to fully rebound.
What if my iris leaves turn yellow after deadheading?
Yellowing leaves are often normal after flowering as the plant redirects energy. However, if more than ⅓ of the fan yellows or the leaves mushy or blackened, it may signal root rot (from overwatering) or iris borers. Act fast: Dig up the rhizome, trim blackened roots, and replant in well-draining soil. Avoid waterlogging!
Can I skip deadheading if I want iris seeds?
Yes! If you’re growing irises for propagation, let the seed pods mature (they’ll turn brown and dry). Save seeds for fall planting, but know that seed-grown irises may take 3–5 years to bloom. For guaranteed reblooms, deadhead and focus on rhizome health instead. Fun fact: Some hybridizers cross-pollinate irises to create new varieties—your garden could be a nursery!
Wrapping up and next steps
So, you’ve mastered the art of deadheading your Iris—congrats! 🌸 The key takeaway? Regular maintenance unlocks vibrant reblooms season after season. With the right tools, timing, and a little patience, your garden will reward you with bold, healthy blooms year-round.
Now that you’re armed with knowledge, why not expand your green thumb’s reach?
Your next logical step? Try your hand at dividing overcrowded clumps or experimenting with fertilizer blends to supercharge growth. Happy gardening—your iris (and future blooms) will thank you! 🌱✨