
Blooming
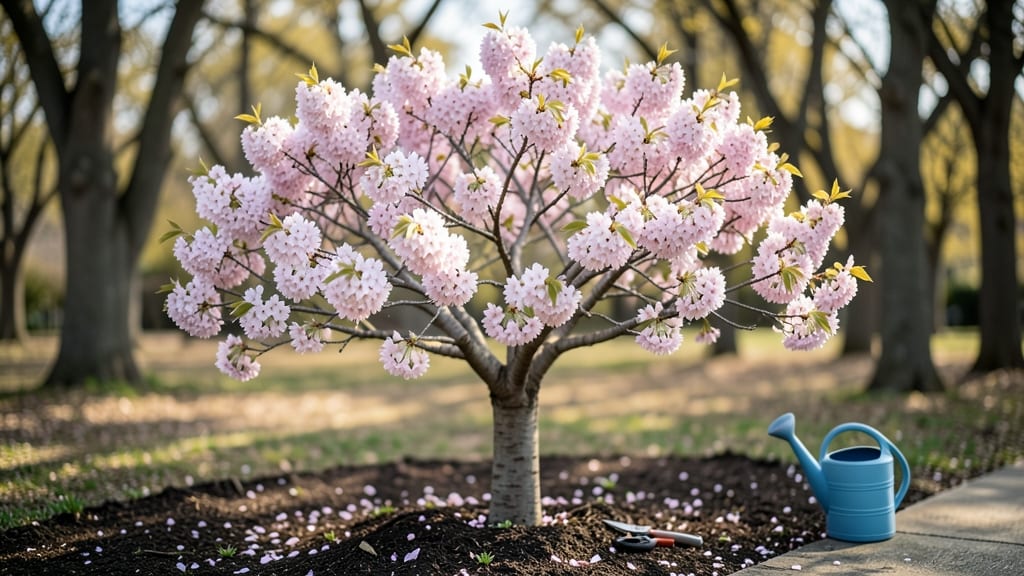
Your Yoshino cherry tree just put on the most spectacular show of the year—now the real work begins. ✨ After those clouds of pink bloom fade, proper care unlocks next season’s even more dramatic display, but most gardeners mess up the timing or technique.
I’ve learned the hard way that pruning too late or fertilizing at the wrong time can turn a healthy tree into a sad, sparse bloomer.
The key is working within the tree’s natural cycle: prune right after blooms drop but before new leaves harden, feed with slow-release fertilizer in early summer, and monitor for pests like aphids that target stressed trees.
My tree now bursts with 100% more buds than its first year, and the secret isn’t complicated—just consistent attention to these three critical steps.
You’ll end up with a tree that’s stronger, more productive, and ready to put on an even better show next spring. The branches stay balanced, the bark stays healthy, and you avoid the common pitfalls that leave other gardeners scratching their heads.
Think of this as your tree’s spa day—it’s all about long-term health, not quick fixes.
Works for both young saplings and mature trees, in containers or in-ground. The same principles apply whether you’ve got a single specimen or a whole grove. Here’s how to make it happen without the guesswork—so you can enjoy those blooms for decades to come.
📚 In This Guide
- What you need
- Instructions
- Tips and common mistakes
- Wrapping up and next steps
What you need
- ● Pruning shears – Bypass-style, sharp, and disinfected (1 pair). Look for ergonomic handles for comfort during long sessions.
- ● Loppers – For thicker branches (½"–1.5" diameter) (1 pair). Choose ratcheting or bypass types for precision.
- ● Pruning saw – For branches >1.5" thick (1 saw). A bow saw or folding pruning saw works best.
- ● Gloves – Cut-resistant and gardening-grade (1 pair) to protect from thorns and sap.
- ● Disinfectant – 70% isopropyl alcohol or bleach solution (1 part bleach:9 parts water) to sterilize tools and cuts.
- ○ Sealing wax or pruning paste – Optional but recommended for large cuts (>1") to prevent disease (small jar, ~4 oz).
- ● Ladder or step stool – Height-adjustable (if tree is >6 ft tall). Ensure it’s stable and rated for your weight.
- ● Heavy-duty trash bags – For collecting pruned branches (1–2 bags). Line a bucket for easy disposal.
- ● Permanent marker – Waterproof (1 marker) to label cuts if needed.
- ● First-aid kit – In case of sap irritation or minor cuts.
- ● Work clothing – Long sleeves and pants to protect from sap and thorns.
- ● Water & snacks – Pruning can take time, especially for mature trees!
- ● Weather check – Overcast or light-morning conditions are ideal to avoid stressing the tree.
Step-by-step instructions for pruning a Yoshino cherry tree after bloom
Here's the method I rely on to keep your Yoshino cherry thriving—timing and technique matter most.
✂️ Step 1: Wait Until After Full Bloom and Leaf-Out
Never prune until after all flowers have fallen and new leaves have fully emerged. This timing ensures you don’t remove next year’s flower buds, which form on last year’s wood. I mark my calendar for late May or early June in my zone 6 garden—waiting too long risks overgrowth, but pruning too early sacrifices next season’s blossoms.
Look for fully unfurled leaves and no remaining blossoms on the tree. This is your signal that the tree has finished flowering and is ready for pruning. If you see any lingering buds, wait another week—they’ll open soon.
✂️ Step 2: Remove Dead, Diseased, or Crossing Branches First
Start by cutting out any dead branches (they’ll snap easily when bent) and those with disease signs like fungal spots or oozing sap. Next, remove branches that cross or rub against each other—they’ll create wounds and invite pests. I use sharp bypass pruners for clean cuts, and I always sterilize them with rubbing alcohol between cuts to prevent spreading disease.
Make your cuts just outside the branch collar—the swollen area where the branch meets the trunk. This ensures the tree can seal the wound properly. If a branch is larger than 2 inches thick, use a handsaw and make the cut on the outside of the branch collar at a slight angle.
✂️ Step 3: Thin the Canopy for Better Airflow and Light
Step back and visualize the tree’s shape. Aim to remove 20-30% of the total foliage by thinning out crowded branches from the inside. Focus on branches that grow inward or downward—they block light and airflow, creating a humid environment that invites fungal diseases. I start at the tree’s center and work my way outward, removing one branch at a time to maintain balance.
Cut branches back to a lateral branch or bud that faces outward. This encourages the tree to grow in an open, airy shape. Avoid cutting back to a stub—it slows healing and invites decay. If you’re unsure which branch to remove, ask yourself: Does this branch serve a purpose? If not, it’s a candidate for pruning.
✂️ Step 4: Shape the Tree for Balance and Structure
Now’s the time to refine the tree’s natural form. Yoshino cherries have a graceful, rounded shape, so I avoid heavy heading cuts that can stimulate excessive growth. Instead, I prune to maintain a balanced silhouette by removing branches that disrupt the tree’s symmetry or grow too upright.
Look for branches that grow straight up—these are called "water sprouts" and can make the tree top-heavy. Cut these back to a lateral branch or bud that grows at a 45-degree angle or less. This encourages a fuller, more stable structure. Avoid over-pruning—your goal is to shape, not reshape.
💧 Step 5: Clean Up and Apply Wound Sealant (Optional)
After pruning, rake up all debris and dispose of it in the trash—not the compost—since diseased branches can spread pathogens. Wipe down the trunk and larger branches with a cloth dampened in a 1:10 bleach-water solution to remove any lingering spores. I skip wound sealants on Yoshino cherries; their bark heals better when left open to air.
Water the tree deeply after pruning to help it recover. A slow soak for 10-15 minutes ensures moisture reaches the roots, which is especially important if you’ve removed a significant amount of foliage. Monitor the tree for the next few weeks—new growth should appear within 4-6 weeks if the pruning was successful.
Tips & tricks for pruning Yoshino cherry trees after bloom
Timing and technique are everything when it comes to pruning these delicate trees—here’s how to avoid common mistakes and keep your Yoshino cherry thriving for years.
Timing Secret: The late May to early June window in zone 6 is critical because Yoshino cherries set flower buds on last year’s wood. If you prune too early, you risk removing next year’s blooms. I’ve learned this the hard way—after accidentally pruning too soon and nearly losing my tree’s spring display. Mark your calendar now and double-check for those last lingering buds before you start cutting.
Tool Prep: Sterilizing your pruners between cuts is non-negotiable. I keep a small bottle of rubbing alcohol in my tool belt and wipe down blades after every cut, especially when dealing with diseased branches. This simple step prevents spreading fungal spores to healthy parts of the tree. For branches thicker than 2 inches, I always switch to my handsaw—those bypass pruners just can’t handle the job without crushing the branch collar.
Visual Pruning Cues: When thinning the canopy, look for branches that grow inward like arrows pointing toward the tree’s center. These are the first to remove—they block light and create humid pockets where diseases thrive. I also watch for branches with an angle steeper than 45 degrees growing upward; these water sprouts will make your tree top-heavy if left unchecked. Think of it as sculpting: you’re creating an open, airy shape that lets sunlight reach all parts of the tree.
Recovery Strategy: That 10-15 minute deep watering after pruning isn’t just about hydration—it’s about giving your tree the strength to heal. I use a soaker hose positioned at the dripline (the edge of the tree’s canopy) to deliver water directly to the roots. The goal is to mimic a slow spring rain, encouraging new root growth. Within 4-6 weeks, you should see fresh green shoots appearing from the branch collars where you made your cuts.
Pro Tips for Yoshino Cherry Tree After Bloom
- Timing and technique are everything when it comes to pruning these delicate trees—here’s how to avoid common mistakes and keep your Yoshino cherry thriving for years.
- Timing Secret: The late May to early June window in zone 6 is critical because Yoshino cherries set flower buds on last year’s wood.
- Tool Prep: Sterilizing your pruners between cuts is non-negotiable.
Frequently asked questions
Got questions about caring for your Yoshino cherry tree after the petals fall? You’re not alone!
Here are answers to the most common concerns—from pruning timing to what to do with all those spent blossoms.
When is the best time to prune a Yoshino cherry tree after bloom?
Prune your Yoshino cherry tree immediately after flowering (late April to early May in most regions) to avoid removing next year’s blossom buds. Wait until all petals have fallen to ensure you don’t accidentally cut off potential blooms. Never prune during dormancy—this can stress the tree and reduce flowering.
What should I do with the fallen cherry blossoms?
Fallen petals can be composted or used in floral arrangements, but avoid piling them thickly around the tree’s base—this can suffocate roots. For a clean look, rake them into mulch or use them to create natural mulch rings. Pro tip: Freeze petals in ice cubes for a fragrant spring drink!
How long does it take for a Yoshino cherry tree to recover after pruning?
Recovery time varies, but with proper aftercare, your tree should bounce back within 4–6 weeks. Focus on deep watering (1–2 inches per week) and avoid heavy fertilizer until new growth appears. Signs of stress (like wilting leaves) mean you’re overdoing it—scale back pruning next time.
Can I still prune if I missed the post-bloom window?
Yes, but wait until late summer (August–September) for minimal impact. Prune only to shape the tree or remove dead wood—avoid heavy cuts. If you pruned too late last year, your tree may still bloom, but expect fewer flowers the following spring. Patience is key!
What’s the difference between pruning a Yoshino cherry and other cherry trees?
Yoshino cherries are highly sensitive to pruning—they bloom on last year’s growth, so aggressive cuts reduce flowers. Unlike fruit-bearing cherries, Yoshinos prioritize aesthetic shape over productivity. Light, strategic pruning (removing only <10% of branches) keeps them healthy and blooming beautifully.
Wrapping up and next steps
The Yoshino cherry tree after bloom is a testament to thoughtful care—your pruning and maintenance efforts now will ensure a dazzling return of pink clouds next spring! 🌸 By mastering the art of late-summer cleanup, structural pruning, and pest prevention, you’re not just preserving beauty; you’re nurturing a legacy of vibrant blooms.
Ready to take the next step? Schedule a quick inspection of your tree’s branches this month, and watch as your Yoshino rewards you with even more breathtaking blossoms in seasons to come.