
Blooming
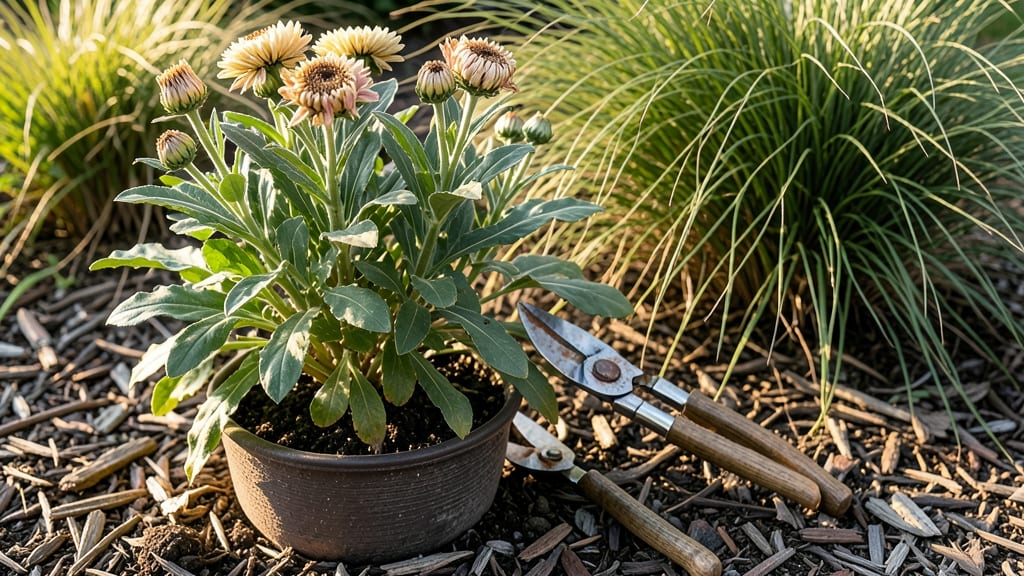
After your mums finish their fall showstopper display, don’t toss them—this is where the real magic happens. ✨ The right post-bloom care transforms next year’s plants from wimpy annuals into reblooming powerhouses (or well-rested perennials, depending on your climate).
I’ve turned my once-sentimental-but-useless mums into year-after-year bloomers by following three simple steps after the last flower fades.
The first move is pruning, but timing matters more than you’d think. For reblooming mums (like ‘Jolinda’ or ‘Merton’ series), cut back one-third of the plant right after the final bloom—never later than October in most zones.
Annual mums? Snip spent blooms weekly to encourage more flowers, but stop pruning by September to harden them off. The goal? Balance growth with dormancy prep.
Here’s the secret weapon: mulch and fertilizer timing. After pruning, top perennial mums with 3-4 inches of straw or shredded leaves to insulate roots through winter. In spring, feed with balanced 10-10-10 fertilizer as soon as shoots emerge—this jumpstarts next season’s blooms.
Skip this, and you’ll get leggy, weak plants with half the flowers.
Mistake alert: Never prune mums in early spring—they bloom on new growth, and cutting too soon delays flowers. In cold climates, dig up tender varieties, pot them, and store in a cool, dark garage (50°F) until spring. Follow these steps, and your mums will outperform store-bought plants every fall.
📚 In This Guide
- What you need
- Instructions
- Tips and common mistakes
- Wrapping up and next steps
What you need
- ● Pruning shears or sharp bypass pruners – 1 pair (sterilized with rubbing alcohol to prevent disease spread).
- ● Garden gloves – 1 pair (to protect your hands from thorns or sap).
- ● Garden scissors or sharp knife – 1 (for finer cuts if needed).
- ● Compost or well-aged manure – 1-2 gallons (for fertilizing after pruning).
- ● Balanced, slow-release fertilizer – 10-10-10 or 20-20-20 (follow package instructions for dosage).
- ● Mulch (straw, shredded leaves, or pine bark) – Enough to cover 2-3 inches around the base.
- ● Watering can or hose with a gentle spray nozzle – 1 (for post-pruning hydration).
- ● Plant food with micronutrients (boosts root and foliage health).
- ● Disinfectant spray (for tools if reusing between plants).
- ● Garden twine or stakes (if your mums need support post-pruning).
- ● Potting mix (if you plan to divide or repot any plants).
Step-by-Step instructions for reviving mums after blooming
Here's the proven method I use to transform last year's mums into next season's showstoppers.
🌿 Step 1: Deadhead Spent Blooms Immediately
As soon as flower heads fade and turn brown, snip them off at the first set of healthy leaves below. This prevents seed formation and redirects energy into root and foliage development. I use sharp bypass pruners to make clean cuts—never tear stems, which invites disease. Work on dry mornings when foliage is crisp to reduce stress on the plant.
Watch for the first true signs of dormancy: when about half the leaves have yellowed and fallen. This usually happens in late fall, but timing varies by climate. In colder zones, you'll see leaves drop earlier; in mild areas, they may linger until winter. Don't wait until all leaves are gone—early deadheading gives roots more time to strengthen.
✂️ Step 2: First Pruning for Foliage Health
About 4-6 weeks after blooming ends, give your mums a light haircut. Cut back all stems to about 2-3 inches above the ground using clean, sharp shears. This removes all the old growth while leaving enough foliage for photosynthesis. I always sterilize my tools with rubbing alcohol between plants to prevent spreading any latent fungal spores.
After pruning, water deeply to help the plant recover. You'll notice new growth emerging from the center within 2-3 weeks—this is your signal that the plant is actively storing energy. If your climate still has warm spells, this regrowth is crucial for next year's blooms. In colder regions, this step can wait until after the first frost.
🪴 Step 3: Prepare for Winter Dormancy
Once all foliage has browned and died back naturally, it's time to prepare for winter. In USDA zones 5-7, mound 3-4 inches of mulch (like shredded leaves or straw) around the base of each plant. This protects roots from freeze-thaw cycles. I never use fresh wood chips—they can draw nitrogen from the soil as they decompose.
In zones 8 and above, you can leave mums unprotected or give them just a light covering. The key is to let the plants experience some cold—they need 4-6 weeks below 40°F to properly set buds for next spring. Water sparingly during dormancy, only when soil feels completely dry 2 inches below the surface.
☀️ Step 4: Springtime Revival and Fertilization
When you see new green growth in early spring (usually February-March depending on your zone), it's time to remove the winter mulch. Cut back any remaining dead stems to 1-2 inches above the ground. This encourages fresh, vigorous growth from the base. I always do this on a dry day to minimize disease risk from wet foliage.
Apply a balanced 10-10-10 fertilizer at half strength when you see 4-6 inches of new growth. This gives your mums a gentle boost without burning tender new leaves. Water thoroughly after fertilizing to help nutrients penetrate the soil. You'll notice leaves emerging more quickly and stems thickening—this is your mum preparing for another spectacular show.
Tips & tricks for reviving mum plants after blooming
These seasonal secrets will help you transform last year's mums into next season's showstoppers—without the guesswork.
Timing is Everything: The 4-6 week window after blooming for your first pruning (Step 2) is critical for energy storage. In mild climates, you might see new growth as early as 2-3 weeks after pruning—this is your plant's way of saying "I'm ready for next year!" Don't rush this process; the new growth signals the plant is actively storing carbohydrates in its roots, which fuels next season's blooms. If your area has warm fall weather, this regrowth is especially important—it gives your mums a head start on winter preparation.
Tool Prep Matters: Sterilizing your pruning shears with rubbing alcohol between plants (as mentioned in Step 2) isn't just about hygiene—it's about preventing latent fungal spores from hitching a ride to your next plant. I keep a small bottle of 70% isopropyl alcohol in my gardening toolkit specifically for this purpose. For extra protection, you can also wipe down tools with a bleach solution (1 part bleach to 9 parts water), but always rinse thoroughly with water afterward to prevent chemical buildup on your blades.
Mulch Selection Strategy: When preparing for winter dormancy (Step 3), avoid using fresh wood chips—they can draw nitrogen from the soil as they decompose, which weakens your mums when they need all their energy reserves. Instead, opt for shredded leaves, straw, or even pine needles. These materials provide insulation while slowly releasing nutrients back into the soil. In colder zones (5-7), aim for that 3-4 inch mound to create a protective barrier against freeze-thaw cycles that can damage roots.
Spring Revival Checklist: When you see those first signs of new green growth in spring (Step 4), do a quick health assessment before cutting back remaining stems. Healthy new growth should be vibrant green and firm to the touch. If you notice any yellowing or mushy stems, this could indicate rot from over-wintering issues. In this case, remove only the affected stems and monitor the plant closely as it revives. The 4-6 inch growth threshold before fertilizing is your plant's way of telling you it's ready for a nutrient boost—don't fertilize too early or you risk burning tender new leaves.
Pro Tips for What To Do With Mum Plants After They Bloom
- These seasonal secrets will help you transform last year's mums into next season's showstoppers—without the guesswork.
- Timing is Everything: The 4-6 week window after blooming for your first pruning (Step 2) is critical for energy storage.
- Tool Prep Matters: Sterilizing your pruning shears with rubbing alcohol between plants (as mentioned in Step 2) isn't just about hygiene—it's about preventing latent fungal spores from hitching a ride to your next plant.
Frequently asked questions
Can I cut mum plants back to the ground after they bloom?
Yes, but timing matters! Wait until late fall or early winter (after frost) to trim back to 2–3 inches above the soil. Cutting too early risks stunting next year’s growth. If you’re in a warm climate, wait until spring—just before new growth appears.
When is the best time to prune mums after blooming?
The ideal window is 6–8 weeks after flowering, ideally in late September or October. This gives plants time to recover before winter. If you miss this, spring pruning (March–April) works too—just avoid heavy cuts then to prevent stress.
What if my mum plants don’t rebloom after pruning?
Reblooming depends on variety, care, and climate. Hardy mums (like Chrysanthemum ‘Mum’) often return, but finicky types may not. Boost reblooming chances by:
- Fertilizing with low-nitrogen, high-phosphorus feed in early spring.
- Ensuring 6+ hours of sunlight daily.
- Avoiding overwatering (soil should dry slightly between waterings).
Should I divide my mum plants after they bloom?
Dividing is best done in early spring or fall, not immediately after blooming. Wait until next year—dig up clumps when they’re dormant (late winter/early spring), separate roots gently, and replant sections 12–18 inches apart. This rejuvenates plants and prevents overcrowding.
What do I do if my mum plant looks dead after pruning?
Don’t panic! Mums can look woody or bare post-pruning but may still be alive. Check for:
- Green shoots at the base (sign of life!).
- Firm stems (squishy = rot; hard = dormant).
- Mulch heavily to protect roots in winter.
Wrapping up and next steps
Don’t let your mums become a post-bloom mystery—now you’ve got the know-how to turn them into next year’s star performers! 🌸 With a little care, pruning, dividing, and proper storage, you’ll enjoy vibrant blooms for seasons to come. Ready to put your new skills to work?
Start by cleaning up your garden this weekend—grab those shears and give your mums the TLC they deserve. Check out our pruning guide for a step-by-step refresher, then share your progress with fellow gardening enthusiasts! 🌱