
Blooming
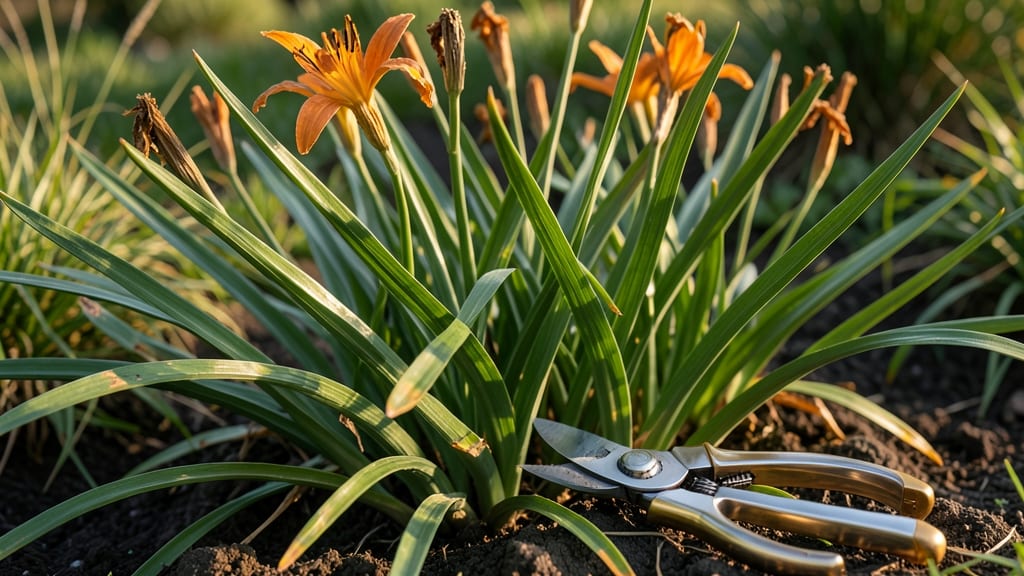
After daylilies finish their summer show, the real magic starts—this is when you decide whether next year’s blooms will be bigger, more abundant, or even new varieties. 🌿 I’ve learned the hard way that skipping these steps means weaker plants and fewer flowers, but with just a few simple moves, you’ll end up with lush foliage and a garden full of daylilies by fall.
The key is timing: deadhead spent blooms immediately to redirect energy, then wait until late summer or early fall to divide crowded clumps. This is when daylilies store nutrients for winter, so you’re not just cleaning up—you’re setting them up for a stronger comeback.
A quick check of the roots tells you everything you need to know about what to keep and what to replant. By mid-fall, you’ll have fresh divisions ready to share with neighbors or replant in spots where they’ll thrive.
The foliage stays green longer, the roots grow deeper, and next summer’s blooms arrive earlier and more vibrant. It’s the secret to turning one daylily into a dozen without buying a single new plant.
Works for both sunny borders and shady corners, and the same principles apply whether you’re dealing with heirlooms or modern hybrids. Let’s get those daylilies ready for next season!
📚 In This Guide
- What you need
- Instructions
- Tips and common mistakes
- Wrapping up and next steps
What you need
- ● Garden gloves (1 pair) – Heavy-duty gloves to protect your hands from thorns and dirt.
- ● Sharp garden shears or pruners – A pair with clean, sharp blades to make clean cuts (avoid dull tools that crush stems).
- ● Shovel or garden fork – A sturdy digging tool (like a transplant spade) to lift daylily clumps from the ground.
- ● Garden hose or watering can – To keep the soil moist before and after dividing.
- ● Compost or well-aged manure (5–10 gallons) – For enriching the soil before replanting.
- ○ Mulch (optional but recommended) – Shredded bark, straw, or pine needles (2–3 inches) to retain moisture and suppress weeds.
- ● Disinfectant spray (e.g., 1 part bleach to 9 parts water) – To sterilize pruners between cuts and prevent disease.
- ● Rooting hormone (powder or gel) – Speeds up root growth for replanted divisions (especially useful for larger clumps).
- ● Wheelbarrow or bucket – For hauling soil, compost, or divided clumps to new planting spots.
- ● Label markers or stakes – If you’re experimenting with new varieties, label them to track growth!
How to care for daylilies after blooming
Here’s the simple routine I follow to keep my daylilies thriving year after year.
🌱 Step 1: Deadhead and Prune for Better Blooms Next Season
Once your daylilies finish blooming, snip off the spent flower stalks 2-3 inches below the base. This prevents seed production, which drains energy from the plant. I use clean, sharp pruners to avoid damaging the leaves—this keeps the plant focused on storing nutrients for next year’s blooms.
Don’t cut the leaves unless they’re yellow or diseased. Healthy foliage continues photosynthesizing until late fall, feeding the roots for winter. If you see any brown or crispy leaves, trim those back to 1 inch above the soil line to prevent pests or disease from spreading.
✂️ Step 2: Divide Mature Clumps for Stronger Plants
Daylilies need dividing every 3-5 years when the center of the clump becomes bare. The best time to divide is in early spring or after blooming, when the plant is actively growing but not stressed. Dig around the clump with a spade, lifting it carefully to avoid breaking the roots.
Separate the clump into smaller sections, ensuring each has 3-5 fans (leaf clusters) and a good root system. Replant the divisions immediately or store them in a shady, cool spot for a day or two if needed. I always divide my largest clumps into 4-6 sections—this keeps them vigorous and prevents overcrowding.
💧 Step 3: Fertilize and Water for Recovery
After dividing, water the plants deeply to help roots establish. Use a balanced, slow-release fertilizer (like 10-10-10) to encourage regrowth. I apply about ½ cup per plant and water it in well. Avoid high-nitrogen fertilizers—they promote leafy growth at the expense of blooms.
Keep the soil consistently moist but not soggy for the first 2-3 weeks after replanting. Daylilies are drought-tolerant once established, but new divisions need steady moisture to recover. Mulch around the base with 2-3 inches of organic mulch to retain moisture and suppress weeds.
☀️ Step 4: Monitor for Pests and Prepare for Winter
Check your daylilies regularly for signs of pests like thrips or aphids, which love tender new growth. If you spot any, spray with a mild insecticidal soap or neem oil. I also keep an eye out for fungal diseases like leaf spot—remove any infected foliage immediately to protect the rest of the plant.
In late fall, cut back the leaves to 2-3 inches tall once they turn brown. This tidies up the garden and prevents pests from overwintering in the debris. Daylilies are hardy in most climates, but in colder zones, a light layer of mulch helps protect the roots from freezing temperatures.
Tips & tricks for perfect daylily post-bloom care
Between us, these small details make all the difference in keeping your daylilies thriving for seasons to come.
Tool Selection: I can't stress enough how much sharper pruners make this process. Dull blades crush stems and tear leaves, which stresses the plant. Invest in a good pair of bypass pruners—they'll glide through those spent flower stalks without a struggle. And always sterilize your tools with rubbing alcohol before use to prevent spreading disease from one plant to another.
Timing Secret: The window between blooming and fall is prime for division, but don't rush it. Wait until after the first frost if you're in a colder climate—this gives the plant time to store up energy for next year. I've learned this the hard way after dividing too early and watching my plants struggle through winter. The ideal time is right after blooming when the plant is still actively growing but before it starts preparing for dormancy.
Division Strategy: When you're separating those clumps, look for the natural divisions where roots meet. These are the cleanest break points and will establish fastest. I aim for sections with at least 3-5 fan clusters—this ensures each new plant has enough leaves to photosynthesize and roots to support growth. Don't worry about getting perfect divisions; even slightly smaller sections will thrive as long as they have some roots attached.
Pro Tips for What To Do With Daylilies After They Bloom
- Between us, these small details make all the difference in keeping your daylilies thriving for seasons to come.
- Tool Selection: I can't stress enough how much sharper pruners make this process.
- Timing Secret: The window between blooming and fall is prime for division, but don't rush it.
Frequently asked questions
Got questions about post-bloom daylily care? You’re not alone! Here are answers to the most common concerns—so you can keep your garden thriving without the guesswork.
Do I need to cut back daylilies after they bloom?
Yes! Deadheading (removing spent blooms) encourages more flowers and keeps your garden tidy. Trim only the faded flower stalks—never cut the fan-shaped leaves. For a cleaner look, snip stems to the first set of leaves or the base after blooms fade.
When is the best time to divide daylilies?
Divide daylilies in early spring (just as new shoots emerge) or early fall (6–8 weeks before frost). Avoid dividing in summer—it stresses plants when they’re already blooming. Choose a cool, overcast day to replant for better survival rates.
Can I leave daylilies in the ground after dividing?
Daylilies are hardy and adaptable. After dividing, replant clumps 12–18 inches apart in well-draining soil. Water thoroughly and mulch to retain moisture. They’ll bounce back quickly—just avoid heavy fertilizing right after transplanting.
Why aren’t my daylilies blooming as much this year?
Overcrowding, poor soil, or lack of sunlight are top culprits. Check these fixes:
- Divide clumps every 3–4 years to prevent congestion.
- Ensure they get 6+ hours of sun daily.
- Amend soil with compost for better nutrients.
- Fertilize lightly in spring with balanced 10-10-10 or bloom-boosting formula.
What if my daylily leaves turn yellow after blooming?
Yellow leaves often signal overwatering, nutrient deficiency, or disease. First, check drainage—daylilies hate soggy roots. If yellowing spreads, test soil pH (ideal: 6.0–6.5) and add iron or compost. Fungal issues? Remove affected leaves and improve airflow.
Can I save daylily seeds for next year?
Daylilies rarely produce viable seeds from blooms (they’re sterile hybrids!). For new varieties, propagate via division or tissue culture (sold by nurseries). If you spot seed pods, they’re likely from a different Hemerocallis species—try growing those instead!
Wrapping up and next steps
After your daylilies have put on their stunning show, don’t let them take a backseat—give them the care they deserve! With a little effort, you can divide, replant, and multiply your plants for even more vibrant blooms next season.
Whether you’re trimming spent flowers, dividing clumps, or prepping for winter, each step ensures your daylilies stay healthy and thrive year after year.
Ready to roll up your sleeves? Start by picking one task this weekend—whether it’s deadheading, dividing, or fertilizing—and watch your garden flourish with confidence! 🌸✨