
Blooming
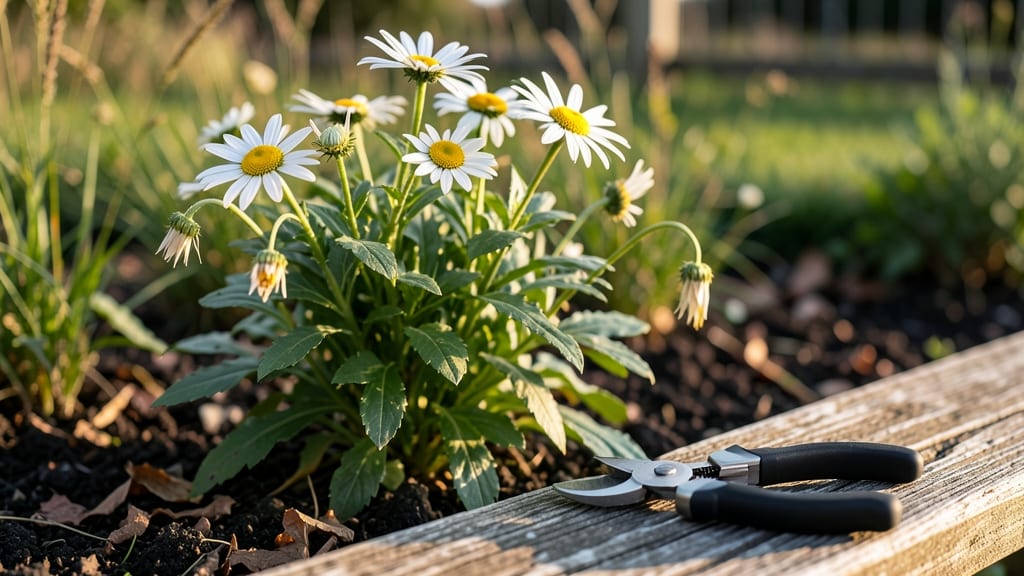
After daisies bloom, the real magic happens in how you care for them—whether you're extending their season or saving seeds for next year. ✨ Those spent blooms hold the key to more flowers, stronger plants, and even free seeds if you're patient.
I’ve turned my daisy patches from one-time showstoppers into year-round performers by mastering just a few simple steps after the petals fade.
The first move? Deadheading—snipping off those old blooms before they go to seed. Grab clean pruners (or your fingers, if you’re gentle) and cut just above the leaf clusters where new buds form. For perennials like Shasta daisies, this keeps them blooming until frost.
Annuals like Gerbera daisies? Deadhead too, but save a few seed heads if you want more next season. The goal? Redirect energy from seeds to fresh flowers.
What you’ll end up with is a daisy patch that blooms 3-4 weeks longer than neighbors who let their plants go dormant. Plus, those spent blooms? Toss them in the compost or let them self-seed in a wildflower area.
My garden now has daisies popping up in unexpected spots—nature’s way of saying "thank you" for a little care.
Works for both sunny borders and wildflower meadows, whether you’re in a hot-summer zone or a cooler climate. The only rule? Stay consistent, and your daisies will reward you with bold color and effortless beauty all season long.
📚 In This Guide
- What you need
- Instructions
- Tips and common mistakes
- Wrapping up and next steps
What you need
- ● Pruning shears or sharp scissors – Clean, sharp tools (preferably sterilized with rubbing alcohol) to trim spent blooms and stems. Size: 4-6 inches for precision.
- ○ Garden gloves – A pair of nitrile or leather gloves to protect your hands from thorns or dirt. Optional: Waterproof gloves if working in wet conditions.
- ● Compost bin or bucket – A 5-gallon bucket or designated compost pile to collect deadheaded flowers and stems (avoid diseased plants).
- ● Potting soil or seed-starting mix – Well-draining, sterile mix (e.g., 50/50 blend of peat moss and perlite) if propagating from cuttings. Quantity: 1-2 cubic feet per batch.
- ○ Rooting hormone (optional) – A gel or powder (e.g., Clonex or Hormex) to boost success rates for cuttings. Note: Only needed for propagation.
- ● Small pots or trays – 4-inch diameter pots or seed trays with drainage holes for propagating cuttings. Quantity: 1 per cutting.
- ○ Mulch (optional) – Shredded bark, straw, or compost to retain moisture and suppress weeds around daisy beds.
- ● Spray bottle with water – For misting cuttings or newly planted seeds to maintain humidity.
- ● Dried flower press – If you love preserving daisies for crafts or arrangements.
- ● Floral wire or ribbon – For creating bouquets or dried flower arrangements.
- ● Label markers – To tag propagated cuttings or new plantings if you’re experimenting with varieties.
- ● Fertilizer (low-nitrogen) – A balanced 10-10-10 or bloom-boosting 5-10-10 fertilizer to revive daisies after deadheading. Apply: Every 4-6 weeks.
- ● Hairspray or clear sealant – For preserving dried daisies in arrangements (spray lightly on stems).
Step-by-step guide to deadheading daisies for continuous blooms
Here’s how I keep my daisies flowering all season—no fancy tools, just simple techniques.
✂️ Step 1: Identify the Right Time to Deadhead
Wait until the daisy flower head starts to fade but hasn’t yet turned brown or seed. You’ll see the petals droop slightly or the center turn dull yellow—this is your cue. Deadheading too early removes blooms that could still attract pollinators, while waiting too long lets the plant waste energy on seed production instead of new flowers.
I like to work on a dry morning when dew has evaporated. This prevents soil from sticking to your hands or tools, making cleanup easier. If you’re unsure, pinch off a few spent blooms and watch your daisies respond—they’ll reward you with fresh buds within days.
✂️ Step 2: Use the Right Technique for Clean Removal
Grasp the faded bloom between your thumb and forefinger and give it a firm twist to snap it off cleanly at the base. Avoid cutting stems—this can damage the plant’s energy flow. If you prefer shears, snip just above a leaf node or side bud to encourage branching and more blooms.
I always deadhead at the stem’s base, not halfway up. This prevents unsightly stubs and ensures the plant directs its energy where it matters. For larger clumps, I work in sections to avoid overwhelming myself—daisies can produce hundreds of blooms, so pace yourself!
🌱 Step 3: Encourage Bushier Growth for More Blooms
After deadheading, take a moment to inspect the plant’s structure. If stems look leggy or sparse, pinch back the tips of new growth to encourage bushier, fuller plants. This simple trick redirects energy from vertical growth to producing more side shoots and flowers.
I also fertilize lightly after deadheading, using a balanced 10-10-10 formula. Daisies are forgiving, but a little boost helps them bounce back faster. Water at the base—never overhead—to keep foliage dry and prevent fungal issues.
🌿 Step 4: Monitor for Pests or Disease
While you’re deadheading, keep an eye out for signs of stress like yellowing leaves, black spots, or chewed petals. Daisies rarely have major issues, but aphids or powdery mildew can sneak in if the plant is overcrowded or waterlogged. Remove any affected leaves immediately and adjust care as needed.
I’ve found that daisies left to go to seed attract fewer pests, so deadheading consistently keeps them healthy. If you notice wilting despite good care, check the roots—overwatering or poor drainage can turn a thriving plant into a sad one overnight.
⏰ Step 5: Plan for Seasonal Care Adjustments
As summer winds down, reduce deadheading frequency. By late August, let some blooms go to seed—they’ll provide food for birds and beneficial insects while the plant prepares for dormancy. In fall, cut back stems to 2-3 inches above the ground, leaving the basal foliage intact.
I mark my calendar for these adjustments—skipping this step can lead to weak growth next spring. Mulch lightly around the base after cutting back to protect roots from winter temperature swings. With this routine, my daisies return stronger every year.
Tips & tricks for perfect daisy deadheading
Here’s what nobody tells you about keeping your daisies blooming like clockwork—these little tweaks make all the difference.
Timing is Everything: I’ve learned the hard way that deadheading at the right moment is everything. Look for that subtle droop in the petals or a slight yellowing in the center—this is your exact cue. If you wait until the flower turns brown, you’re too late, and the plant will focus on seeds instead of new blooms. I’ve seen daisies go from a single spent bloom to a fresh one in just three days when deadheaded at the perfect time.
Tool-Free Technique: You don’t need fancy pruners—just your fingers! Grasp the faded bloom firmly and twist it off at the base. This method prevents damaging the stem and keeps the plant happy. I’ve been using this technique for years, and it’s saved me from buying unnecessary tools. If you’re using shears, cut just above a leaf node to encourage more branching and blooms.
Seasonal Adjustments: In late summer, I ease up on deadheading. By August, I let some blooms go to seed—they feed birds and beneficial insects while the plant prepares for dormancy. This small change has kept my daisies thriving year after year. In fall, I cut back stems to about 2-3 inches above the ground, leaving the basal foliage intact to protect the roots through winter.
Pest Prevention: While deadheading, keep an eye out for signs of stress like yellowing leaves or black spots. Daisies rarely have major issues, but aphids or powdery mildew can sneak in if the plant is overcrowded. I’ve found that removing affected leaves immediately and keeping the foliage dry prevents most problems. A light application of neem oil can also work wonders if you spot early signs of pests.
Pro Tips for What To Do With Daisies After They Bloom
- Here’s what nobody tells you about keeping your daisies blooming like clockwork—these little tweaks make all the difference.
- Timing is Everything: I’ve learned the hard way that deadheading at the right moment is everything.
- Tool-Free Technique: You don’t need fancy pruners—just your fingers!
Frequently asked questions
Got questions about keeping your daisies blooming or what to do with those spent flowers? Here are some of the most common queries—plus quick, actionable answers to keep your garden thriving!
Do I have to deadhead daisies after they bloom?
Not always—but it’s highly recommended! Deadheading (removing spent blooms) encourages more flowers by redirecting the plant’s energy toward new growth instead of seed production. For perennial daisies, like gerbera or Shasta daisies, deadheading keeps them blooming all season. For annuals (like sweet alice), it can extend their lifespan by weeks!
When is the best time to deadhead daisies?
Strike while the iron’s hot—right after the petals wilt and turn brown! Use clean pruners or your fingers to snip or pinch off the entire flower head (including the seed pod) just above a set of leaves. Morning deadheading is ideal because the stems are often still turgid with water, making them easier to handle.
What if I miss deadheading and the daisy goes to seed?
No stress! If you let a few daisies go to seed, you might get self-seeding next year (a free show!). However, if the plant looks tired or overcrowded, trim back the stems by 1/3 to promote fresh growth. Pro tip: If you’re saving seeds for next season, let 2-3 flowers mature fully—then deadhead the rest!
Can I use deadheaded daisy stems for anything else?
Get creative with your clippings:
- Floral arrangements: Wilted daisy stems still add texture—try them in dried bouquets or pressed flower art.
- Compost: Chop up stems and add them to your compost pile for nutrient-rich soil.
- Herbal tea (for some varieties):strong> Chrysanthemum daisies (like ‘Painted Lady’) can be brewed into a calming tea (check safety first!).
- Natural dye: Experiment with dyeing fabrics or paper using daisy petals (yellow hues work best).
Why are my daisies not reblooming after deadheading?
Here are the top culprits:
- Lack of sunlight: Daisies need 6+ hours of sun daily—move them if they’re in shade.
- Over-fertilizing: Too much nitrogen = lush leaves, fewer blooms. Use a balanced bloom booster instead.
- Water stress: Irregular watering causes buds to drop. Keep soil evenly moist (but not soggy).
- Disease or pests: Check for powdery mildew (white dust) or aphids. Treat with neem oil if needed.
If the issue persists, your daisies might be perennials nearing dormancy—cut back stems in fall and mulch to protect roots.
Wrapping up and next steps
Don’t let your daisies fade into forgetfulness—with a little care, they’ll reward you with vibrant blooms all season long! Whether you’re deadheading, preserving, or repurposing, each step keeps your garden thriving and your creativity flowing. 🌼✨
Ready to put these tips into action? Grab your shears, pick your favorite method, and give your daisies the love they deserve. Your garden—and future blooms—will thank you!