
Blooming
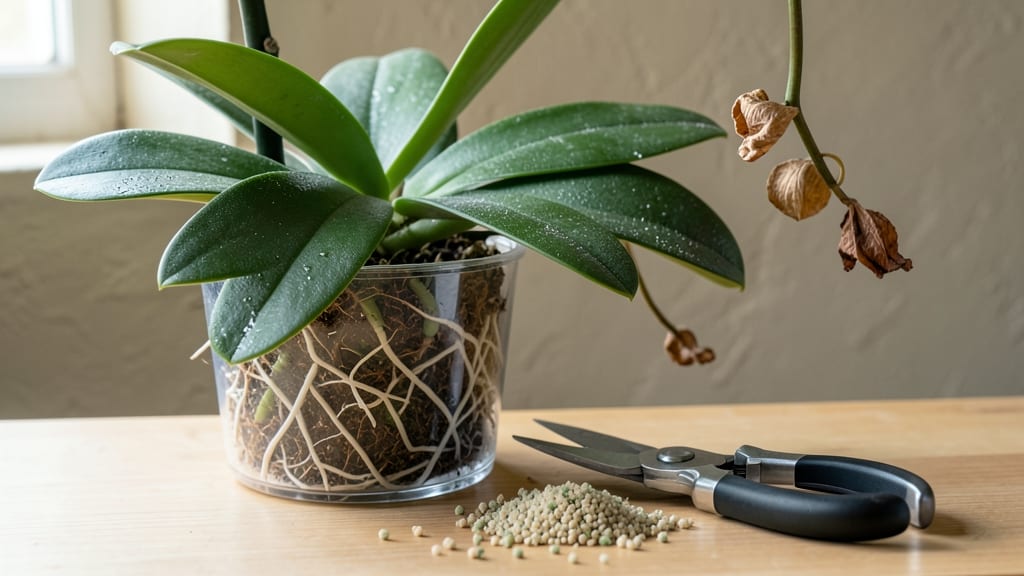
What to do with an orchid after blooming determines whether it lingers as a one-time showstopper or returns year after year—here’s how to coax reblooms from those spent spikes. ✨ I’ve nursed my own orchids back from sad, spent spikes to vibrant rebloomers, and the secret starts with knowing exactly which stems to cut and when to feed them.
Most people stop caring after the flowers fade, but that’s when the real work begins for next season’s showstopper blooms.
The first step is pruning the flower spike—but only if it’s truly dead. A green, firm spike can still produce new blooms, while a dry, brown one should be trimmed down to the base.
After pruning, adjust your watering to once a week (less in winter) and switch to a balanced fertilizer every 4-6 weeks. This keeps roots healthy without overwhelming the plant.
By summer, you’ll see new growth—thick, green shoots signaling the plant’s energy is shifting back to blooming. Repot every 2-3 years in fresh bark mix to prevent rot, and move your orchid to bright, indirect light (no direct sun).
With this routine, my orchids now bloom twice a year instead of once.
Works for Phalaenopsis, Cattleya, or Dendrobium—just adjust timing for your orchid’s natural cycle. The key is consistency: prune once, feed regularly, and watch your orchid transform from a post-bloom letdown to a year-round star.
📚 In This Guide
- What you need
- Instructions
- Tips and common mistakes
- Wrapping up and next steps
What you need
- ● Pruning shears or clean, sharp scissors – Sterilized with rubbing alcohol to prevent bacterial infections.
- ● Well-draining orchid potting mix – Specifically formulated for epiphytic orchids (e.g., bark, sphagnum moss, charcoal blend).
- ● A clean pot with drainage holes – Slightly larger than the current one (1–2 inches in diameter).
- ● Balanced orchid fertilizer (20-20-20 or 10-10-10) – Diluted to half-strength for post-bloom care.
- ● Spray bottle with room-temperature water – For gentle hydration (avoid tap water if it’s heavily chlorinated).
- ● Household items for sterilization – Rubbing alcohol (70% or higher) and paper towels.
- ● Orchid-specific repotting kit – Includes tools like a mounting board or slotted pot for air circulation.
- ● Root stimulator or seaweed extract – Boosts regrowth after pruning (follow product instructions).
- ● Humidity tray or pebble tray – If your home has dry air (ideal for orchids!).
- ● Grow lights (LED or fluorescent) – For low-light areas (12–14 hours/day).
- ● Journal or plant tracker – To log pruning dates, fertilizer schedules, and blooming cycles.
Step-by-Step instructions for orchid post-bloom care
Here's how I transform my orchids from spent blooms to thriving plants ready for next season's showstopper flowers.
✂️ Step 1: Prune the Spent Flower Spike
Once all blooms have fully faded and the spike turns brown, use sterilized pruning shears to trim the spike 1 inch above the third node from the base. This is where new growth can emerge. I always disinfect my shears with rubbing alcohol first—orchids are sensitive to bacterial infections, and clean cuts heal faster.
Look for the small bumps along the spike—these are nodes where potential new growth can develop. Cutting above the third node gives your orchid the best chance to produce either a new flower spike or vegetative growth. If the spike is completely dried and papery, you can trim it right at the base instead.
💧 Step 2: Adjust Watering and Humidity
Reduce watering to every 7-10 days once the flower spike is removed. Orchids need less moisture without blooms to support. I check by sticking my finger 1 inch into the potting mix—if it feels dry, that's when to water. Overwatering now causes root rot, which kills orchids quickly.
Maintain humidity around 40-60% by misting lightly or placing the pot on a tray with pebbles and water. My orchids sit on a decorative pebble tray with just enough water to create humidity without submerging the roots. Avoid cold water—always use room-temperature or slightly warm water to prevent shock.
☀️ Step 3: Provide Optimal Light and Temperature
Move your orchid to bright, indirect light—think east or west-facing windows. Too much direct sun now causes leaf burn, while too little light means no energy for next year's blooms. I rotate my orchids a quarter turn weekly so they grow evenly toward the light source.
Keep daytime temperatures around 65-75°F and nighttime temps 55-65°F. A 10°F difference between day and night encourages flower bud formation. If your home stays too warm at night, consider moving the orchid to a cooler room or near a window with good airflow.
🌿 Step 4: Fertilize for Recovery and Growth
Switch to a balanced orchid fertilizer (like 20-20-20) diluted to half strength. Feed every 4-6 weeks during the recovery period. I use liquid fertilizer because orchids absorb nutrients through their roots and leaves. Never fertilize when the mix is dry—always water first, then fertilize.
Look for new growth emerging from the base or along the nodes where you pruned. This is your orchid's way of storing energy for next season. If you see fresh, vibrant green leaves, your care is working. Yellowing leaves mean you're overwatering or the roots are rotting—reduce watering immediately and check the roots for mushy spots.
⏰ Step 5: Monitor for New Flower Spikes
After 8-12 weeks of proper care, watch for new flower spikes emerging from the base. These will look like small, tight buds on a thin stem. This is your orchid's signal that it's ready to bloom again. I keep a small notebook to track when spikes appear—it helps me predict next year's bloom time.
If no spikes appear by late summer, consider giving your orchid a slight chill period of 50-55°F at night for 2-3 weeks. Some orchids need this temperature drop to trigger blooming. Just don't let it get colder than 50°F—that can damage the plant.
Tips & tricks for orchid post-bloom revival
Transforming your orchid from a spent bloom to a thriving plant takes attention to detail—here's how to avoid common pitfalls and maximize next season's potential.
Pruning Precision: When trimming that spent spike in Step 1, count those nodes carefully—each one represents a potential growth point. If you accidentally cut below the third node, don't panic! Simply trim back to just above the next visible node. I've saved many orchids this way, though it does reduce the growth potential slightly. The key is to make clean cuts at a 45-degree angle to prevent water from pooling and causing rot.
Humidity Hack: Maintaining that 40-60% humidity range in Step 2 can be tricky in dry climates. I've found that grouping orchids together creates a microclimate that naturally boosts humidity. Place them on a tray filled with pebbles and just enough water to touch the bottom—this passive humidifier works wonders without risking root rot. Grouping also makes it easier to monitor moisture levels consistently across all plants.
Lighting Strategy: The bright, indirect light recommendation in Step 3 is crucial—direct sun can scorch leaves while too little light starves the plant. I've noticed that east-facing windows provide perfect morning light without the harsh afternoon sun. For west-facing windows, use a sheer curtain to diffuse the light. If your home lacks good natural light, consider a grow light with a full spectrum—orchids need that blue light spectrum for optimal growth.
Fertilizer Timing: The 4-6 week feeding schedule in Step 4 works because orchids absorb nutrients slowly during their recovery phase. I've learned the hard way that over-fertilizing now can burn delicate roots. Always dilute that fertilizer to half strength and flush the mix with plain water every 2-3 months to prevent salt buildup. This simple maintenance step makes a surprising difference in long-term plant health.
Pro Tips for What To Do With An Orchid After Blooming
- Transforming your orchid from a spent bloom to a thriving plant takes attention to detail—here's how to avoid common pitfalls and maximize next season's potential.
- Pruning Precision: When trimming that spent spike in Step 1, count those nodes carefully—each one represents a potential growth point.
- Humidity Hack: Maintaining that 40-60% humidity range in Step 2 can be tricky in dry climates.
Frequently asked questions
Got questions about post-bloom orchid care?
You’re not alone! Here are answers to the most common concerns—so you can keep your orchid thriving and ready for its next stunning show.
Do I need to cut off the blooming stem after an orchid flowers?
Not always! If the stem is green and healthy, leave it—it may produce new blooms or baby orchids (keikis). Only trim dead or brown stems just above a node (a small bump) using sterilized scissors. This encourages future growth.
How soon after blooming should I prune my orchid?
Wait until the flowers fully wilt and the stem turns yellow or brown. Pruning too early can stress the plant, while waiting too long risks pests or rot. Aim to trim within 1–2 weeks of the last bloom fading.
Should I change my orchid’s watering routine after blooming?
Yes! Reduce watering slightly—overwatering stresses the plant. Let the potting mix dry out between waterings (about 5–7 days for most orchids). Use room-temperature water and avoid soggy roots to prevent rot.
Can I repot my orchid right after it blooms?
Not ideal! Wait until spring or early summer (active growth phase) to repot. This gives your orchid time to recover. If repotting is urgent (e.g., root rot), do it gently and avoid disturbing new growth.
Will my orchid bloom again if I don’t cut the stem?
Maybe! Some orchids (like Phalaenopsis) may rebloom on the same stem if it’s healthy. Others (e.g., Cattleyas) need the stem removed to trigger new blooms. Observe your orchid’s habits—if it’s a rebloomer, monitor for buds!
Wrapping up and next steps
Caring for your orchid after blooming doesn’t have to be intimidating—just follow these simple steps to prune, feed, and revive your plant for a stunning comeback! With patience and the right techniques, you’ll soon be rewarded with even more vibrant blooms next season. 🌸
Now that you’re armed with the know-how, take action today—give your orchid the TLC it deserves, and enjoy watching it thrive! Ready to explore more orchid care tips? Your next blooming masterpiece starts here! ✨