
Blooming
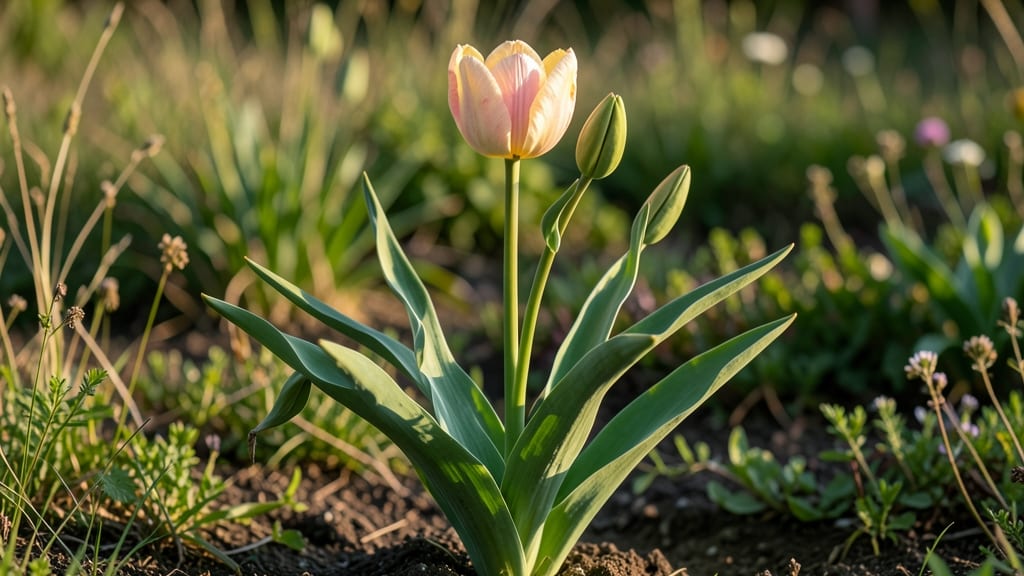
Your tulips' post-bloom care determines next year's showstopper display. ✨ After those vibrant blooms fade, most gardeners make the same mistake—cutting stems too soon or ignoring the foliage. But those yellowing leaves are actually powering up next season's flowers deep in the soil.
Here's the secret: leave the stems until they turn completely brown and crispy, even if it takes 6-8 weeks. This process lets the bulbs store energy for next year.
While they're doing that, give them a light feeding with bulb-specific fertilizer or composted manure. Water only when the top inch of soil feels dry—overwatering now leads to rot.
By late summer, you'll see the stems finally wither. That's your cue to trim them back and let the soil dry slightly before winter. For crowded clumps, now's the time to lift and divide bulbs—though most gardeners skip this and still get great results.
The key is patience; next spring's blooms reward every careful step you take now.
This method works for all tulip varieties, from classic reds to fancy frilled types. The only exception? If you're growing species tulips, they prefer different care—but that's a story for another time. Let's get those bulbs ready for their next grand performance.
📚 In This Guide
- What you need
- Instructions
- Tips and common mistakes
- Wrapping up and next steps
What you need
- ● Pruners or clean, sharp scissors – 1 pair (sterilized with rubbing alcohol to prevent disease).
- ● Garden gloves – 1 pair (to protect hands from thorns and soil).
- ● Well-draining potting mix – 2–3 gallons (for repotting or dividing roots). Mix should include perlite or sand (20–30%) for aeration.
- ● 5-gallon bucket or wheelbarrow – 1 (for transporting soil/roots).
- ● Watering can or hose with adjustable nozzle – 1 (for gentle watering).
- ● Balanced fertilizer (10-10-10 or 5-10-10) – Small bag (follow label for dilution ratios).
- ● Mulch (straw, shredded bark, or compost) – 1–2 inches (to retain moisture and regulate soil temp).
- ● Hand trowel – 1 (for digging and dividing roots gently).
- ○ Garden fork – 1 (optional, for loosening compacted soil).
- ● Spray bottle with water – 1 (to mist roots during repotting).
- ○ Rooting hormone (optional) – Small tube (speeds up regrowth if dividing bulbs).
- ● Label markers & stakes – 5–10 (to track tulip varieties if mixing types).
- ○ Drip irrigation kit (optional) – 1 (for consistent moisture post-replanting).
Step-by-Step instructions for reviving tulips after bloom
Here's how to nurse your tulips back to strength so next spring's blooms outshine this year's.
✂️ Step 1: Deadhead and Cut Back Properly
As soon as the tulip blooms fade completely, snip the flower stalk 1 inch above the first set of leaves using clean, sharp pruners. This prevents seed production, which drains energy from the bulb. I always use sterilized tools to avoid spreading disease between plants.
Leave the fan-shaped leaves alone—they're photosynthesizing now, storing energy for next year's bloom. If you remove them too early, the bulb won't have enough reserves. You'll know you've done it right when only the healthy green leaves remain standing.
💧 Step 2: Water and Fertilize for Bulb Recovery
Keep the soil consistently moist but not soggy for 4-6 weeks after blooming. Water deeply when the top 2 inches of soil feel dry—this encourages the bulb to rebuild its energy stores. I use a soaker hose to deliver water right at the base without wetting the leaves.
Apply a low-nitrogen, high-phosphorus fertilizer (like 5-10-10) right after deadheading. This supports root and bulb development rather than leafy top growth. Follow package instructions for application rates—over-fertilizing now can actually harm the bulb.
☀️ Step 3: Gradually Reduce Care as Leaves Yellow
When the leaves start turning yellow about 6-8 weeks after blooming, that's your signal to taper off watering. Let the soil dry slightly between waterings, but don't let it become completely dry. You want the bulb to finish its energy storage cycle naturally.
Stop fertilizing entirely once the leaves yellow. The bulb needs this natural process to harden off for dormancy. You'll see the leaves eventually collapse and die back completely—this is normal and necessary for next year's blooms.
⏰ Step 4: Prepare for Dormancy and Next Season
Once all the foliage has died back completely, stop watering entirely. The dormant bulb needs dry conditions to rest. In colder climates, the ground will naturally provide insulation, while warmer areas may need a 2-3 inch layer of mulch to protect the bulbs.
Mark the planting location so you don't disturb the bulbs when preparing the bed for next season. Tulips typically need 12-14 weeks of dormancy before they'll bloom again. This resting period is crucial for developing strong, vibrant flowers next spring.
Tips & tricks for reviving tulips after bloom
Common pitfalls—and how to sidestep every one when bringing your tulips back to life.
Precision Cutting: When you're ready to deadhead in Step 1, make sure to use clean pruners and cut the flower stalk exactly 1 inch above the first set of leaves. This precise measurement is crucial—cutting too high removes the leaves that are still photosynthesizing, while cutting too low can leave the bulb vulnerable to disease. I've learned this the hard way after accidentally removing too much foliage and watching my tulips struggle the following spring.
Watering Wisdom: During those critical 4-6 weeks after blooming in Step 2, the key is consistency. Use your finger to check the top 2 inches of soil—it should feel moist but not soggy. Overwatering can lead to bulb rot, while underwatering starves the bulb of the energy it needs. A soaker hose works best because it delivers water directly to the roots without wetting the leaves, which helps prevent fungal diseases.
Fertilizer Finesse: When applying your low-nitrogen, high-phosphorus fertilizer after deadheading, follow the package instructions precisely. I can't stress enough how important this is—over-fertilizing now can actually harm the bulb by encouraging excessive leaf growth at the expense of root and bulb development. Think of this as a targeted energy boost for the roots rather than a general growth stimulant.
Dormancy Preparation: As you approach the 12-14 week dormancy period in Step 4, resist the urge to water or fertilize once the leaves have completely died back. This might feel counterintuitive, but it's essential for the bulb to harden off properly. In warmer climates, that 2-3 inch layer of mulch can make all the difference in protecting the bulbs during their crucial resting period.
Pro Tips for Tulips After Bloom
- Common pitfalls—and how to sidestep every one when bringing your tulips back to life.
- Precision Cutting: When you're ready to deadhead in Step 1, make sure to use clean pruners and cut the flower stalk exactly 1 inch above the first set of leaves.
- Watering Wisdom: During those critical 4-6 weeks after blooming in Step 2, the key is consistency.
Frequently asked questions
Got questions about what to do with your tulips after they’ve finished blooming? You’re not alone! Here are some of the most common concerns—and their solutions—to keep your garden thriving for next season.
Do I cut back tulips after they bloom?
Yes! Once your tulips finish blooming, remove the flower stalk (but leave the foliage) to redirect energy back to the bulb. Cutting too early can weaken the bulb, while leaving dead blooms may attract pests. Aim to trim stalks after they yellow—usually 6–8 weeks post-bloom.
How long should I wait before cutting back tulip leaves?
Never cut tulip leaves until they’ve turned brown and crispy—this ensures the bulb stores nutrients for next year. If you remove leaves too soon, your tulips may skip blooming entirely. Patience pays off! Most gardeners wait until late summer or early fall.
Can I replant tulip bulbs after they bloom?
After the foliage dies back, dig up bulbs (if desired) and replant them in a well-draining spot with full sun. For perennial blooms, leave them in the ground—they’ll naturalize over time. Just avoid disturbing them until the leaves fade completely.
Why are my tulip bulbs not blooming the next year?
No blooms? Check these fixes:
- Improper care: Cutting leaves too early or overwatering.
- Poor sunlight: Tulips need 6+ hours of sun daily.
- Overcrowding: Divide bulbs every 3–4 years to prevent competition.
- Pests/disease: Squirrels or tulip fire (a fungal issue) can sabotage bulbs.
What’s a good alternative if tulips don’t rebloom?
Try these low-maintenance, reblooming perennials for year-after-year color:
- Daffodils (hardier than tulips!)
- Alliums (dramatic purple globes)
- Daylilies (tough and prolific)
- Peonies (luxurious and long-lived)
Wrapping up and next steps
Caring for your tulips after they bloom is all about patience and the right techniques—your efforts will pay off with vibrant blooms next season!
By deadheading, fertilizing, and protecting their roots, you’re setting the stage for a stunning comeback. Don’t let their post-bloom dormancy fool you—these beauties are just recharging!
Ready to turn your garden into a tulip paradise? Start by marking your calendar for next spring and repeat these simple steps. Your future self (and your neighbors!) will thank you. 🌸✨