
Blooming
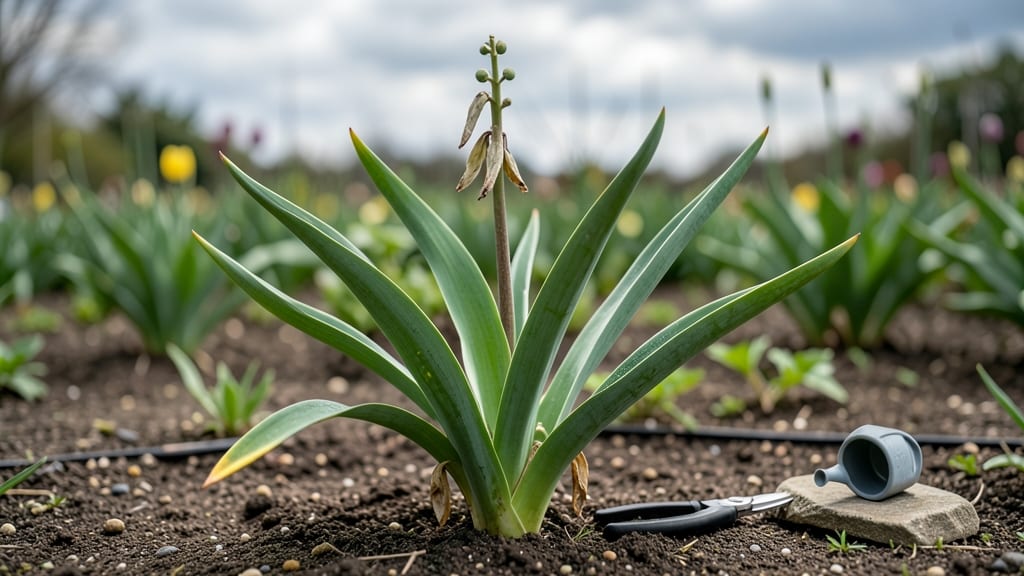
The real work begins now with your tulip foliage after bloom—those stems are storing energy for next spring’s showstopper display. Leaving those yellowing leaves alone is the secret to a bigger, more vibrant show next year, as the bulb’s reserves build underground.
I’ve learned the hard way that cutting them too soon means smaller (or no) blooms next year.
The key is patience and timing: wait until the foliage turns completely brown and crispy before trimming. This usually happens by late summer, depending on your climate. Snip at the base with clean shears, but leave a little stub—about an inch—to avoid disturbing the bulb.
Over-trimming weakens the bulb’s reserves, and you’ll regret it when spring rolls around.
Yellowing leaves mid-summer? Don’t panic. This is normal as the plant redirects energy to the bulb. Just avoid fertilizing or watering heavily—you’re not growing flowers anymore, you’re nurturing next year’s potential. A healthy bulb means bigger blooms in spring, and that’s worth the wait.
This method works for all tulips, whether you’re growing in garden beds, containers, or even those stubborn bulbs that refuse to bloom. The payoff? Stronger stems, more vibrant flowers, and a garden that keeps delivering year after year. Let’s make next spring your best yet.
📚 In This Guide
- What you need
- Instructions
- Tips and common mistakes
- Wrapping up and next steps
What you need
- ● Pruning shears or sharp scissors – Clean, sterilized, and sharp (to avoid crushing stems).
- ● Garden gloves – Protect your hands from thorns and dirt.
- ● Compost bin or bucket – For collecting healthy foliage and debris (5+ gallon capacity recommended).
- ● Balanced, water-soluble fertilizer – Look for a 10-10-10 or 20-20-20 NPK ratio (1–2 cups per 100 sq ft).
- ○ Mulch (optional but helpful) – Shredded bark, straw, or compost (2–3 inches thick).
- ● Watering can or hose with a gentle spray nozzle – For deep hydration.
- ● Labeling tags or markers – To track tulip varieties if saving bulbs.
- ● Bulb fertilizer – High in phosphorus (e.g., 5-10-10) to encourage root growth.
- ● Epsom salt – 1 tbsp dissolved in a gallon of water for magnesium boost (great for yellowing leaves).
- ● Dried flower press or vase – To preserve blooms or stems for crafts.
- ● Compost thermometer – If repurposing foliage into compost (ideal temp: 130–160°F).
- ● Plant-based dye kits – For creative projects like natural fabric dyes from tulip petals.
Step-by-Step guide to reviving tulip foliage after bloom
Here’s how to turn last year’s spent tulips into next season’s star performers—no guesswork, just proven techniques.
🌱 Step 1: Wait Until Foliage Fully Yellows
After tulips bloom, resist the urge to cut back stems immediately. Instead, let the foliage yellow naturally—this is how the plant stores energy for next year’s flowers. You’ll know it’s ready when the leaves turn a uniform golden-brown, typically 4-6 weeks after blooming. This process, called photosynthesis, fuels the bulb’s reserves.
If you cut stems too soon, the bulb won’t store enough energy, and you’ll get fewer or smaller blooms next season. I always mark the date when tulips finish blooming on my calendar to track progress. Patience here pays off—skipping this step means weaker growth down the line.
✂️ Step 2: Cut Back Stems at the Right Time
Once the foliage is completely yellow and crispy, it’s time to trim. Use clean, sharp pruners to cut stems back to about 2 inches above the soil line. This removes dead growth while leaving enough leaf material to feed the bulb. Avoid cutting too low—you want to preserve the base where energy absorption happens.
I like to do this on a dry morning when the stems are upright. If you wait until rain or dew, the cut edges may rot. After trimming, leave the clippings on the compost pile—they’ll break down quickly and return nutrients to the soil.
💧 Step 3: Water Deeply and Fertilize for Bulb Recovery
After cutting back, give the area a deep watering to encourage the bulb to absorb remaining nutrients. Focus on the root zone, not the foliage, and water until the soil is 6 inches deep and evenly moist. This helps the bulb replenish its energy stores before dormancy. Overwatering now can lead to rot, so let the top inch of soil dry out between waterings.
Apply a balanced, low-nitrogen fertilizer (like 10-10-10) at half strength to support bulb recovery. I scatter the granules around the base and water them in thoroughly. This gives the bulb a gentle nutrient boost without overstimulating new growth. Skip high-nitrogen fertilizers—they encourage leafy growth at the expense of flower production.
☀️ Step 4: Mulch and Prepare for Dormancy
Spread a 2-3 inch layer of organic mulch (like shredded leaves or straw) over the soil to protect the bulbs as they enter dormancy. This insulates the ground, regulates temperature, and retains moisture. Avoid thick mulch layers—too much can suffocate the bulbs. I use a rake to spread it evenly, keeping it 1-2 inches away from the stem bases to prevent rot.
Leave the mulch in place until early spring. It’ll break down slowly, adding organic matter to the soil. In late fall, before the first hard frost, add a top-dressing of compost to further enrich the soil. This sets the stage for stronger blooms next season.
🌿 Step 5: Monitor and Plan for Next Year
In early spring, remove the old mulch and check for signs of new growth. If the area looks bare, gently scratch the soil surface with a trowel—sometimes shoots are hidden beneath the surface. Once you see 2-3 inches of green foliage, it’s time to water lightly and fertilize again with a bulb-specific formula.
Here’s the thing—tulips perform best in full sun, so if your garden spot gets less than 6 hours of sunlight daily, consider relocating them. I’ve found that tulips in partial shade still bloom but produce fewer flowers. Keep an eye out for pests like tulip bulbs flies and treat with neem oil if needed.
Tips & tricks for perfect tulip foliage revival
Real talk: Skipping the foliage stage after tulips bloom is the fastest way to weaker blooms next year. Here’s how to get it right the first time.
Patience Pays Off: Those 4-6 weeks of letting foliage yellow naturally are non-negotiable. I’ve seen gardeners rush this step and end up with half the blooms the following spring. Mark your calendar the day tulips finish blooming—this helps track the exact timing. If you’re in a cooler climate, the process may take closer to 6 weeks rather than 4 weeks.
Pruning Precision: When cutting back stems in Step 2, aim for that 2-inch mark above soil level—any lower and you risk damaging the bulb’s energy reserves. Use a clean, sharp pruner to make crisp cuts, and always do this on a dry morning. I’ve learned the hard way that wet stems lead to rot at the cut edges, which can spread to the bulb.
Watering Wisdom: That 6-inch deep watering in Step 3 isn’t just about moisture—it’s about giving bulbs one last chance to absorb nutrients. Use a soil probe or long screwdriver to check moisture depth. If the soil feels dry at 6 inches, water again. Overwatering now is worse than underwatering—it can cause bulb rot before dormancy sets in.
Mulch Matters: The 2-3 inch layer of organic mulch in Step 4 does more than insulate—it prevents soil temperature swings that can stress bulbs. I’ve found that straw breaks down slower than shredded leaves, making it ideal for winter protection. Just keep it 1-2 inches away from stems to avoid trapping moisture against the bulb.
Pro Tips for Tulip Foliage After Bloom
- Real talk: Skipping the foliage stage after tulips bloom is the fastest way to weaker blooms next year.
- Patience Pays Off: Those 4-6 weeks of letting foliage yellow naturally are non-negotiable.
- Pruning Precision: When cutting back stems in Step 2, aim for that 2-inch mark above soil level—any lower and you risk damaging the bulb’s energy reserves.
Frequently asked questions
Got questions about what to do with your tulip foliage after those stunning blooms fade? You’re not alone!
Here are some of the most common queries—plus clear, actionable answers to help you keep your garden thriving.
Why shouldn’t I cut tulip foliage right after the flowers die?
Tulip foliage is critical for next year’s blooms! Cutting it too soon removes the plant’s energy reserves, stored in the leaves via photosynthesis. Wait until the leaves turn brown and crispy (usually 6–8 weeks post-bloom) before trimming. Patience pays off with bigger, healthier flowers!
How do I know when it’s safe to cut back tulip leaves?
Look for these signs: fully yellowed or browned leaves that crunch when touched. If you’re unsure, leave a few stems—even if they’re unsightly. The goal is to let the plant fully decompose nutrients into the bulb. Pro tip: Mark spent blooms with a flag or stake to track progress!
Can I reuse tulip foliage for compost or mulch?
Once leaves are brown and dry, chop them into small pieces and add them to your compost pile. They’ll break down quickly, enriching your soil with nitrogen and organic matter. Avoid using fresh green foliage—it can mat and attract pests. For mulch, mix dried leaves with other materials to balance carbon and nitrogen.
My tulip leaves turned brown mid-season—is my plant dead?
Not necessarily! Premature browning can signal overwatering, disease (like tulip fire), or bulb rot. Check for soft, mushy bulbs or fungal spots. If the bulb feels firm and the roots are intact, your plant may still recover. Reduce watering, improve drainage, and avoid fertilizing until new growth appears in spring.
What’s the best way to store tulip bulbs if I’m replanting later?
Dig up bulbs after foliage dies back (late summer), let them dry in a shady, well-ventilated spot for 1–2 weeks, then store them in a cool (40–50°F), dark place (like a mesh bag in the fridge). Avoid plastic bags—condensation causes rot. Replant in fall, about 6–8 inches deep, for a stunning comeback next spring!
Wrapping up and next steps
Don’t let those wilted tulips signal the end of their story—your garden’s next masterpiece starts now! 🌱 By deadheading, fertilizing, and nurturing the foliage, you’re not just tidying up; you’re setting the stage for even more stunning blooms next spring.
With a little care, your tulips will reward you with healthier stems, stronger roots, and showstopper flowers year after year.
Ready to turn your garden into a tulip powerhouse? Grab your gloves, follow the steps, and watch your patience bloom into beauty! 🌸 Start planning your spring tulip revival today!