
Blooming
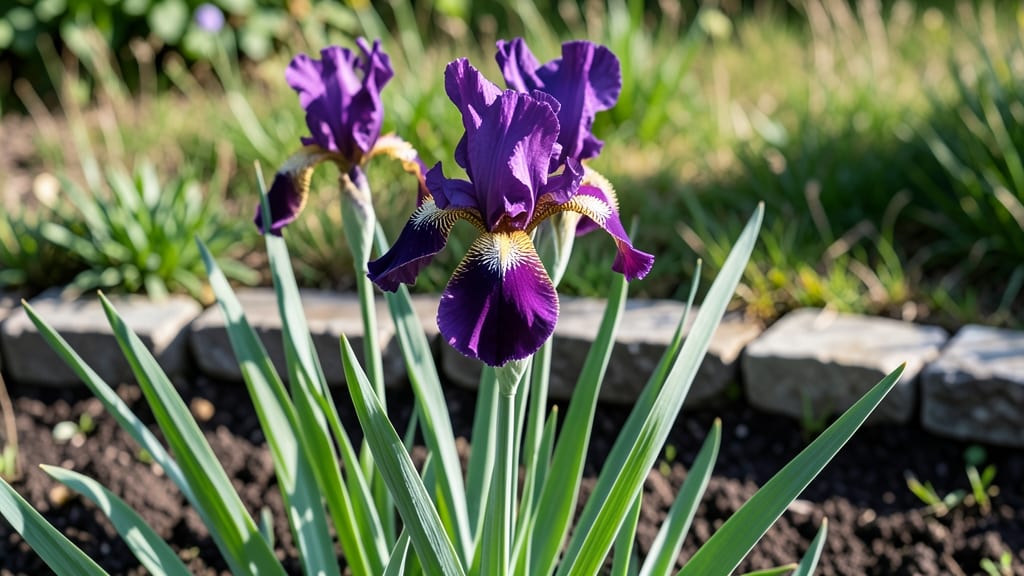
Summer-blooming irises transform your garden into a fragrant haven that hums with bees and butterflies. 🌿 The secret to their vibrant, long-lasting blooms lies in understanding their summer needs—when to feed them, how to protect them from heat stress, and why mulch matters more than most gardeners realize.
These irises thrive in full sun but need consistent moisture during their peak growing months. I’ve found that dividing clumps every 3-4 years keeps them productive, while a light application of compost in early summer gives them the nutrients they crave without overwhelming their roots.
By mid-July, you’ll see stalks heavy with blooms that perfume the air and attract pollinators. The key is balancing water—enough to keep the soil moist but not soggy—and watching for iris borers, which can devastate plants if ignored.
Works beautifully in USDA zones 3-9, whether in borders, containers, or naturalized meadows. Here’s how to keep them thriving all season.
📚 In This Guide
- What you need
- Instructions
- Tips and common mistakes
- Wrapping up and next steps
What you need
- ● Summer-blooming iris rhizomes: 3–5 healthy, firm rhizomes (preferably Iris germanica or Iris xiphium varieties for summer blooms).
- ● Well-draining soil: 5–10 cubic feet of a mix of: 60% garden soil
- ● 30% coarse sand or perlite
- ● 10% compost or aged manure
- ● Garden fork or trowel: For digging and aerating soil.
- ● Organic fertilizer: 1 lb of low-phosphorus, high-potassium fertilizer (e.g., 5-10-10 ratio).
- ● Mulch: 2–3 inches of pine bark, straw, or gravel (to retain moisture and deter weeds).
- ● Watering can or hose with a gentle spray nozzle.
- ○ Gloves (optional but recommended): To protect hands from soil and sharp rhizome edges.
- ● Pollinator-friendly companions: Seeds or small plants of lavender, catmint, or bee balm to attract bees and butterflies.
- ● Slow-release fertilizer spikes: For hassle-free nutrient delivery over 3–6 months.
- ● Stakes or trellis: If growing tall varieties (e.g., Iris ensata) for support.
- ● Soil pH test kit: To ensure your soil is slightly alkaline (pH 6.5–7.5), ideal for irises.
- ● Decorative stones or edging: To create a polished look around your iris bed.
How to grow summer-blooming iris for pollinator-friendly gardens
Here's the foolproof method I've used to coax vibrant, fragrant iris blooms that transform any garden into a pollinator magnet.
🌱 Step 1: Select and Prepare the Perfect Planting Site
Choose a location with full sun exposure (6+ hours daily)—iris blooms thrive where they get plenty of warmth. The soil should drain exceptionally well; iris roots rot quickly in soggy conditions. Amend heavy clay with 2-3 inches of coarse sand or perlite to improve drainage. I always test my soil first—iris prefer a slightly acidic to neutral pH between 6.0 and 7.0.
Dig a hole twice as wide as the iris rhizome but only 1-2 inches deep. The top of the rhizome should remain visible after planting—this prevents rotting. If your soil is sandy, mix in a handful of compost to retain moisture without suffocating the roots. The key is balance: enough nutrients to support blooms, but never so rich that foliage grows at the expense of flowers.
🌿 Step 2: Plant Rhizomes at the Right Depth and Spacing
Position each rhizome with the fan of roots facing downward and the pointed end pointing outward. This ensures proper growth orientation. Space rhizomes 12-18 inches apart in rows, allowing room for foliage to spread. Crowding leads to weak stems and fewer blooms—trust me, I learned this the hard way with my first overplanted bed.
Press the rhizome gently into the soil until it sits firmly but isn't buried. The top should remain exposed to sunlight. Water immediately after planting to settle the soil around the roots. You'll know it's right when the soil looks slightly compressed but not packed down like clay. Over the next week, keep the soil consistently moist but never soggy—this is critical for root establishment.
☀️ Step 3: Provide Consistent Care for Strong, Fragrant Stalks
Once established, iris needs minimal watering (1 inch per week)—more is worse. Let the soil dry slightly between waterings to prevent fungal diseases. Fertilize lightly in early spring with a balanced 10-10-10 fertilizer at half-strength. Too much nitrogen produces lush foliage but stunts blooms. I skip fall fertilization entirely; iris stores enough nutrients in the rhizomes to sustain next year's growth.
Deadhead spent blooms by cutting the stalk 1 inch above the lowest healthy leaf. This redirects the plant's energy toward next year's buds rather than seed production. Mulch lightly with 2 inches of shredded bark in winter to protect rhizomes from temperature swings, but avoid thick mulch—iris needs cold dormancy to bloom reliably.
✂️ Step 4: Divide and Renew Every 3-4 Years
Iris rhizomes multiply quickly, and overcrowding reduces bloom quality. In early spring or after flowering, dig up clumps and separate sections with a sharp knife. Each division should have at least 3 fans of leaves. Discard old, woody rhizomes—they won't produce new growth. Replant divisions immediately in fresh soil, following the same depth guidelines. You'll see stronger, more abundant blooms the following season.
This is the moment that matters: dividing revitalizes the plant and prevents the center from going dormant. I always mark new plantings with small stakes to avoid disturbing them during summer watering. Within weeks, you'll notice fresh, vibrant growth signaling successful establishment.
🐝 Step 5: Encourage Pollinators with Strategic Planting
Pair iris with complementary pollinator plants like lavender, catmint, and bee balm. These create a continuous nectar source from early spring through fall. Plant iris in clusters of 3-5 plants to increase visibility to bees and butterflies. The fragrant blooms attract pollinators naturally—no chemical lures needed.
Leave some spent blooms on the plant if you want to support seed production. The seed pods provide food for birds and beneficial insects later in the season. I always leave a few stalks until they turn brown, then cut them back to maintain a tidy appearance. The trade-off? More wildlife in your garden and a steady supply of pollinators for future blooms.
Tips & tricks for growing summer blooming iris
These game-changing insights will help you cultivate iris blooms that are not just beautiful but also irresistible to pollinators.
Soil Preparation Secret: When amending heavy clay soil with 2-3 inches of coarse sand or perlite in Step 1, mix it thoroughly with the native soil—don't just layer it on top. This ensures even drainage throughout the root zone. I've found that adding a handful of organic matter like leaf mold or well-rotted compost to sandy soils creates the perfect balance for iris rhizomes, preventing both waterlogging and dehydration. The goal is to mimic the well-drained, slightly gritty conditions iris prefer in their native habitats.
Rhizome Orientation Insight: In Step 2, when positioning your rhizomes, pay close attention to the natural shape—the fan of roots should always face downward like a crown. The pointed end should face outward, not upward or inward. This orientation allows the rhizome to grow properly and develop strong stalks. I've seen many gardeners make this mistake, leading to weak growth and poor blooming. Think of it like planting a potato—always with the "eyes" facing up!
Watering Wisdom: The 1 inch per week watering guideline in Step 3 is perfect, but timing matters just as much. Water deeply in the morning so the foliage has all day to dry, preventing fungal diseases like iris borer. I've noticed that consistent morning watering also encourages deeper root growth, which translates to stronger stalks and more abundant blooms. Avoid evening watering—wet leaves overnight create the perfect environment for fungal infections.
Dividing Strategy: When it's time to divide your iris clumps in Step 4, use a sharp, sterilized knife to make clean cuts between rhizomes. Each division should have at least 3 healthy fans of leaves to ensure vigorous regrowth. I always discard any rhizomes that are soft, mushy, or have visible signs of rot—they won't produce good growth. The key is to work gently but decisively, and replant divisions immediately in fresh soil to minimize stress on the plants.
Pro Tips for Summer Blooming Iris
- These game-changing insights will help you cultivate iris blooms that are not just beautiful but also irresistible to pollinators.
- Soil Preparation Secret: When amending heavy clay soil with 2-3 inches of coarse sand or perlite in Step 1, mix it thoroughly with the native soil—don't just layer it on top.
- Rhizome Orientation Insight: In Step 2, when positioning your rhizomes, pay close attention to the natural shape—the fan of roots should always face downward like a crown.
Frequently asked questions
Got questions about growing summer-blooming iris? We’ve got answers!
Whether you’re a first-time gardener or a seasoned green thumb, these FAQs will help you cultivate fragrant, pollinator-friendly stalks with ease.
When is the best time to plant summer-blooming iris?
Plant summer-blooming iris in early spring (as soon as the soil is workable) or in fall (6–8 weeks before the first frost). Avoid planting in extreme heat—rhizomes need time to establish roots. For container gardening, spring is ideal to prevent winter stress.
How long does it take for summer iris to bloom after planting?
Patience is key! Summer-blooming iris typically take 1–2 years to establish and flower. First-year plants focus on root growth, while mature rhizomes may bloom in late summer (July–August). Consistent moisture and sunlight speed up the process.
What pests or diseases should I watch for with summer iris?
Common issues include iris borers (look for sawdust-like frass) and thrips (silver streaks on petals). Prevent borers by removing old foliage in fall and treating with neem oil. Fungal diseases like leaf spot thrive in wet conditions—ensure good drainage and avoid overhead watering.
Can I grow summer-blooming iris in containers? How?
Use a well-draining pot (at least 12 inches deep) with a mix of potting soil and perlite. Plant rhizomes half-buried (top exposed) and place in full sun. Water when the top inch of soil dries, and fertilize lightly in spring. Just avoid overcrowding—space rhizomes 6+ inches apart.
How do I extend the blooming season for summer iris?
Deadhead spent blooms to encourage reblooming, but leave some seed pods for pollinators. For a longer display, choose reblooming varieties like ‘Immortality’ or ‘Florence Sullivan.’ Mulch lightly to retain moisture and reduce stress. Bonus: Plant near bee balm or coneflowers to attract pollinators that boost flower production!
Wrapping up and next steps
Transforming your garden into a buzzing, fragrant haven with summer-blooming iris is easier—and more rewarding—than you think! 🌸 Whether you’re a seasoned gardener or just starting out, these vibrant blooms will not only dazzle your senses but also play a vital role in supporting local pollinators.
Now that you’re armed with the right materials and answers to common questions, it’s time to roll up your sleeves and get growing.
Start by selecting your favorite Iris varieties and follow the simple steps to cultivate them. Before you know it, your garden will be alive with color, scent, and the delightful hum of bees and butterflies. Ready to make your mark? Grab your tools and begin your fragrant journey today!