
Transplanting
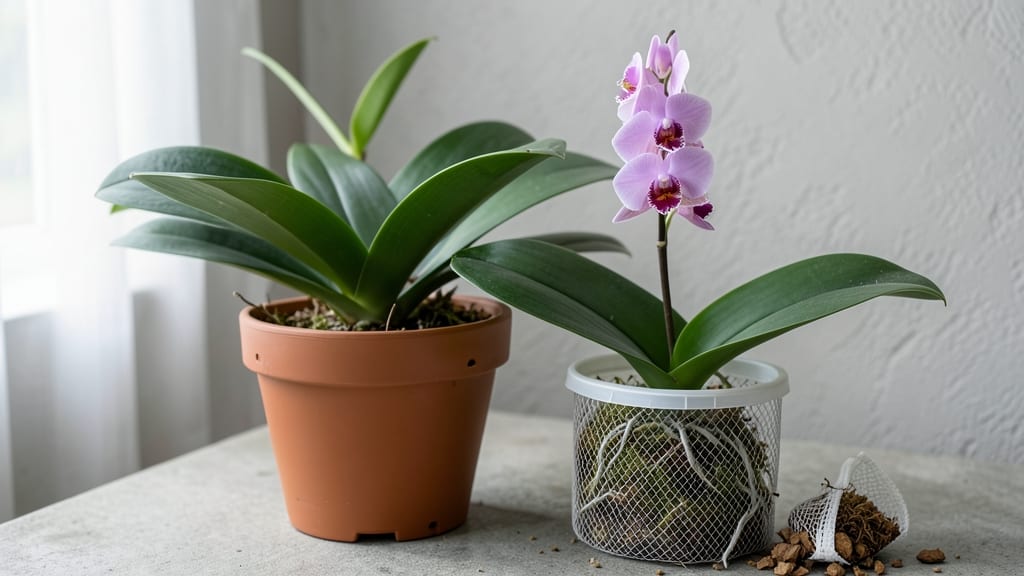
Repotting orchids in bloom feels like walking a tightrope—one wrong move and those delicate flowers could drop. ✨ But with the right technique, you can refresh their home without sacrificing a single bloom.
The secret lies in minimal disturbance, precise timing, and understanding what orchids truly need during their flowering phase.
You’ll need a slightly larger pot (just 1-2 inches wider), fresh bark mix, and sterilized tools to avoid stress. Most orchids bloom for 8-12 weeks, so repotting mid-bloom means waiting until the flowers are about halfway through their cycle. This balance keeps roots happy while preserving those stunning blossoms.
After repotting, place your orchid in bright, indirect light and avoid fertilizing for 4-6 weeks. The roots will adjust while the flowers stay vibrant. You’ll notice new root growth within 2-3 weeks, proving the stress was worth it.
This method works for Phalaenopsis, Cattleya, and Dendrobium—just adjust timing based on your orchid’s natural bloom duration. The key is patience and gentle handling. Let’s get those orchids thriving without the drama.
📚 In This Guide
- What you need
- Instructions
- Tips and common mistakes
- Wrapping up and next steps
What you need
- ● New orchid pot: Size: 1-2 inches larger than the current pot (e.g., if your orchid is in a 4-inch pot, upgrade to 5-6 inches).
- ● Material: Plastic with drainage holes (most common) or clay/terracotta (for better airflow).
- ● Quantity: 1 (but have a backup in case of mishaps!).
- ● Fresh orchid bark mix: Type: Medium-grade fir bark (1/4"–1/2" chunks) mixed with charcoal (10% of the mix) and perlite/pumice (10-20%) for drainage.
- ● Quantity: Enough to fill the new pot completely (typically 1-2 cups, depending on pot size).
- ● Pruning tools: Sterilized scissors or pruners (for trimming roots or spent flower spikes).
- ● Rubbing alcohol (70% or higher) to sterilize tools before and after use.
- ● Glove: A pair of gardening gloves (to protect your hands from sharp bark edges and bacteria).
- ● Spray bottle: Filled with room-temperature water (for misting roots gently).
- ○ Twine or fishing line: 12-18 inches (optional, for securing the orchid if it’s top-heavy with blooms).
- ● Anti-fungal spray (e.g., hydrogen peroxide 3% or cinnamon powder) to treat roots if you spot rot.
- ● New flower spike fertilizer (diluted 20-20-20 or orchid-specific food) to give your blooms a post-repot boost.
- ● Misting fan (to create humidity while your orchid recovers).
- ● Temporary support stake (if your orchid has heavy blooms and needs extra stability).
Step-by-Step guide for repotting orchids while they're in bloom
Here's my foolproof method for refreshing orchid pots without sacrificing a single flower.
🪴 Step 1: Gather Supplies and Prepare Workspace
You'll need a clean 6-inch pot with drainage holes (orchids hate soggy roots), fresh orchid bark mix, sterilized sharp scissors, and a spray bottle with lukewarm water. I always work on a clean towel—dropped bark pieces are impossible to clean up later. Choose a pot just 1 inch larger than the current one; orchids need room to grow but not too much extra space.
Fill the new pot about 1/3 full with bark mix. Moisten it lightly with your spray bottle until it feels damp like a wrung-out sponge. The goal is to create a slightly airy medium that allows roots to breathe while still providing support. If the bark feels dry when you squeeze it, add a few more sprays of water.
✂️ Step 2: Remove the Orchid Carefully Without Damaging Flowers
Gently squeeze the sides of the current pot to loosen the root ball. If the orchid resists, slide a butter knife around the edges to separate it from the pot walls. Hold the base of the plant firmly with one hand while supporting the flower spike with your other hand—orchid blooms are surprisingly delicate when stressed. You'll see roots spilling out, some green and others silvery-white (those are older, dormant roots).
Don't be tempted to trim any roots during this step, even if they look dead. Healthy roots will regrow quickly, and cutting now risks damaging the plant's energy reserves. Instead, focus on gently separating any roots that have grown around the pot's interior. If you see roots growing through the drainage holes, that's normal—just untangle them carefully as you work.
🌿 Step 3: Refresh the Root System and Replant
Place the orchid on top of the bark mix in the new pot. Spread the roots downward gently, encouraging them to grow through the new medium. Add more bark mix around the sides, pressing lightly to secure the plant. The pot should feel snug but not cramped—you should be able to wiggle it slightly without the plant shifting dramatically. Fill any remaining gaps with additional bark until the orchid sits at the same depth as before.
Here's where most people make a mistake: watering immediately. Instead, wait 24 hours before giving the orchid its first drink. This allows any damaged roots to callus over slightly, reducing the risk of rot. After that, water thoroughly until water runs freely from the drainage holes, then let it drain completely before placing it back in its growing spot.
☀️ Step 4: Provide Ideal Conditions for Recovery
Move the repotted orchid to a location with bright, indirect light for the next 7-10 days. Avoid direct sunlight, which can stress the plant further while it adjusts. Keep the humidity around 50-70% by placing the pot on a tray filled with pebbles and water (just make sure the pot isn't sitting in water). You'll notice new root growth within 3-4 weeks—look for small, green tips pushing through the bark.
The key to preserving those beautiful blooms is patience. Resist the urge to fertilize for at least 4 weeks—the plant needs all its energy focused on root recovery, not new growth. Once you see fresh root activity, you can resume your normal fertilization schedule. Most orchids will continue blooming for 6-8 weeks after repotting, so enjoy the show while you wait for the next flush of flowers.
Tips & tricks for repotting orchids while preserving blooms
Between us, repotting orchids while they're in bloom feels like walking a tightrope—one wrong move and you risk dropping those gorgeous flowers. Here's what nobody tells you about making this process smoother than silk.
Root Handling Technique: When you're untangling those roots in Step 2, think of them like delicate fishing line—you want to guide, not force. I've found that gently wrapping the root ball in a damp paper towel before removing it from the old pot prevents breakage. The moisture keeps roots pliable while you work, and the towel provides just enough cushion to avoid snapping those silvery-white dormant roots. This simple trick has saved me from having to explain to clients why their orchids suddenly looked like they'd been through a root canal.
Medium Moisture Secret: That initial 1/3 fill with bark mix in Step 1 should feel like a wrung-out sponge—not damp, not dry, but perfectly in that middle ground. Here's the thing: if you over-moisten the bark, you're creating a breeding ground for rot before the roots even have a chance to recover. I test moisture by squeezing a handful—if water beads up on my fingers, it's too wet. If it crumbles when I poke it, it needs more hydration. This balance is what gives orchids that perfect air-to-root ratio they crave.
The 24-Hour Wait Game: I know what you're thinking—"24 hours without water? That's torture!" But trust me on this: that waiting period is when nature's magic happens. The slight callusing that occurs on any minor root damage creates a protective barrier against rot. During this time, place your repotted orchid in a spot with gentle air circulation (like a slightly open window) to help any exposed roots start the healing process. It's like giving your plant a mini spa day before the real recovery begins.
Light Transition Strategy: The bright, indirect light recommendation in Step 4 is non-negotiable, but here's the pro move: gradually introduce your orchid to its permanent light spot over those 7-10 days. Start with 2 hours of indirect light on day 1, then add 1-2 hours each subsequent day. This slow acclimation prevents the shock that can cause buds to drop prematurely. I've seen orchids that would have lost half their blooms simply by being moved too quickly to their final sunny window.
Pro Tips for Repotting Orchids In Bloom
- Between us, repotting orchids while they're in bloom feels like walking a tightrope—one wrong move and you risk dropping those gorgeous flowers.
- Root Handling Technique: When you're untangling those roots in Step 2, think of them like delicate fishing line—you want to guide, not force.
- Medium Moisture Secret: That initial 1/3 fill with bark mix in Step 1 should feel like a wrung-out sponge—not damp, not dry, but perfectly in that middle ground.
Frequently asked questions
Got questions about repotting orchids while they’re still blooming? You’re not alone!
Here are answers to the most common concerns—so you can tackle this task with confidence and keep those gorgeous flowers intact.
Can I repot an orchid that’s currently in bloom?
Yes, but timing is everything! Repotting during bloom is riskier because orchids are sensitive to stress. If you must do it, choose a cool, cloudy day to minimize shock. Avoid repotting if flowers are newly opened—wait until buds form or blooms fade slightly. Patience pays off!
How soon after repotting will my orchid’s blooms drop?
Most orchids won’t drop blooms immediately if repotted carefully, but stress can cause buds to abort or flowers to wilt faster. Expect a 1–2 week adjustment period—keep humidity high (60–70%) and avoid direct sunlight. If flowers do drop, don’t panic; new buds may still form!
What’s the best temperature to repot an orchid in bloom?
Ideal temps are 60–75°F (15–24°C). Avoid extremes! Cold drafts (like AC vents) or hot sun can instantly stress the plant. If your home is too warm, repot in the early morning or evening. Pro tip: Mist the plant lightly before repotting to prep it for the change.
Is it better to wait until my orchid finishes blooming to repot?
Waiting until after blooming
(when new growth starts) is the safest option. This lets the orchid recover without stressing its energy reserves. If you’re repotting now, trim spent blooms post-repotting to redirect energy to roots. Think of it as a two-step process: repot first, then prune!
My orchid’s leaves turned yellow after repotting—what went wrong?
Yellow leaves usually mean root rot or overwatering. Check these fixes:
- Drainage: Ensure the pot has holes and fresh bark mix isn’t compacted.
- Watering: Wait 5–7 days before watering post-repot to let roots adjust.
- Light: Avoid direct sun for 2 weeks—bright, indirect light is key.
Wrapping up and next steps
Repotting orchids in bloom might seem daunting, but with the right technique and timing, you can preserve those stunning flowers while giving your plant a fresh start. Remember: minimal disturbance, gentle hands, and a patient approach are key—your orchid will thank you with vibrant blooms for weeks to come! 🌸
Now that you’re armed with confidence, why not take the next step? Try repotting your next orchid in bloom and share your success (or lessons learned) with fellow plant enthusiasts. Happy growing! 🌱