
Pruning
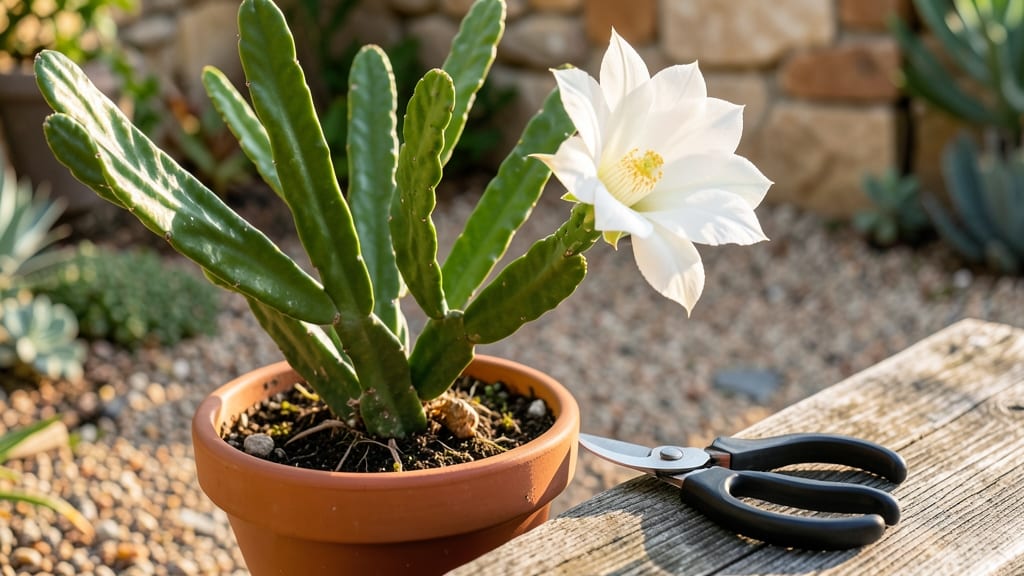
Night blooming cereus pruning isn’t just about cutting—it’s about setting up next year’s moonlit show. ✨ The right timing and technique turn a post-bloom cleanup into a flower-boosting ritual. After those stunning nocturnal blooms fade, the real work begins: shaping the plant for bigger, more dramatic displays in 12 months.
You’ll need just three tools: clean, sharp pruners, rubbing alcohol for sterilization, and a pencil to mark cuts. The secret lies in patience—never rush the process. Prune only after the last bloom of the season, when the plant’s energy naturally shifts from flowering to recovery.
This is your chance to remove dead stems while encouraging new, stronger growth for the next cycle.
What you’ll end up with is a cereus that blooms more prolifically, with stems that stay sturdy and healthy. The key is making cuts just above leaf nodes, never leaving stubs.
This simple technique prevents rot and directs energy where you want it—into next year’s spectacular, fragrant flowers that open under the moonlight.
Works for both Selenicereus and Hylocereus varieties, and adapts to indoor or greenhouse growing. Here’s how to do it right the first time—and avoid the common mistakes that kill future blooms.
📚 In This Guide
- What you need
- Instructions
- Tips and common mistakes
- Wrapping up and next steps
What you need
- ● Pruning shears – Bypass pruners (sharp, clean, and sterilized to prevent disease). *Avoid anvil pruners—they crush stems!
- ● Rubbing alcohol (70% or higher) – For disinfecting tools between cuts (1 small bottle).
- ● Garden gloves – Nitrile or latex-free (to protect from spines and sap).
- ○ Horticultural sealant – Optional but helpful (e.g., tree wound pruning sealant) for larger cuts (1 small jar).
- ● Disposable gloves or paper towels – For handling sap (if your plant oozes sticky residue).
- ● Notebook & pen – To track pruning dates, cuts made, and plant responses.
- ● Magnifying glass – Helps spot tiny buds or hidden damage on thick stems.
- ● Pruning saw – Only if dealing with very thick (1"+) stems (1 small handsaw).
- ● Rooting hormone – If you plan to propagate cuttings (1 small tube).
- ● Spray bottle with water – Keeps dust down while pruning (especially in dry climates).
- ● Camera or phone – Document your plant’s progress before/after pruning!
Step-by-Step guide to pruning night blooming cereus for stunning flowers
Here's how to time your cuts for maximum blooms next season—no guesswork involved.
✂️ Step 1: Identify and Mark the Right Segments
Night blooming cereus flowers grow on new segments that form after pruning. Examine your plant and locate the thickest, healthiest segments—these are your future blooming stems. Use a permanent marker to circle the topmost joint of each segment you plan to keep. I like to mark them in late summer when growth slows naturally.
Skip any segments with soft spots, wrinkles, or discoloration—these won’t produce flowers. Healthy segments should feel firm to the touch and have shiny, green skin. If a segment is smaller than 4 inches long, it’s too young to bloom next year and should be removed entirely.
⏰ Step 2: Time Your Pruning for Optimal Regrowth
Prune your night blooming cereus 6-8 weeks before your first frost date—this gives the plant enough time to heal and form new segments before dormancy. In most climates, that means late August to early September. Avoid pruning in spring or early summer—new growth won’t mature enough before winter.
Use sterilized pruning shears (wipe blades with rubbing alcohol between cuts) to make clean slices just above the marked joint. Never tear segments—this invites rot. After cutting, let the wounds air-dry for 24 hours before storing. I place my cuttings in a shady, well-ventilated spot to prevent moisture buildup.
🌱 Step 3: Encourage New Growth Before Dormancy
After pruning, move your plant to a bright, indirect light spot (like an east-facing window) and reduce watering to keep the soil slightly moist but never soggy. You’ll see new segments emerge from the joints in 4-6 weeks. These baby stems are critical—they’re what will bloom next year.
If your plant isn’t producing new growth by mid-October, it’s not getting enough light. Supplement with a grow light for 12 hours daily until dormancy. Avoid fertilizing now—you want root and segment development, not leafy growth. Once new segments reach 2-3 inches long, you can ease back into normal care.
☀️ Step 4: Prepare for Winter Dormancy
When temperatures drop below 50°F at night, your cereus will naturally slow growth. Stop watering entirely and move the plant to a cool, dark place (like a garage or basement) where temps stay between 50-60°F. Check monthly—if segments shrivel or turn mushy, reduce humidity by placing a small fan nearby.
In late February or early March, bring the plant back to bright light and resume watering when the soil feels completely dry. New blooms will form on the segments that grew last fall—that’s your reward for precise timing. Watch for buds in late spring, and you’ll have showstopping nighttime flowers by summer.
Tips & tricks for perfect night blooming cereus pruning
Timing is everything when it comes to pruning your night blooming cereus—these tricks will help you maximize next year's blooms without the guesswork.
Segment Selection Matters: In Step 1, when choosing segments, pay special attention to the thickest, healthiest ones—these are your future blooming stems. I always look for segments that are at least 4 inches long and feel firm to the touch. A quick trick: tap the segment gently—it should sound hollow, not dull. This indicates healthy tissue that will produce strong new growth. Remember, smaller segments won't have enough energy to bloom next season.
The 24-Hour Drying Rule: After making your cuts in Step 2, the 24-hour air-drying period is absolutely critical. I place my cuttings on a clean, dry paper towel in a well-ventilated area. This prevents rot from setting in at the cut points. If you're in a humid climate, consider placing a small fan nearby to increase airflow. The goal is to create a natural callus that will protect against fungal infections during dormancy.
Light is Non-Negotiable: In Step 3, when encouraging new growth, don't skimp on light. While bright indirect light is ideal, if you notice your plant struggling by mid-October, supplement with a grow light for 12 hours daily. I use a simple LED grow bulb that fits into a standard lamp socket. Position it about 12 inches above the plant—closer than this can cause leaf burn. The key is to mimic natural daylight conditions as closely as possible during this critical growth window.
Dormancy Temperature Check: When preparing for winter dormancy in Step 4, maintaining temperatures between 50-60°F is essential. If your basement or garage fluctuates, consider adding a small thermometer to monitor conditions. I've found that temperatures below 50°F can cause the plant to go dormant too early, while anything above 60°F might encourage unwanted growth. A simple solution: place your plant on a shelf near an exterior wall where temperatures naturally stabilize.
Pro Tips for Night Blooming Cereus Pruning
- Timing is everything when it comes to pruning your night blooming cereus—these tricks will help you maximize next year's blooms without the guesswork.
- Segment Selection Matters: In Step 1, when choosing segments, pay special attention to the thickest, healthiest ones—these are your future blooming stems.
- The 24-Hour Drying Rule: After making your cuts in Step 2, the 24-hour air-drying period is absolutely critical.
Frequently asked questions
Got questions about pruning your night-blooming cereus? You’re not alone! Here are answers to the most common concerns—so you can keep your cactus thriving and flowering like a pro.
When is the best time to prune my night-blooming cereus?
Prune right after the flowering season (spring or early summer) when the plant has finished blooming. Avoid pruning during dormancy (fall/winter) or active growth (late summer)—this helps prevent stress and ensures healthy regrowth for next year’s flowers. A quick trim in late May or June keeps your plant happy!
How much of the plant can I safely cut off?
Remove no more than 1/3 of the plant’s height or volume in a single session. Focus on dead, damaged, or overly leggy stems—healthy growth should remain intact. Over-pruning can weaken the plant and reduce next year’s blooms. Think of it like giving your cactus a light haircut, not a buzz cut!
What if my night-blooming cereus doesn’t bloom after pruning?
Lack of blooms often means too much pruning or improper timing. Ensure you pruned after flowering, not during dormancy, and avoid cutting into the main stem (the "head"). If it still skips blooms, check light (12+ hours of bright, indirect light) and fertilizer (low-nitrogen feed in spring/summer). Patience is key—some varieties need 2–3 years to rebound!
Can I propagate my cuttings right away?
Yes! Let cuttings dry for 2–3 days to callus over (prevents rot), then place them in cactus soil. Keep them in bright, indirect light and avoid watering for 1–2 weeks. Root growth takes 4–6 weeks—be patient! This is a great way to expand your collection without stressing the parent plant.
What if my plant looks sad after pruning?
Don’t panic! A little wilting or yellowing is normal as your cactus adjusts. Reduce watering for 2 weeks and keep it in shady conditions until new growth appears. If the stems turn mushy or smell bad, it’s root rot—stop watering immediately and repot in fresh, dry soil. Most plants bounce back in 3–4 weeks!
Wrapping up and next steps
Pruning your night blooming cereus at the right time is the secret to unlocking next year’s showstopping flowers—and you’ve got all the tricks now! Remember: patience is key—trim after blooms fade, avoid over-pruning, and always sterilize your tools.
With these steps, your plant will reward you with healthier growth and even more dramatic nighttime displays.
Ready to put your new skills to work? Grab your shears, mark your calendar, and give your night blooming cereus the care it deserves. Next season’s blooms start with this single, confident step! 🌙✨