
Blooming
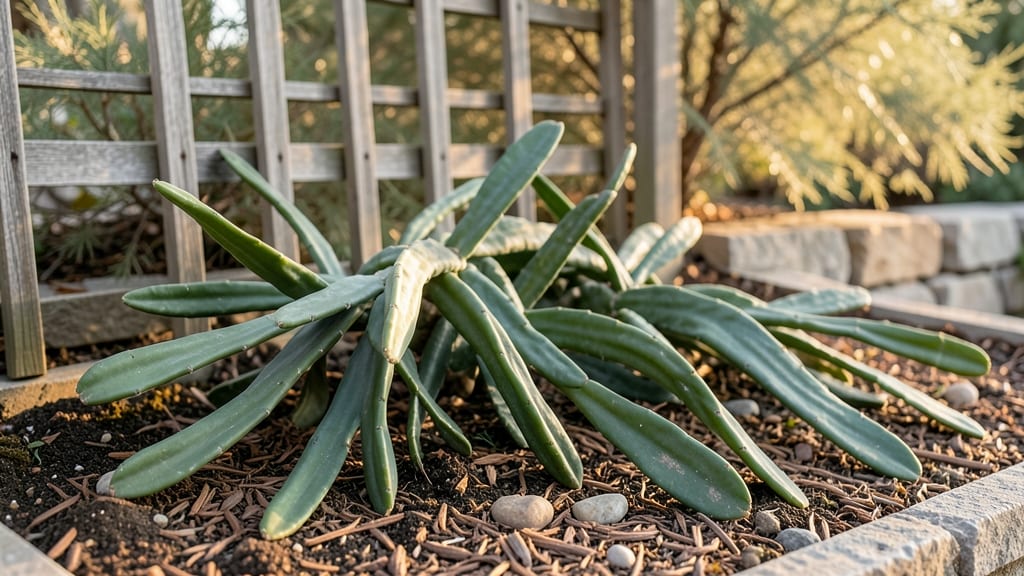
Your night blooming cereus leaves could be the secret to year-round blooms—if you prune them right. 🌙 I’ve learned that most people trim too late or too aggressively, which means fewer flowers and weaker growth. The key is timing: after blooms fade, but before new growth starts.
Start by identifying the dead segments—they’re the ones that shrank after flowering. Use sterilized pruners to cut just above a joint where leaves meet the stem.
This encourages fresh growth without shocking the plant. Water lightly after pruning, but hold off on fertilizer for a week to let the cuts heal.
Within 4-6 weeks, you’ll see plump new pads forming where you cut. These become next year’s blooms, so protect them from drafts and sudden temperature swings. The reward? A plant that flowers twice a year instead of once, with bigger, brighter blooms each time.
Works for both indoor plants and those in greenhouses. The same principles apply whether you’re dealing with a single stem or a sprawling collection. Here’s how to keep your cereus thriving all season long.
📚 In This Guide
- What you need
- Instructions
- Tips and common mistakes
- Wrapping up and next steps
What you need
- ● Pruning shears: Bypass pruners (sharp, clean, and sterilized) – 1 pair (avoid anvil pruners to prevent crushing stems).
- ● Disinfectant: Rubbing alcohol (70%+ isopropyl) or hydrogen peroxide (3%) – small bottle (for sterilizing tools).
- ● Gloves: Nitrile or latex-free garden gloves – 1 pair (to protect from sap and thorns).
- ○ Cutting surface: Clean tray, newspaper, or aluminum foil – large enough to catch clippings (optional but helpful!).
- ● Cactus/succulent soil: Fast-draining mix (50% potting soil + 50% perlite/pumice) – 1-2 gallons (for repotting pruned sections, if propagating).
- ○ Rooting hormone: Optional but recommended – small tube (speeds up propagation if you’re saving cuttings).
- ● Markers/pens: Waterproof labels or masking tape – 5-10 pieces (to track pruned sections if propagating).
- ● Grafting tool: For advanced pruners working with grafted NBCs (e.g., Selenicereus hybrids).
- ● Spray bottle: With water or diluted hydrogen peroxide – to clean wounds on the plant post-pruning.
- ● Plant food: Balanced liquid fertilizer (5-5-5 or 10-10-10) – small bottle (to revive the plant after pruning).
- ● Heat mat: If propagating cuttings in cooler climates (70-75°F ideal).
- ● Camera/phone: To document your pruning progress (because before-and-after shots are satisfying!).
How to prune night blooming cereus for continuous flowering
Here's the method I've used to keep my plants blooming reliably—no guesswork, just precise timing and cuts.
✂️ Step 1: Identify and Mark Dormant Segments
Night blooming cereus (often called queen of the night) grows in segments called "joints" or "photoperiods." After blooming, these segments enter dormancy and turn woody. Look for the leathery, brownish segments that feel firm to the touch—these are ready for removal. I mark them with a soft pencil so I don't accidentally cut the wrong ones.
Don't remove anything green or plump—those are still active growth segments. The dormant segments won't regrow from that point, so cutting them encourages new growth from the remaining healthy joints. I always prune after the last bloom cycle, typically in late spring or early summer, when new growth has begun.
✂️ Step 2: Sterilize Tools and Make Clean Cuts
Use a sharp, sterilized pair of pruning shears or a knife to make clean cuts at a 45-degree angle, about ¼ inch above a node (the bump where leaves or branches emerge). This angle prevents water from pooling on the cut, which could rot the stem. I dip my tools in rubbing alcohol between cuts to prevent spreading any potential diseases.
Never rip or tear segments—this damages the plant's vascular system and invites infection. The cut should be smooth, exposing the pale green interior. If you see brown or black inside, that segment was already compromised and should be removed entirely. I like to keep at least 3-4 healthy joints on each stem to ensure the plant has enough energy to rebloom.
🌱 Step 3: Encourage New Growth with Proper Aftercare
After pruning, place the plant in a bright, indirect light spot (like an east-facing window) and water sparingly—only when the top 2 inches of soil feel dry. Overwatering now can drown the new growth points. I use a spray bottle to mist the remaining joints lightly, which helps them recover faster.
Within 4-6 weeks, you should see new growth emerging from the nodes just below your cuts. This is your signal that the plant is healing and preparing for its next bloom cycle. If no new growth appears after 8 weeks, check for pests like mealybugs or scale, which can stress the plant and prevent regrowth.
☀️ Step 4: Adjust Light and Fertilize for Reblooming
Once new growth appears, move the plant to a location with 12-14 hours of bright, indirect light daily. A south-facing window or a grow light works well. Night blooming cereus needs this light to set flower buds for the next cycle. I rotate the plant a quarter turn weekly to ensure even growth and prevent it from leaning toward the light.
Start fertilizing lightly with a balanced, water-soluble fertilizer (like 10-10-10) diluted to half strength every 4-6 weeks during the growing season. Stop fertilizing in late summer to allow the plant to enter its natural dormancy phase, which is crucial for setting next year's blooms. I always reduce watering slightly during this time, letting the soil dry out more between waterings.
⏰ Step 5: Time Dormancy for Next Year’s Blooms
In late fall, reduce watering further and stop fertilizing entirely. The plant will naturally slow down and enter dormancy, which is essential for reblooming. During this time, keep the soil just barely moist—never soggy. I move my plants to a cooler spot (50-60°F) with minimal light, mimicking their natural winter conditions.
Resist the urge to prune again during dormancy—wait until spring when new growth resumes. The dormant period is when the plant stores energy for next year's blooms, so let it rest. By early spring, you'll see the cycle begin anew with fresh, plump segments ready to grow and bloom again.
Tips & tricks for perfect night blooming cereus pruning
Keeping your night blooming cereus thriving requires precision—these are the insights I wish I'd known when I first started pruning mine.
Visual Identification: In Step 1, the key is distinguishing dormant from active segments. Press gently on each joint—dormant segments will feel firm and papery, while active ones remain plump and slightly springy. I've learned to use a soft pencil to mark segments that feel slightly soft but show no green—these are transitional and should stay for now. The visual cue is the segment's color: healthy green means leave it, brownish means ready to prune.
Cutting Technique: The 45-degree angle in Step 2 isn't just about aesthetics—it's about plant health. When you make the cut, you're creating a larger surface area that can heal faster. I've found that using a new razor blade (sterilized with rubbing alcohol) gives the cleanest cuts. If you notice brown streaks inside the cut, that segment was already compromised and should be removed entirely—it won't heal properly and could spread rot to healthy parts.
Post-Pruning Recovery: The 4-6 week window in Step 3 is crucial for new growth. I've discovered that placing a small fan on low setting near the plant helps prevent fungal growth during this vulnerable period. If your plant isn't showing signs of new growth after 8 weeks, check the undersides of leaves for tiny white cotton-like clusters—those are mealybugs, and they'll sap your plant's energy before it can rebloom.
Light Management: For the 12-14 hours of light in Step 4, I recommend using a timer for your grow lights if you're supplementing natural light. This ensures consistent light exposure, which is critical for flower bud formation. I've noticed that rotating the plant weekly actually helps prevent the plant from growing lopsided—it might seem like extra work, but it pays off when you see even growth all around the stem.
Pro Tips for Night Blooming Cereus Leaves
- Keeping your night blooming cereus thriving requires precision—these are the insights I wish I'd known when I first started pruning mine.
- Visual Identification: In Step 1, the key is distinguishing dormant from active segments.
- Cutting Technique: The 45-degree angle in Step 2 isn't just about aesthetics—it's about plant health.
Frequently asked questions
Got questions about your night-blooming cereus leaves? You’re not alone!
Here are some of the most common concerns—and their easy fixes—to keep your plant thriving and reblooming like a pro.
Why are my night-blooming cereus leaves turning yellow or dropping?
Yellowing or dropping leaves are usually signs of overwatering or underwatering. Check the soil—it should be completely dry before watering again. Also, ensure your plant gets bright, indirect light (like a sunny window with filtered light). If the issue persists, inspect for pests like spider mites or mealybugs.
How do I encourage my night-blooming cereus to bloom again?
Night-blooming cereus (like Selenicereus varieties) need a 12-hour dark period followed by bright light to trigger blooming. Place it in a cool (60–65°F) spot at night, then move it to warm, sunny conditions during the day. Fertilize lightly with a low-nitrogen, high-phosphorus bloom booster in spring and summer.
When is the best time to prune my night-blooming cereus leaves?
Prune after blooming (spring or early summer) to remove dead, damaged, or leggy growth. Use sterilized pruners to cut just above a leaf node. Avoid heavy pruning—focus on shaping and encouraging new, healthy growth. Never prune during dormancy (winter), as this can stress the plant.
Can I propagate my night-blooming cereus from leaves?
Yes! Cut a healthy stem with 3–4 segments and let it dry for 1–2 days to callous. Plant it in cactus/succulent mix and keep it in bright, indirect light with minimal water. Roots should form in 4–6 weeks. Pro tip: Use a humidity dome or plastic bag to speed up rooting!
What should I do if my night-blooming cereus isn’t blooming at all?
Check these common culprits:
- Light: Move it to a sunnier spot (6+ hours of light daily).
- Temperature: Ensure nighttime temps drop to 55–65°F for 2+ weeks.
- Age: Young plants may take 2–3 years to bloom. Be patient!
- Stress: Avoid sudden changes in water, light, or temperature.
Wrapping up and next steps
Mastering the art of pruning night blooming cereus leaves unlocks a garden filled with stunning, year-round reblooms—and you’re now equipped with the know-how! 🌸 From timing your cuts to sharpening your tools, every step ensures healthier growth and breathtaking flowers.
Don’t let hesitation hold you back—grab those shears and give your plant the care it deserves.
Ready to transform your blooms? Start by scheduling your next pruning session—just remember: patience and precision are your best friends. Happy gardening! 🌿✨