
Blooming
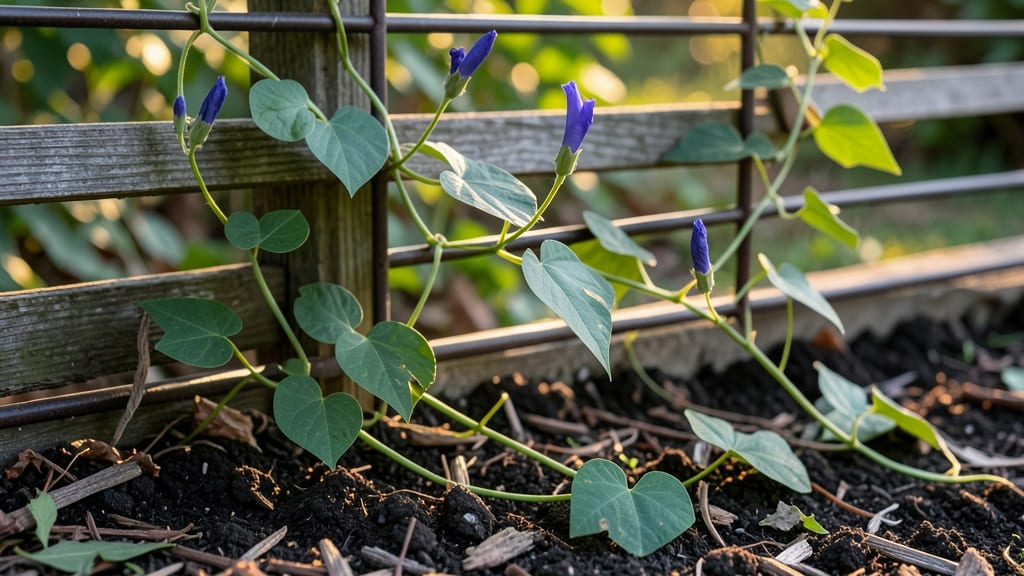
First, you'll need to spot them: morning glory seedlings have heart-shaped leaves with slightly jagged edges, and they grow fast—sometimes 2-3 inches per week if conditions are perfect.
The trick is keeping them happy before they bloom: bright light (12+ hours daily), moist but not soggy soil, and a gentle weekly fertilizer to build strong stems. Too much water or shade, and you'll get leggy, weak plants that struggle to climb later.
By the time they're 6 inches tall, you'll see the first tendrils forming—this is when they're ready to move outdoors or into your greenhouse. Those tendrils are your cue to start training them on supports, because once they bloom, they'll climb anything with foolproof determination.
The payoff? Months of trumpet-shaped blooms in every color imaginable, starting as early as June if you give them this head start.
Even if you're not a greenhouse expert, this works for windowsill starters or direct-sown seedlings—just adjust the timing. The secret is patience: morning glories reward the growers who nurture them before the show begins. Here's how to set them up for success.
📚 In This Guide
- What you need
- Instructions
- Tips and common mistakes
- Wrapping up and next steps
What you need
- ● Morning glory seeds: Choose Ipomoea purpurea (common morning glory) or Ipomoea nil (heavenly blue) varieties. Buy 10–20 seeds for a lush display.
- ● Seed-starting trays or small pots: 4–6 inch pots or a seedling tray with cell inserts (1–2 seeds per cell).
- ● Seed-starting mix: A lightweight, sterile mix (e.g., 50% peat moss + 50% perlite or a pre-mixed greenhouse blend).
- ● Greenhouse or grow lights: A 4–6 ft tall greenhouse or LED grow lights (12–16 hours/day) for optimal germination.
- ● Spray bottle: For gentle watering (16–20 oz capacity).
- ● Plastic wrap or humidity dome: To retain moisture during germination.
- ● Thermometer/hygrometer: Ideal 70–75°F (21–24°C) for germination.
- ● Fertilizer: Balanced liquid fertilizer (e.g., 10-10-10) diluted to half-strength for young seedlings.
- ● Trellis or support: A small A-frame trellis (1–2 ft tall) to train seedlings early.
- ○ Heating mat: (Optional) For faster germination in cooler climates (70–80°F range).
- ● Labeling tags: To track varieties and planting dates.
Step-by-step guide to growing morning glory starters indoors
Here's how to get a head start on vibrant summer climbers using greenhouse techniques.
🌱 Step 1: Select and Prepare Seeds for Germination
Morning glories thrive from fresh seeds, so choose high-quality packets labeled for your region. I like to soak the seeds overnight in lukewarm water—this softens the hard outer coating and speeds up germination. Use a small bowl and let them sit for 12 hours before planting. You'll see the seeds swell slightly, indicating they're ready.
After soaking, drain the water completely and let the seeds air-dry for 10-15 minutes. This prevents mold from forming in the damp soil. I always plant 4 seeds per container since germination rates can vary. Use your finger to make a small hole about ½ inch deep—deeper planting delays emergence because the seedling must push through more soil.
🪴 Step 2: Fill Containers with Light, Well-Draining Soil
Fill your 4-inch pots with a sterile seed-starting mix—never garden soil, as it compacts and suffocates tender roots. I blend mine with 20% perlite to improve drainage. Press the soil down gently until it's firm but not packed—this creates good root contact while leaving air pockets for growth.
Moisten the soil until it's damp to the touch but not soggy. You'll know it's right when a handful compresses slightly but doesn't crumble. Plant the soaked seeds ½ inch deep, spacing them evenly in the pot. Cover lightly with additional mix, then mist the surface with water until evenly damp. A heavy watering can will bury the seeds too deep, so use a spray bottle instead.
💧 Step 3: Provide Warmth and Humidity for Germination
Morning glories germinate best at 70-75°F, so place the pots on a seedling heat mat or in a warm spot like the top of your fridge. Cover the pots with a clear plastic dome or plastic wrap to retain moisture and warmth. Check daily for condensation—this is normal, but remove the cover immediately if you see mold forming.
Keep the soil consistently moist but never waterlogged. You'll see the first sprouts in 7-14 days, depending on temperature. Once 50% of seeds have germinated, remove the cover completely to prevent damping-off. This fungal disease attacks young seedlings and can wipe out your starter in days.
☀️ Step 4: Move to Bright Light and Harden Off
As soon as the first true leaves appear, move the seedlings to a south-facing window or under grow lights for 14-16 hours daily. Morning glories need strong light to prevent leggy growth—thin, weak stems that stretch toward the light. You'll know they're getting enough light when the leaves are dark green and compact, not pale and spaced far apart.
Two weeks before your last frost date, start hardening off the seedlings. Place them outside in a shaded, sheltered spot for 1-2 hours the first day, then gradually increase outdoor time by 1 hour daily. This prepares them for transplanting by toughening their stems and leaves. Watch for wilting—if it happens, they're not ready yet and need more time.
⏰ Step 5: Transplant and Support for Climbing
Transplant the seedlings outdoors after the soil warms to 60°F and all frost risk has passed. Choose a spot with full sun and install trellises or stakes at least 6 feet tall—morning glories need vertical support to climb. Dig a hole twice as wide as the root ball and place the seedling in, firming soil around the base.
Water deeply at the base to settle the soil and encourage root growth. You'll see new leaves emerge within a week—that's your signal everything is working. Mulch around the base with 2-3 inches of organic mulch to retain moisture and suppress weeds. Avoid overhead watering, as wet foliage invites fungal diseases like powdery mildew.
Tips & tricks for perfect morning glory starters
Here's what nobody tells you about getting those delicate climbers off to the right start.
Seed Prep Secret: The 12-hour soak is non-negotiable—it's the difference between seeds that sprout in days versus weeks. Use room-temperature water (not hot) to avoid shocking the seeds. I like to place the bowl on a seedling heat mat during soaking to maintain that 70-75°F germination zone. After draining, pat the seeds dry with a paper towel for those final 10-15 minutes—this critical drying step prevents mold before planting.
Soil Science: That 20% perlite mix isn't just for drainage—it creates air pockets that prevent root rot in those 4-inch pots. Press the soil gently but firmly after planting to eliminate air gaps, then use a spray bottle to mist until water runs through the drainage holes. Pro move: Add a thin layer of horticultural sand on top before covering with plastic—this prevents soil splash when you water.
Lighting Strategy: Those 14-16 hours daily of light are crucial for preventing leggy seedlings. If your south-facing window isn't getting enough sun, supplement with a grow light placed just 2-3 inches above the seedlings. Watch for leaves that turn toward the light source—this is your signal to rotate the pots daily for even growth. I've seen seedlings grow 2 inches in a single day with proper lighting!
Hardening Off Hack: Start the hardening process 2 weeks before your last frost date, but don't rush it. Begin with just 1-2 hours in shade, then increase by 1 hour daily. The key is gradual exposure—sudden changes cause stress that shows up as wilting. Place your seedlings in their final outdoor location during this process so they recognize their new home's conditions before transplanting.
Pro Tips for Morning Glory Before Bloom
- Here's what nobody tells you about getting those delicate climbers off to the right start.
- Seed Prep Secret: The 12-hour soak is non-negotiable—it's the difference between seeds that sprout in days versus weeks.
- Soil Science: That 20% perlite mix isn't just for drainage—it creates air pockets that prevent root rot in those 4-inch pots.
Frequently asked questions
Got questions about growing morning glory before bloom? You’re not alone! Here are some common queries to help you get started with confidence:
How soon can I transplant morning glory seedlings into the greenhouse?
Transplant your morning glory seedlings into the greenhouse 4–6 weeks after germination, once they’ve developed 2–3 true leaves and nighttime temps stay above 50°F (10°C). Harden them off for 3–5 days first to avoid shock—gradually expose them to outdoor conditions (or your greenhouse’s environment) to toughen up those tender stems!
Why aren’t my morning glory seedlings sprouting, even with proper moisture?
Patience is key! Morning glory seeds often take 14–21 days to germinate—sometimes longer if soil temps are cool (<60°F/15°C). If they still don’t sprout, check for freshness (old seeds may fail) or try soaking them overnight in warm water to break dormancy. If all else fails, test a new batch from a trusted supplier.
Can I grow morning glory from cuttings instead of seeds?
Yes! While seeds are easiest, you can propagate morning glory from healthy, vine cuttings (4–6 inches long) in spring. Dip the cut end in rooting hormone, plant in moist perlite or sand, and keep humid (use a plastic bag or propagator). Roots typically form in 2–4 weeks. Just avoid woody stems—they root poorly!
What pests should I watch for in morning glory seedlings?
Keep an eye out for aphids, spider mites, and slugs—they love young, tender plants. For aphids, spray with soapy water (1 tsp mild soap per quart of water). Use diatomaceous earth for slugs, and introduce ladybugs or lacewings for natural pest control. Rotate seedlings occasionally to prevent fungal issues like powdery mildew in humid greenhouses.
How much sunlight do morning glory starters need before blooming?
Give your seedlings 6–8 hours of bright, indirect light daily (a south-facing window or grow lights work). Once in the greenhouse, full sun (6+ hours) is ideal for robust growth and vibrant blooms. If leaves look leggy or pale, supplement with grow lights (12–16 hours/day) until they’re hardened off.
Wrapping up and next steps
Growing morning glories from seed before the bloom is a rewarding journey that sets the stage for a burst of vibrant summer color! 🌱 By mastering the right soil, light, and timing, you’ll give your climbers a head start—transforming your greenhouse (or windowsill) into a lush nursery of potential.
Remember, patience is key, but so is action: the earlier you start, the sooner you’ll enjoy those iconic trumpet-shaped blooms.
Ready to take the next step? Mark your calendar for early spring sowing, and watch as your tiny seedlings grow into thriving vines. Grab your supplies and get planting—your summer garden awaits! ✨