
Blooming
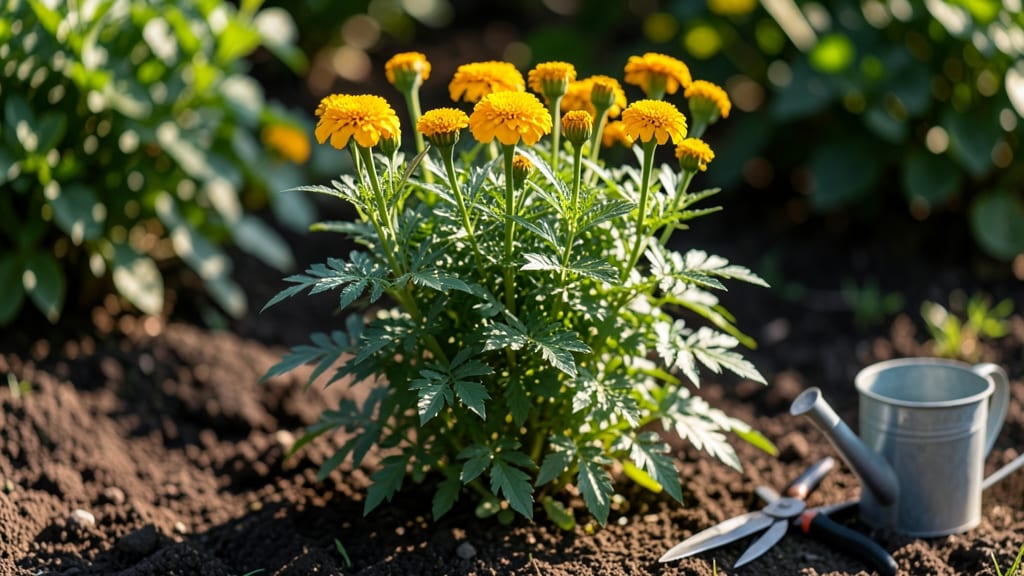
Pruning marigolds before bloom transforms scraggly stems into vibrant, long-lasting flower powerhouses. 🌼 I’ve seen marigolds go from leggy and sparse to bushy and prolific just by pinching back stems at the right time—and the secret isn’t complicated.
It’s all about timing, technique, and a little extra care during their early growth phase.
Start by planting marigolds in well-draining soil with full sun (6+ hours daily) and spacing them 12-18 inches apart. Water deeply after planting, then maintain 1 inch of moisture per week—never letting them dry out completely.
The key to strong blooms is encouraging a compact, bushy shape early, which means removing the top set of leaves when stems reach 6-8 inches tall.
When done right, you’ll see thicker stems, more side shoots, and a explosion of blooms that last well into fall. The plants develop deeper roots, resist flopping, and produce larger, brighter flowers than unpruned varieties.
This method works for both French and African marigolds, and it’s especially effective in hot climates where plants can get leggy without guidance.
Here’s the game-changer: prune again in 3-4 weeks if new growth gets too tall, and always use clean shears to avoid disease. The payoff? A border so dense with blooms that pests stay away—and your neighbors ask for cuttings. Let’s get those marigolds thriving.
📚 In This Guide
- What you need
- Instructions
- Tips and common mistakes
- Wrapping up and next steps
What you need
- ● Marigold plants: Healthy, non-blooming varieties (e.g., Tagetes erecta or Tagetes patula). Aim for 3–5 mature plants (6–12 inches tall) per project.
- ● Pruning shears: Sharp, bypass-style shears (avoid dull tools to prevent crushing stems).
- ○ Clean, sterilized scissors: Optional backup for delicate stems (rubbing alcohol wipe recommended).
- ● Gloves: Lightweight gardening gloves to protect hands from sap or thorns (if using Tagetes lemmonii).
- ○ Compost or mulch: 1–2 gallons per plant to replenish soil post-pruning (optional but recommended).
- ○ Garden kneeler/pad: For comfort during close-up work (optional but highly recommended!).
- ● Spray bottle with water: To hydrate cut stems before replanting (if dividing).
- ● Label markers: If propagating cuttings, use biodegradable labels to track varieties.
- ○ Sunlight meter (optional): To confirm your garden gets 6+ hours of direct sun daily.
- ● Confirm marigolds are 30–45 days old (pre-bloom stage). Check for 3–5 sets of true leaves and no flower buds.
- ● Choose a mild, overcast day to minimize stress on plants (avoid pruning in extreme heat or cold).
- ● Ensure soil is well-draining (amend with perlite if needed).
Step-by-Step guide to pre-bloom pruning for marigolds
Here’s how to coax your marigolds into fuller, bushier plants with more abundant blooms.
🌱 Step 1: Identify the Right Time to Prune
Prune marigolds when they reach 6-8 inches tall and have 5-7 true leaves—this is the ideal window before they start flowering. You’ll notice sturdy stems with a compact growth habit; if you wait until buds form, you’ll stunt their potential. The goal here is to encourage lateral branching, which leads to more flowers later.
Check for new leaf sets forming along the main stem. These are your visual cue that the plant is ready for pruning. Avoid working in direct sunlight—morning or late afternoon is best to reduce stress on the plant.
✂️ Step 2: Pinch Back the Main Stem
Use clean, sharp pruners to snip the main stem just above a set of leaves—about ¼ inch above the leaf node. This small cut signals the plant to redirect energy toward side shoots rather than vertical growth. I like to make the cut at a 45-degree angle to help water run off and prevent rot.
Don’t cut too close to the leaves—you’ll risk damaging the growth point. If you’re unsure, count two leaf sets down from the top and pinch there. This ensures the plant has enough foliage to support new growth while still encouraging bushiness.
☀️ Step 3: Encourage Lateral Growth with Light and Water
After pruning, move your marigolds to a spot with full sun (6+ hours daily) to help them recover quickly. You’ll see new shoots emerging from the leaf nodes within 7-10 days. Keep the soil evenly moist but not soggy—water deeply when the top 1 inch feels dry. Overwatering now can lead to weak stems or fungal issues.
Apply a balanced fertilizer (10-10-10) at half-strength to support the plant’s recovery. Focus on nitrogen initially to promote leafy growth, which will set the stage for more blooms later. Avoid heavy feeding right after pruning—you want roots to establish first.
🌿 Step 4: Monitor and Repeat for Bushier Plants
Watch for new lateral branches forming along the stem. Once these reach 4-6 inches tall, repeat the pinching process on the strongest shoots. This second pruning ensures a fuller, more compact plant. You’ll know you’re doing it right when the plant looks denser and more balanced.
If you notice yellowing leaves after pruning, it’s usually a sign of overwatering or stress. Adjust your watering schedule and ensure good airflow around the plant. With consistent care, your marigolds will reward you with longer bloom seasons and more vibrant flowers.
Tips & tricks for perfect pre-bloom marigold pruning
Real talk: Pruning marigolds before bloom is where the magic happens—but only if you nail these key details.
Timing is Everything: That 6-8 inch height window in Step 1 is non-negotiable. I've pruned at 5 inches and gotten stunted growth, while waiting until 9 inches often meant missing the prime lateral branching window. The 5-7 true leaves rule is your best friend—count them carefully, especially if your plants are growing fast. Morning pruning is ideal because the plants have had time to transpire overnight, reducing stress.
Precision Cutting Technique: In Step 2, that ¼-inch clearance above the leaf node matters more than you'd think. I've made cuts too close to the leaves and ended up with weak regrowth. The 45-degree angle isn't just for aesthetics—it creates more surface area for water runoff, which prevents fungal infections at the cut site. Pro tip: Sterilize your pruners with rubbing alcohol between plants to avoid spreading any potential pathogens.
Post-Pruning Recovery Strategy: The 7-10 day window for new shoots in Step 3 can feel like forever, but patience pays off. I've seen gardeners get impatient and overwater during this period, which leads to those dreaded yellow leaves. Instead, focus on keeping that top inch of soil consistently moist but never soggy. A simple moisture meter can be a game-changer here—it takes the guesswork out of watering.
Fertilizer Timing: That half-strength 10-10-10 application in Step 3 is crucial timing. I learned this the hard way by fertilizing too soon after pruning—it stresses the plant when it's already recovering. Wait until you see those first new shoots emerging before applying, and focus on that nitrogen boost to build leafy structure for future blooms. Think of it as giving your plant a protein shake after surgery.
Pro Tips for Marigolds Before Bloom
- Real talk: Pruning marigolds before bloom is where the magic happens—but only if you nail these key details.
- Timing is Everything: That 6-8 inch height window in Step 1 is non-negotiable.
- Precision Cutting Technique: In Step 2, that ¼-inch clearance above the leaf node matters more than you'd think.
Frequently asked questions
Got questions about marigolds before bloom? You’re not alone!
Here are some of the most common concerns—and their easy solutions—to help you master pre-bloom pruning like a pro.
How do I know when my marigolds are ready for pre-bloom pruning?
Prune marigolds when they reach 6–8 inches tall and just before the first buds form. Look for the third or fourth set of true leaves—this is your cue! Early pruning encourages bushier growth and more blooms later. Avoid cutting too late, or you might delay flowering.
Will pruning marigolds before bloom stunt their growth?
Not if done correctly! Pruning stimulates growth by redirecting energy to lateral stems, which leads to more flowers, not less. Just use clean, sharp shears and avoid removing more than ⅓ of the plant’s height at once. Think of it like a haircut—too much too soon can shock, but the right trim keeps things lush!
Can I use marigold leaves or stems before bloom for cooking or remedies?
Yes! While the flowers are the star, young leaves and stems (harvested before bloom) are edible and packed with flavor. Use them like herbs in salads, pestos, or teas. Caution: Avoid older leaves (they can be bitter) and always wash thoroughly. For remedies, marigold leaves are used in anti-inflammatory poultices—just ensure they’re pesticide-free!
What if my marigolds don’t bloom after pre-bloom pruning?
No blooms? Check these fixes:
- Light: Marigolds need 6–8 hours of sun daily. Move to a sunnier spot if needed.
- Water: Keep soil consistently moist but not soggy—drought stress delays blooming.
- Fertilizer: Feed with a balanced, low-nitrogen fertilizer (like 10-10-10) every 4–6 weeks.
- Deadheading: Remove spent blooms to encourage new ones!
Are there marigold alternatives for pre-bloom pruning?
Try these pruning-responsive annuals for similar results:
- Zinnias – Prune when 6–8” tall for bushier blooms.
- Cosmos – Pinch back early to prevent legginess.
- Sunflowers (dwarf varieties) – Trim side shoots for thicker stems.
- Calendulas – Prune to encourage continuous flowering.
Wrapping up and next steps
Caring for marigolds before bloom isn’t just about pruning—it’s about setting the stage for vibrant, long-lasting blooms that’ll turn heads in your garden. 🌼 With the right tools, timing, and technique, you’ll enjoy a season of lush, healthy flowers that keep giving.
Now that you’re armed with the know-how, grab those shears and give your marigolds the love they deserve—your future blooms will thank you!
Ready to take it further? Experiment with different pruning schedules or try growing marigolds from seed to see how early care shapes their growth. Happy gardening!