
Blooming
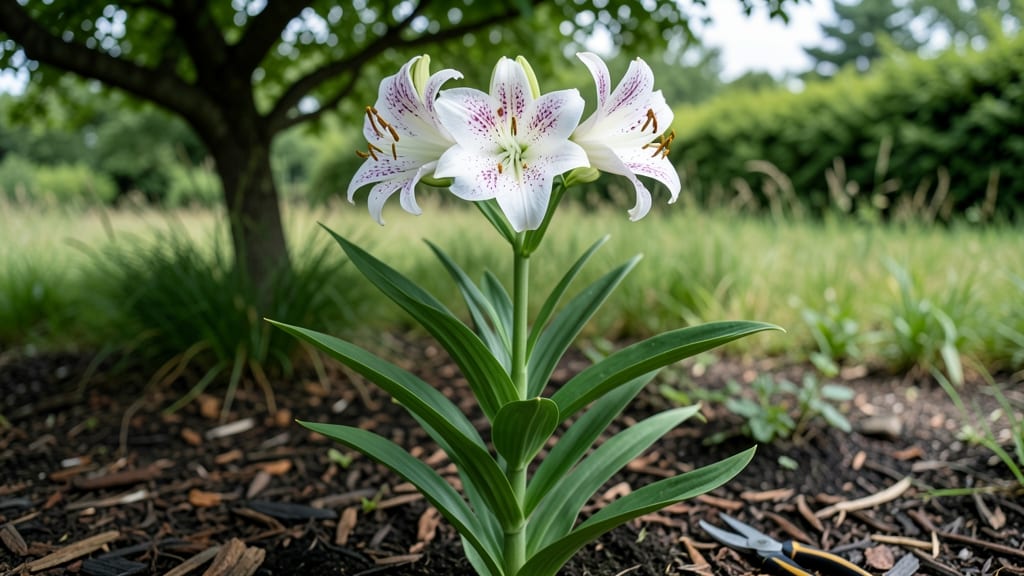
The lily in full bloom transforms any garden into a stage for nature’s most dramatic performances—tall, velvety petals swaying in the breeze, their intoxicating fragrance cutting through summer heat. 🌸 I’ve watched my Asian lilies put on a show for six weeks straight, their golden trumpets standing out against the green backdrop like beacons.
The secret isn’t deadheading—it’s placement and companionship that makes them the undeniable stars of the show.
Start by giving them room to shine: plant them where their height (up to 5 feet) can anchor a border or dominate a mixed bed.
Pair their bold colors with low-growing foliage like hostas or ferns to create contrast, or let them stand alone as a bold statement piece near pathways or patios. The key is color coordination—deep purples pair beautifully with silver foliage, while white lilies glow against dark greens or purples.
Timing is everything: most lilies bloom in midsummer, but reblooming varieties like ‘Stargazer’ or ‘Casa Blanca’ can give you two shows a year. Plant them where they’ll get morning sun and afternoon shade to prolong their bloom time.
The fragrance alone draws in pollinators, turning your garden into a buzzing, blooming spectacle that neighbors will envy.
For maximum impact, group them in odd numbers (3, 5, or 7) to create natural focal points. Add a few grasses or ornamental onions at their base for texture, and watch as they become the centerpiece of your seasonal landscaping.
The drama doesn’t end with the blooms—even their dried seed pods add winter interest.
📚 In This Guide
- What you need
- Instructions
- Tips and common mistakes
- Wrapping up and next steps
What you need
- ● Lily bulbs or tubers: Choose Asiatic, Oriental, Trumpet, or Martagon lilies (perennial varieties). Buy 3–5 healthy bulbs (size: 2–3 inches in diameter) for a stunning display.
- ● Well-draining potting mix or garden soil: 5–10 gallons, amended with 1–2 parts compost and 1 part perlite or coarse sand (for containers).
- ● Organic fertilizer: Balanced 10-10-10 or bulb-specific fertilizer (e.g., Espoma Lily Food). Use 1–2 tbsp per bulb at planting.
- ● Mulch: 2–3 inches of pine straw, shredded bark, or straw (retains moisture and regulates soil temp).
- ● Garden trowel or bulb planter (for digging holes 6–8 inches deep and 12–18 inches apart).
- ● Watering can or hose with a gentle spray nozzle (avoid oversaturating bulbs).
- ○ Gloves (optional but recommended—lily bulbs can be messy!).
- ○ Stakes or trellis (optional, for Trumpet lilies—they grow 3–6 feet tall!).
- ● Sunlight: Full sun (6+ hours/day) for most lilies (except Martagon lilies, which tolerate partial shade).
- ● Soil pH: 6.1–7.5 (slightly acidic to neutral). Test your soil here if unsure.
- ● Patience: Asiatic/Oriental lilies bloom in 1–2 years; Trumpet lilies take 3–5 years for full glory.
Step-by-step guide to coaxing lilies into repeated full bloom
Here's how to grow lilies that reward you with bold, repeat performances—no deadheading required.
🌱 Step 1: Plant Bulbs in Well-Drained, Sunlit Soil
Choose a location with 6+ hours of morning sun and afternoon shade in hot climates—lilies appreciate warmth but hate afternoon heat stress. Dig holes 3 times deeper than the bulb's height and 2-3 times wider to encourage robust root spread. The reason for this depth is that lilies store energy in their roots, and shallow planting leads to weak stems.
Amend the soil with 2-3 inches of compost mixed into the bottom of each hole. This ensures nutrients are available where the roots will grow most actively. Place the bulb with its pointed end facing up—this is critical because upside-down bulbs won't sprout. Cover with soil, leaving the top third exposed to prevent rot.
☀️ Step 2: Water Deeply and Maintain Consistent Moisture
Water immediately after planting to settle the soil and eliminate air pockets around the roots. Keep the soil evenly moist but never soggy for the first 4-6 weeks—this is when roots establish themselves. You'll know moisture is right when the top inch of soil feels damp to touch but doesn't glisten with excess water.
Once the first leaves appear, reduce watering slightly but maintain 1 inch per week during the growing season. Overwatering now causes bulb rot, while underwatering stresses the plant and reduces bloom size. Mulch with 2-3 inches of organic matter (like shredded bark) to retain moisture and regulate soil temperature.
✂️ Step 3: Fertilize Strategically for Stronger Blooms
Apply a balanced 10-10-10 fertilizer at planting time to kickstart growth, then switch to a low-nitrogen, high-phosphorus formula (like 5-10-10) when buds form in early spring. The key here is phosphorus—it's what pushes energy into flower production rather than leafy growth. Scatter granules 6 inches away from the stems to avoid burning the foliage.
Stop fertilizing 6-8 weeks before your first frost to allow the plant to harden off and store nutrients in the bulb for next year's blooms. I've found that lilies respond better to slow-release granules than liquid feeds—they don't get "burned" by overapplication, and the timing is foolproof.
🌿 Step 4: Let Foliage Yellow Naturally for Next Year's Blooms
Here's where most gardeners go wrong: they cut back foliage too soon. Leave the leaves until they turn completely yellow and crisp—this process, which takes 8-10 weeks after blooming, is how the plant feeds the bulb for next season. The longer you wait, the bigger and more dramatic next year's flowers will be.
When the leaves finally die back, trim them to 2 inches above the soil line with clean, sharp shears. This prevents disease from overwintering in dead foliage while still allowing the bulb to photosynthesize until the last possible moment. I know it looks messy to leave them standing, but trust the process—your lilies will thank you with repeat performances.
⏰ Step 5: Mulch and Protect Over Winter
Apply a 4-6 inch layer of mulch in late fall to insulate bulbs from freeze-thaw cycles that cause heaving. I use straw because it breaks down slowly and adds organic matter as it decomposes. In Zone 5 and colder, add a 12-inch layer of leaves or straw on top for extra protection.
Remove the mulch in early spring when soil temperatures reach 50°F—you'll see sprouts pushing through within 2-3 weeks. This timing is crucial because mulch left too long can smother emerging shoots. Lilies are surprisingly cold-hardy once established, but they need consistent moisture to break dormancy smoothly.
Tips & tricks for perfect lily blooms that rebloom year after year
These are the secrets I've learned from years of growing lilies that come back bigger and more dramatic every season.
Planting Depth Matters: The 3 times deeper planting isn't just about roots—it's about creating space for the bulb to store energy. I've seen lilies planted too shallow struggle with weak stems that flop under heavy blooms. Use a ruler to verify depth, especially with larger bulbs. The top third exposed prevents rot while allowing photosynthesis for the bulb's top growth point.
Soil Temperature Timing: The 50°F soil temperature threshold for removing mulch in spring is your cue that roots are ready to wake up. I test this by pressing my finger into the soil—if it feels cool but not icy, it's time. Cold soil shocks tender new shoots, while warm soil encourages consistent growth. In colder zones, wait until you see green tips peeking through before removing mulch completely.
Fertilizer Transition Strategy: Switching from 10-10-10 to 5-10-10 when buds form is where the magic happens for reblooming. The phosphorus boost directs energy to flower production instead of leafy growth. I apply the second fertilizer when the first buds appear, about 6-8 weeks before my area's first frost date. This timing ensures the plant stores enough nutrients for next year's blooms while still producing flowers this season.
Winter Protection Hack: For Zone 5 and colder, I double the mulch layer to 12 inches using straw and leaves. The air pockets in straw insulate better than solid mulch while breaking down to enrich the soil. In extreme winters, I add a layer of evergreen boughs on top—they shed snow slowly, preventing freeze-thaw cycles that can heave bulbs out of the ground.
Pro Tips for Lily In Full Bloom
- These are the secrets I've learned from years of growing lilies that come back bigger and more dramatic every season.
- Planting Depth Matters: The 3 times deeper planting isn't just about roots—it's about creating space for the bulb to store energy.
- Soil Temperature Timing: The 50°F soil temperature threshold for removing mulch in spring is your cue that roots are ready to wake up.
Frequently asked questions
Got questions about keeping your lilies blooming beautifully without deadheading drama? You’re not alone! Here are the answers to the most common queries—so you can enjoy those stunning flowers year after year.
Why do some lilies refuse to rebloom even if they’re healthy?
Lilies often need patience and the right conditions to rebloom. Overwatering, poor drainage, or insufficient sunlight (they love 6+ hours of sun) can stunt regrowth. Also, younger plants (first 2-3 years) focus energy on establishing roots—so don’t stress if blooms are sparse early on. Pro tip: Feed them with a balanced fertilizer in spring for a boost!
How long does it take for lilies to bloom after planting?
Most lilies take 60-90 days to bloom after planting bulbs, but timing varies by variety. Asiatic lilies (early bloomers) may flower in 50-60 days, while Oriental lilies (late bloomers) can take up to 3 months. Plant in early spring (after frost) for the best results—just give them time!
Can I grow lilies in containers instead of the ground?
Lilies thrive in large containers (at least 12" deep) with well-draining soil. Use a mix of potting soil + perlite to prevent rot. Just ensure the pot has drainage holes and place it in full sun. Container lilies may rebloom slightly less than ground-planted ones, but they’re perfect for patios or balconies!
What do I do if my lily leaves turn yellow or wilt?
Yellowing leaves often signal overwatering or fungal issues. Let the soil dry between waterings, and avoid soggy conditions. Wilting could mean underwatering or heat stress—mulch around the base to retain moisture. If spots appear, treat with neem oil or copper fungicide. Prevention tip: Space plants 12-24" apart for airflow!
Are there lilies that rebloom without deadheading?
Yes! Oriental hybrids and some Asiatic varieties (like ‘Stargazer’ or ‘Casa Blanca’) are known to rebloom without deadheading, though results vary. That said, removing spent blooms encourages stronger second flushes—so it’s still worth a try! For guaranteed reblooms, cut back foliage in late fall (but leave some leaves until they yellow naturally).
Wrapping up and next steps
Watching a lily in full bloom is like witnessing nature’s own masterpiece—vibrant, resilient, and effortlessly stunning. These perennials prove that beauty thrives with minimal fuss, especially when you skip deadheading and let them shine on their own terms.
Whether you’re a seasoned gardener or just starting, embracing their low-maintenance charm is a gift to both your garden and your sanity!
Ready to elevate your outdoor space? Plant a few lilies today and enjoy their breathtaking reblooms year after year—nature’s way of saying, "You’ve got this!" 🌸✨