
Blooming
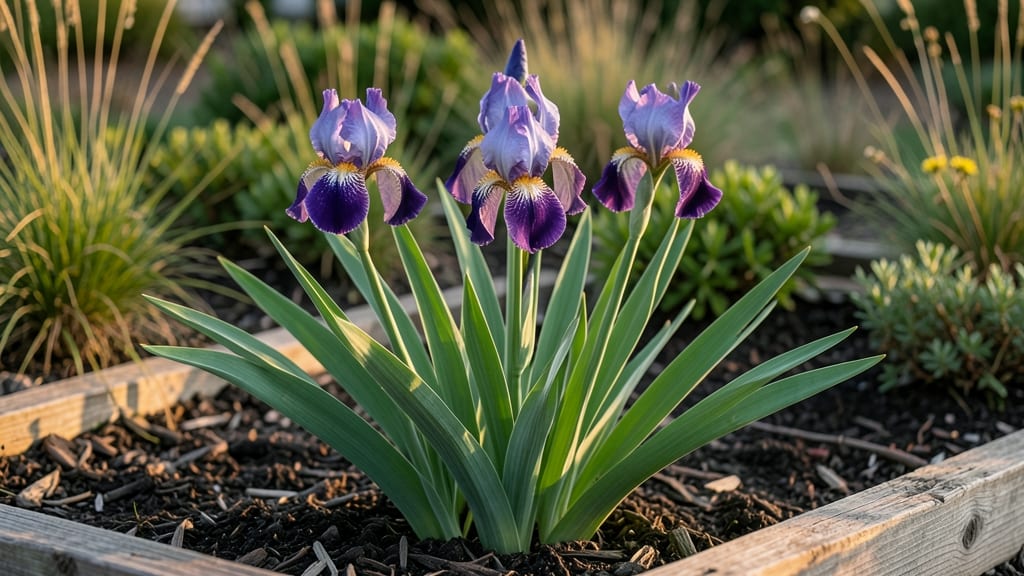
The iris flower bloom time varies by zone and variety, but with these tricks, your garden will explode with color between late April and June—just like mine does every year! 🌸 The secret isn’t just planting; it’s understanding how climate, sunlight, and even last year’s pruning influence when those dramatic blooms appear.
Northern Hemisphere gardeners see most irises bloom in May-June, while Southern Hemisphere varieties shine from September-October. The difference comes down to chilling requirements—some need winter cold to trigger flowers, while others prefer milder winters. I’ve grown both, and the right variety for your climate makes all the difference.
With proper care—like dividing clumps every 3-4 years and fertilizing in early spring—you’ll get longer, more vibrant blooms that last weeks. The key is patience: irises reward consistency, not shortcuts. Think of it as setting the stage for a summer showstopper.
Here’s the game-changer: Prune spent blooms immediately, but leave the foliage until it yellows. This fuels next year’s flowers. Your irises will thank you with bold, healthy blooms that turn heads every season.
📚 In This Guide
- What you need
- Instructions
- Tips and common mistakes
- Wrapping up and next steps
What you need
- ● Iris rhizomes (bare-root): 10–20 per 10 sq. ft. (choose early, mid-, or late-season varieties for extended bloom time).
- ● Well-draining soil: Mix of native soil + 2–3 inches of compost or aged manure (pH 6.0–7.0).
- ● Garden fork or tiller: For loosening soil to 12–18 inches deep.
- ● Organic fertilizer (low-nitrogen): 5-10-10 or bone meal (1 tbsp per rhizome at planting).
- ● Garden gloves: Heavy-duty to protect hands from sharp rhizome edges.
- ● Watering can or hose with gentle spray nozzle: For post-planting hydration.
- ○ Mulch (optional but recommended): 2–3 inches of shredded bark or straw to retain moisture.
- ● Soil test kit: To verify pH/nutrient levels before planting.
- ● Stakes or plant labels: For tracking varieties (especially if mixing colors!).
- ● Slow-release granules: For a nutrient boost during peak bloom (spring/summer).
- ● Drip irrigation system: Automates watering for consistent moisture.
- ● Pruners: For trimming spent blooms to encourage reblooming.
Step-by-step instructions for planting irises for reliable summer blooms
Timing matters most with irises—plant them right, and you’ll enjoy bold summer color for years.
🌱 Step 1: Choose and Prepare Iris Rhizomes for Planting
Select healthy rhizomes with firm, plump roots and no signs of rot or soft spots. The top of the rhizome should be slightly rounded, while the bottom is flat or slightly concave. Irises thrive in full sun, so choose a location with at least 6 hours of direct sunlight daily. If your soil drains poorly, amend it with 2-3 inches of sand or grit mixed into the top 12 inches of soil.
Soak the rhizomes in lukewarm water for 2-3 hours before planting to encourage root growth. This step is especially important in dry climates, where rhizomes can dry out quickly. Handle them gently—they’re tough but bruise easily. I like to plant mine in early fall or late winter, when the soil is cool but workable.
☀️ Step 2: Plant Rhizomes at the Correct Depth and Spacing
Dig holes 4-6 inches deep and space them 12-24 inches apart, depending on the iris variety. The top of the rhizome should be exposed—never bury it completely. This ensures the rhizome stays dry and prevents rot. If you’re planting in a row, position rhizomes with their fan-shaped roots facing outward for even growth.
Gently press the soil around the rhizome to secure it, but don’t pack it down tightly. The rhizome needs to stay slightly elevated to dry out between rains. After planting, water deeply to settle the soil and encourage root establishment. You’ll know it’s right when the soil around the rhizome looks firm but not muddy.
💧 Step 3: Water and Fertilize for Strong Root Development
Keep the soil consistently moist but not soggy for the first 2-3 weeks after planting. Irises are drought-tolerant once established, but young rhizomes need steady moisture to root deeply. Water at the base of the plant, avoiding the leaves, to prevent fungal diseases like leaf spot. You’ll see new roots emerge within 4-6 weeks if conditions are right.
Apply a balanced, slow-release fertilizer (like 10-10-10) in early spring, once the first shoots appear. Irises don’t need heavy feeding, but a light application in spring and again after blooming encourages strong growth. Stop fertilizing in late summer to allow the rhizomes to prepare for dormancy.
⏰ Step 4: Prune and Maintain for Repeat Blooms
After the blooms fade, cut the flower stalks down to 2-3 inches above the rhizome with clean, sharp pruners. This redirects the plant’s energy into next year’s growth rather than seed production. Leave the fan of leaves intact—they photosynthesize all summer to feed the rhizome. You’ll notice the leaves yellowing in late summer or fall, which is normal as the plant enters dormancy.
Divide crowded clumps every 3-4 years in early fall to maintain vigor. Lift the rhizomes, separate the fans, and replant the healthiest sections. This prevents overcrowding and ensures strong blooms. Mulch lightly with 2 inches of compost or straw in winter to protect the rhizomes from extreme cold or freeze-thaw cycles.
Tips & tricks for perfect iris planting timing
Timing is everything when planting irises—these insights will help you avoid common pitfalls and maximize those vibrant summer blooms.
Sunlight Strategy: That 6 hours of direct sunlight requirement is non-negotiable for irises. If your garden gets partial shade, consider planting in the sunniest spot you have—even a few hours less sunlight can delay blooming or reduce flower size. I’ve seen irises in morning sun with afternoon shade still perform well, but afternoon sun is more critical for consistent blooms.
Soaking Secret: The 2-3 hour soak in lukewarm water is particularly important if you’re planting in dry climates or during hot weather. This jumpstarts root growth and compensates for potential moisture loss. Pro tip: Use rainwater or distilled water if your tap water has high chlorine levels—irises are sensitive to chemical buildup in their early stages.
Planting Depth Precision: The 4-6 inch depth recommendation isn’t arbitrary—the rhizome’s top should peek above soil level. If buried too deep, it’ll rot; too shallow, and it’ll dry out. I like to use a ruler to verify depth, especially when planting multiple rhizomes. The exposed top also helps identify where the plant is growing after emergence.
Watering Wisdom: Those first 2-3 weeks of consistent moisture are critical for root establishment. I set up a drip irrigation system on a timer to avoid overwatering—irises hate soggy roots. Once established, you’ll see new roots emerge within 4-6 weeks, signaling it’s time to reduce watering slightly to encourage dormancy preparation.
Pro Tips for Iris Flower Bloom Time
- Timing is everything when planting irises—these insights will help you avoid common pitfalls and maximize those vibrant summer blooms.
- Sunlight Strategy: That 6 hours of direct sunlight requirement is non-negotiable for irises.
- Soaking Secret: The 2-3 hour soak in lukewarm water is particularly important if you’re planting in dry climates or during hot weather.
Frequently asked questions
Got questions about getting your irises to bloom at just the right time? Here are some common ones—and their answers—to help you plan like a pro!
When do irises typically bloom, and how can I predict their timing?
Most iris varieties bloom in late spring to early summer (April–June in temperate zones), but timing depends on your climate and variety. Bearded irises often bloom first, followed by sibirticas and Japanese irises later. Check your USDA zone and local frost dates—irises need 6–8 weeks of cool weather before blooming for vibrant displays.
Why aren’t my irises blooming this year?
Missed blooms usually stem from overcrowding, poor nutrition, or improper care. Dig up and divide clumps every 3–4 years to refresh growth. Feed with low-nitrogen, high-phosphorus fertilizer (like 5-10-10) in early spring. Also, ensure they get full sun (6+ hours/day) and well-draining soil. If they’re not blooming, they might be leafing out—patience!
Can I force irises to bloom earlier or later?
While you can’t drastically alter bloom time, you can nudge them slightly. For earlier blooms, plant dwarf varieties (like Iris reticulata) or move established clumps to a warmer microclimate. To delay blooming, prune spent blooms immediately and avoid fertilizing in late summer. Note: Forcing irises to bloom out of season stresses the plant—focus on healthy roots first!
Do irises bloom better in wet or dry conditions?
Irises hate soggy soil—they prefer moderate moisture with excellent drainage. Overwatering can rot rhizomes, while drought stress may delay blooms. Water deeply once a week (or when the top 2 inches of soil dry out) and mulch lightly to retain moisture. Pro tip: Plant irises on a slope or raised bed to prevent water pooling.
What can I plant near irises to extend my summer color?
Pair irises with complementary perennials for a long-blooming display! Try:
- Alliums (purple globes, bloom same time as irises)
- Catmint (blue spikes, blooms June–September)
- Daylilies (yellow/orange, summer–fall)
- Salvia (purple/blue, late spring–summer)
Wrapping up and next steps
Timing your iris blooms is all about patience, precision, and a little bit of magic! 🌸 By understanding their optimal planting window (fall for best results) and climate-specific cues, you’ll unlock stunning summer displays year after year.
Whether you’re a seasoned gardener or just starting, these insights will help you cultivate irises that steal the show.
Ready to transform your garden? Start by marking your calendar—fall is your best bet for planting, but even late-season prep can set you up for success. Grab your gloves, dig in, and watch those vibrant blooms reward your efforts!