
Blooming
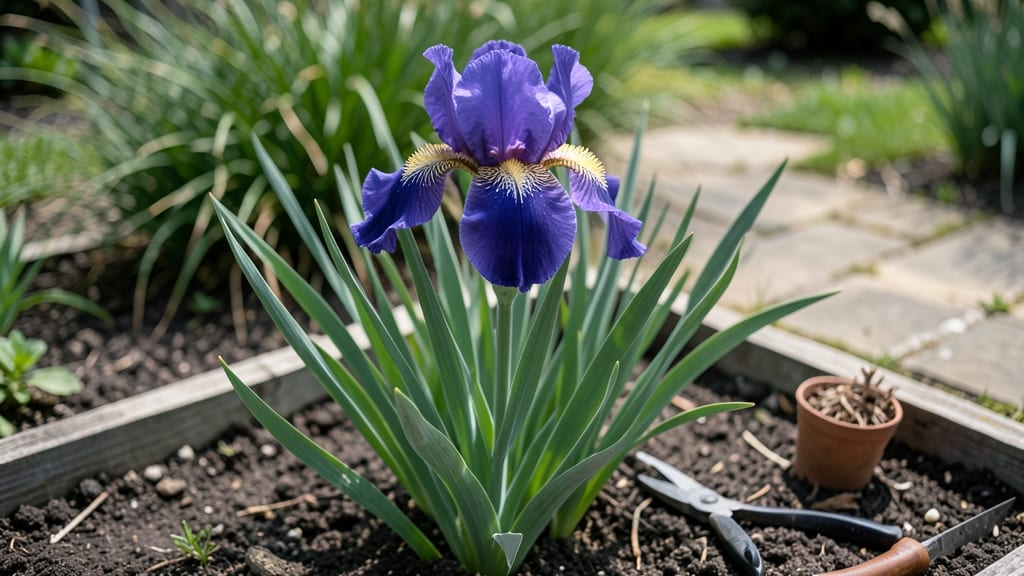
The a iris blooming season arrives just as the frost finally melts—late winter to early summer is their peak window, and timing varies by variety and climate. 🌸 I’ve watched my own rhizomes push through the soil like clockwork, their sword-like leaves signaling the show is about to begin.
The secret to nonstop blooms? Understanding their frost-proof timeline and giving them the right conditions before the first buds even appear.
Most irises bloom between March and June, with bearded varieties typically leading the charge in early spring, followed by Siberian and Louisiana types later in the season. In warmer climates like Zone 8 and above, you might even catch a second flush of blooms in fall.
The key is matching your care to their natural rhythm—too much water in winter can rot rhizomes, while insufficient sunlight stunts flower production.
With proper sunlight (full sun for at least 6 hours daily), well-draining soil, and minimal pruning after blooms fade, your irises will reward you with vibrant, long-lasting blooms for years.
I’ve seen some stalwarts in my garden still putting on a show well into June, their petals unfurling like delicate fans against the backdrop of fresh green foliage.
Regional tweaks matter: Northern gardeners should plant rhizomes in late summer or early fall to establish roots before winter, while Southern growers can plant anytime except during extreme heat. The goal is consistent moisture without soggy soil—think of it as giving your irises a drink, not a bath.
📚 In This Guide
- What you need
- Instructions
- Tips and common mistakes
- Wrapping up and next steps
What you need
- ● Iris rhizomes: Choose healthy, firm rhizomes (preferably bearded irises for classic blooms). Aim for 3–5 rhizomes per square foot for a lush display.
- ● Well-draining soil: Mix 1 part compost with 2 parts native soil (irises hate soggy roots!). A pH of 6.0–7.0 is ideal.
- ● Garden fork or tiller: For aerating heavy clay soil (critical for drainage!).
- ● Organic mulch: 2–3 inches of straw, pine needles, or wood chips to retain moisture and suppress weeds.
- ● Slow-release fertilizer: 5-10-10 NPK ratio (apply 1–2 lbs per 100 sq ft in early spring).
- ● Pruners (sterilized): For trimming dead foliage after blooming.
- ● Gloves & knee pads: Because gardening is hard work!
- ● Copper-based fungicide: To prevent iris borer (spray in early spring if your area is prone).
- ● Stakes or rings: For tall bearded irises (helps keep blooms upright).
- ● Drip irrigation system: For 1–2 inches of water per week (irises are drought-tolerant but love consistency!).
- ● Garden journal: Track bloom times, soil notes, and pests for future reference!
Step-by-Step guide to extending your iris blooming season
Here's how I keep irises flowering reliably year after year—no matter what Mother Nature throws at them.
🌱 Step 1: Time Your Planting for Optimal Root Establishment
Fall is the best time to plant irises for next year's blooms, but don't wait too late. Aim for 6-8 weeks before your first hard frost—typically September to early October in most climates. Planting too early means roots won't establish before winter, while planting too late risks frost damage to tender new growth.
Dig a hole 12-18 inches deep (twice the depth of the rhizome) and 12 inches wide. The top of the rhizome should sit just above soil level—burying it too deep suffocates the plant, while leaving it exposed leads to rot. You'll see the rhizome's natural crown where the leaves and roots emerge; position this at the soil surface.
☀️ Step 2: Choose the Sunniest Spot in Your Garden
Irises thrive in full sun—at least 6 hours daily—but they'll tolerate 4 hours in cooler climates. The more sun, the more vigorous the blooms. I always plant mine where they'll get morning sun and afternoon shade in hotter regions to prevent leaf scorch.
Watch for yellowing leaves in summer—they're normal and indicate the plant is going dormant. Don't panic and fertilize. Instead, reduce watering once blooms fade, signaling the plant to prepare for next season's growth.
💧 Step 3: Master the Watering Balance
Irises hate soggy roots but need consistent moisture during their active growing season. Water deeply once a week during the first year after planting, then every 10-14 days once established. The soil should be dry 2-3 inches down between waterings—stick your finger in to check.
Here's the thing—irises are drought-tolerant once established, but they won't bloom well if stressed. You'll see weak, sparse blooms if the soil dries completely between waterings. Mulch lightly with 2-3 inches of organic mulch (like shredded bark) to retain moisture and regulate soil temperature.
✂️ Step 4: Deadhead and Divide at the Right Times
Deadhead spent blooms immediately after they fade to redirect the plant's energy into next year's flowers. Cut the flower stalk down to the ground but leave the leaves intact—they photosynthesize and feed the rhizome. You'll notice new growth emerging from the sides of the rhizome in late summer; this is your signal to prepare for division.
Divide irises every 3-5 years in late summer or early fall. You'll know it's time when you see fewer blooms or crowded rhizomes. Dig up clumps, separate the rhizomes with a clean knife, and replant the healthiest ones. Discard any that are mushy or have black spots—these show disease.
⏰ Step 5: Protect Against Frost and Winter Stress
Irises are famously cold-hardy, but young plants or newly divided rhizomes need extra protection. Once temperatures drop below 20°F, mound 4-6 inches of mulch around the base of the plants. Remove the mulch in early spring before new growth appears to prevent rot.
Watch for frost damage in early spring—you'll see blackened or mushy leaves. Simply trim away the damaged parts and let the plant recover. Irises are tough and will bounce back. In warmer climates, you might see a second flush of blooms in late summer if you provide consistent water and light.
Tips & tricks for extending your iris blooming season
Real talk: the difference between a garden full of irises and one that barely blooms often comes down to these small but critical details.
Planting Precision: When you're digging that 12-18 inch hole in Step 1, pay attention to the rhizome's natural crown—the point where leaves and roots meet. This should sit just at soil level, not buried or exposed. I've seen gardeners bury rhizomes too deep, which suffocates them, or leave them exposed, leading to rot. The crown needs to peek just above the soil like a proud little sentinel.
Sunlight Strategy: That 6 hours of daily sun in Step 2 is non-negotiable for peak blooms, but here's what nobody tells you—morning sun with afternoon shade in hot climates prevents leaf scorch while still giving irises the energy they need. I've had irises in full afternoon sun wilt dramatically by evening, while those with morning sun and afternoon shade stayed vibrant all season.
Watering Wisdom: The 2-3 inches dry test in Step 3 is your best friend. Stick your finger in the soil—if it's damp only in the top inch, you're overwatering. If it's completely dry 3 inches down, you're underwatering. I've seen irises with weak blooms because gardeners either drowned them or let them dry out completely between waterings. Consistency is key, especially during that first critical year after planting.
Dividing Insight: When you notice fewer blooms or crowded rhizomes in Step 4, that's your plant screaming for attention. The 3-5 year division schedule is a guideline, but don't wait until you see major decline. I've divided irises every 4 years and seen immediate improvement in bloom quantity and size the following season. Just remember—you're looking for firm, healthy rhizomes to replant, not the soft, diseased ones you should discard.
Pro Tips for Iris Blooming Season
- Real talk: the difference between a garden full of irises and one that barely blooms often comes down to these small but critical details.
- Planting Precision: When you're digging that 12-18 inch hole in Step 1, pay attention to the rhizome's natural crown—the point where leaves and roots meet.
- I've had irises in full afternoon sun wilt dramatically by evening, while those with morning sun and afternoon shade stayed vibrant all season.
Frequently asked questions
Got questions about iris blooming season? You’re not alone—these stunning perennials captivate gardeners with their timing, care, and vibrant displays. Here are answers to the most common queries to help you plan your iris blooming season like a pro!
When is the best time to plant irises for spring blooms?
Plant iris rhizomes in early fall (4–6 weeks before the first frost) or late winter/early spring (as soon as the ground is workable). Fall planting gives roots time to establish before winter, ensuring robust blooms the following spring. Avoid planting in summer heat—rhizomes need cool soil to thrive.
Why do my irises bloom later than neighbors’?
Several factors can delay blooming: age (older rhizomes may slow down), light (irises need full sun—6+ hours daily), or soil (poor drainage or heavy clay can stress them). Divide clumps every 3–4 years to rejuvenate growth. If blooms are sparse, fertilize in early spring with a low-phosphorus formula (e.g., 10-10-10).
Can irises survive frost, and how do I protect them?
Most iris varieties are frost-hardy (USDA Zones 3–9), but tender new shoots may need protection in extreme cold (<10°F). Mulch with 2–3 inches of straw or shredded leaves after the first frost to insulate roots. Avoid heavy mulch—irises dislike soggy soil. In zones with harsh winters, a light frost cloth over clumps can help.
What can I plant near irises to extend the blooming season?
Pair irises with complementary perennials for continuous color:
- Early spring: Crocus or Daffodils (bloom before irises, then fade as irises peak).
- Late spring/summer: Daylilies or Catmint (fill gaps after iris blooms).
- Fall interest: Russian Sage or Sedum (add height and texture).
What should I do if my irises stop blooming?
Non-blooming irises often need a wake-up call! Try these fixes:
- Trim spent blooms but leave the leaves (they feed the rhizome).
- Divide clumps if they’re overcrowded (dig up, separate, and replant in spring).
- Check watering: Irises hate soggy roots but need 1–2 inches of water weekly during dormancy.
- Move to sunnier spot if shaded by trees or structures.
Wrapping up and next steps
Watching your irises burst into vibrant color is a rewarding experience—one that’s all the sweeter when you’re prepared! 🌸 From late winter to early summer, these frost-proof beauties offer nonstop color with minimal fuss.
Whether you’re a seasoned gardener or just starting, timing is key: plant bulbs in fall for a showstopping spring display.
Ready to dive in? Start by marking your calendar for the ideal planting and blooming windows in your zone. Then, grab your gloves and get growing—your future iris garden is waiting! 🌱✨