
Blooming
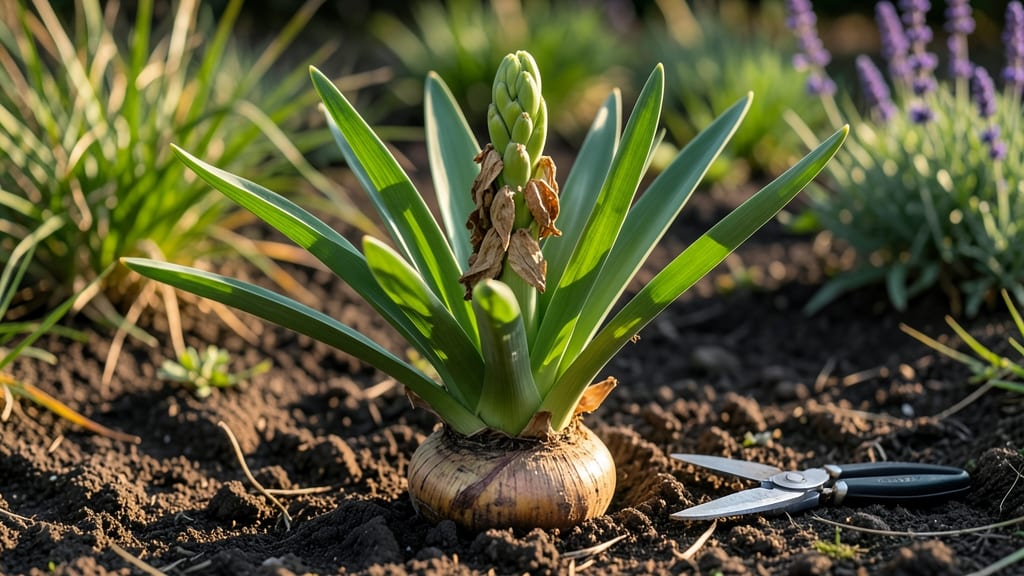
Cutting back hyacinths after their fragrant spring show doesn’t mean saying goodbye forever—it’s the secret to next year’s even more dramatic blooms. 🌸 I’ve learned that what happens after those purple spikes fade determines whether you’ll see another showstopper in 12 months.
Most gardeners stop caring once the flowers droop, but that’s exactly when the real work begins for bulbs that want to come back stronger.
The key is letting those strappy leaves stay put for 6-8 weeks after blooming—this is when the bulb stores up energy for next spring. I used to yank everything back immediately, and my hyacinths never rebounded.
Now I mark the spot with a tiny flag so I don’t accidentally dig them up later. If you’re in a hot climate, just keep the soil moist until the leaves yellow naturally.
By summer’s end, you’ll have a choice: leave the bulbs where they are or dig them up to divide and replant. Either way, a light feeding with bulb fertilizer in early fall wakes them up for next year’s performance.
The bulbs you nurture now will reward you with taller, more fragrant stems—and maybe even a few surprise blooms on the side shoots.
This method works whether you’re growing in garden beds, containers, or even under trees where other plants struggle. The only real mistake is rushing the process—patience pays off with hyacinths that come back bigger and better every year. Let’s get those bulbs ready for their next starring role!
📚 In This Guide
- What you need
- Instructions
- Tips and common mistakes
- Wrapping up and next steps
What you need
- ● Garden gloves – A pair (nitrile or leather for durability)
- ● Hand trowel or small spade – For digging and dividing bulbs
- ● Pruning shears or sharp scissors – To trim faded foliage
- ● Garden fork or bulb fork – Helps loosen soil around bulbs without damaging them
- ● 5-gallon bucket or wheelbarrow – For collecting dug-up bulbs and soil
- ● Balanced, all-purpose fertilizer – 10-10-10 or similar (follow package instructions)
- ○ Compost or well-aged manure – 2-3 gallons (optional but highly recommended for nutrient boost)
- ● New planting location (if relocating) – Well-draining soil, partial shade, and space for bulb clusters
- ● Bulb fertilizer (high in phosphorus) – For replanting (e.g., 5-10-10)
- ● Mulch (straw or shredded bark) – To protect bulbs in winter
- ● Soil moisture meter – Ensures bulbs aren’t over- or under-watered
- ● Disinfectant spray (10% bleach solution) – To clean tools and prevent disease
- ● Plant labels or markers – If replanting in a mixed garden
Step-by-Step instructions for reviving and replanting hyacinth bulbs
Here’s how to nurse your spent hyacinths back to strength for another stunning spring display.
🌱 Step 1: Wait Until Foliage Fully Yellows and Dies Back
After blooms fade, leave the foliage alone—it’s feeding the bulb for next year. Wait until the leaves turn completely yellow and wither naturally, which usually takes 6-8 weeks after flowering. This ensures the bulb stores enough energy for next season’s growth.
If you cut back foliage too soon, the bulb won’t replenish its reserves. You’ll know it’s ready when you can gently tug a leaf and it pulls away easily. This is your signal to dig up the bulbs.
✂️ Step 2: Dig Up Bulbs Carefully and Cure Them
Use a garden fork to loosen the soil around the bulb, then lift it out. Shake off excess dirt and inspect for soft spots or mold—discard any damaged bulbs. Healthy bulbs should feel firm and dry to the touch.
Place the bulbs in a dry, shaded spot for 1-2 weeks to cure. This drying process helps prevent rot when stored. Avoid direct sunlight, which can overheat the bulbs. Store them in a paper bag or mesh container for airflow.
🪴 Step 3: Store Bulbs in a Cool, Dry Place Over Summer
Keep the cured bulbs in a cool, dark place with temperatures between 60-70°F and good airflow. A basement, garage, or even a mesh bag hung in a shed works well. Avoid plastic containers—they trap moisture and encourage rot.
Check the bulbs monthly for signs of mold or softness. If you notice any, remove the affected bulb immediately. By late summer or early fall, you’ll see new shoots emerging—this is your cue to replant.
☀️ Step 4: Replant Bulbs in Well-Draining Soil
Choose a sunny spot with at least 6 hours of direct sunlight daily. Dig a hole 6 inches deep—about 3 times the bulb’s height—and mix in a handful of compost for nutrients. Space bulbs 4-6 inches apart to allow room for growth.
Place the bulb in the hole with the pointed end facing up. Cover it with soil and water lightly to settle it in. Avoid overwatering, as soggy soil can cause rot. Mulch with 2 inches of organic matter to retain moisture and regulate soil temperature.
💧 Step 5: Water and Fertilize for Next Year’s Blooms
After replanting, water the bulbs once a week unless rainfall provides moisture. Once new shoots appear in early spring, increase watering to every 5-7 days. Use a balanced fertilizer (like 10-10-10) in early fall to encourage root growth.
By following these steps, your hyacinths will return stronger and more vibrant next spring. The key is patience—letting the foliage die back naturally and storing bulbs properly sets the stage for spectacular blooms.
Tips & tricks for reviving hyacinth bulbs
Patience and attention to detail are everything when it comes to bringing back your hyacinths—here's how to avoid the most common pitfalls and ensure those vibrant blooms return next year.
Timing is Everything: Those 6-8 weeks of letting foliage die back naturally are non-negotiable. I learned this the hard way after cutting back too soon and getting weak, sparse blooms the following spring. Think of it like a plant's winter prep—it needs that time to store energy. If you're impatient, mark your calendar 6 weeks after the last bloom fades as your deadline for digging.
The Cure is Critical: That 1-2 week curing period in Step 2 isn't just about drying—it's about hardening the bulbs. I've seen bulbs develop mold during storage because they weren't fully cured. Place them in a spot with good airflow (like a mesh bag) and check daily. If you notice any soft spots, isolate that bulb immediately—it's better to lose one than risk losing them all.
Storage Secrets: The 60-70°F temperature range is your sweet spot, but don't overlook humidity control. I store mine in an old sock hung in my garage—it breathes better than plastic and keeps out pests. If your storage area gets damp, add a silica gel packet to absorb excess moisture. And remember: monthly checks are your friend. A little prevention now saves hours of troubleshooting later.
Replanting Right: When you're digging those 6-inch deep holes in Step 4, take a moment to loosen the soil at the bottom with your fork. Compacted soil can strangle new roots. Also, if your soil drains poorly, mix in some perlite or coarse sand with that compost—hyacinths hate soggy feet. The 4-6 inch spacing gives roots room to establish before next spring's growth spurt.
Pro Tips for Hyacinth After Bloom
- Patience and attention to detail are everything when it comes to bringing back your hyacinths—here's how to avoid the most common pitfalls and ensure those vibrant blooms return next year.
- Timing is Everything: Those 6-8 weeks of letting foliage die back naturally are non-negotiable.
- The Cure is Critical: That 1-2 week curing period in Step 2 isn't just about drying—it's about hardening the bulbs.
Frequently asked questions
Got questions about what to do with your hyacinths after they’ve bloomed? You’re not alone! Here are some of the most common concerns—and straightforward answers—to help you keep your garden thriving.
What should I do with hyacinth bulbs after the flowers fade?
Once blooming ends, leave the foliage intact for 6–8 weeks to photosynthesize and store energy for next year. Only trim dead flower stalks (not the leaves) to keep the bulb strong. If your climate freezes, dig up bulbs after foliage yellows and store them in a dry, cool place until replanting in fall.
Can I replant hyacinth bulbs in the same spot every year?
While hyacinths can return to the same spot, rotating them every 2–3 years prevents soil depletion and reduces pests/diseases. Choose a well-draining location with partial sun (6 hours/day) and amend the soil with compost for best results.
Why did my hyacinths bloom poorly this year?
Poor blooming often stems from overwatering, lack of sunlight, or improper bulb storage. Ensure bulbs get full sun to partial shade, water moderately (not soggy), and fertilize lightly in early spring. If stored improperly (too warm/humid), bulbs may not rebloom—aim for 40–50°F (4–10°C) during dormancy.
What can I plant near hyacinths for year-round color?
Pair hyacinths with spring ephemerals like crocuses or tulips, or perennials like daffodils or ferns for layered interest. Avoid competitive plants (e.g., aggressive grasses) that steal nutrients. For containers, mix hyacinths with heuchera or ajuga for contrast.
Are hyacinth bulbs toxic to pets or kids?
Yes! All parts of hyacinths contain oxalates and alkaloids, which can cause mouth irritation, vomiting, or drooling if ingested. Keep them out of reach of curious pets and children. Wear gloves when handling bulbs and wash hands afterward.
Pro Tip:
Label your hyacinth bulbs with planting dates to track their age—older bulbs (5+ years) may bloom less reliably. Divide clumps every few years to rejuvenate growth!
Wrapping up and next steps
Caring for your hyacinths after bloom doesn’t have to be complicated—just a little patience and love! By following these steps, you’ll not only extend their life this season but also set the stage for a stunning comeback next year.
Remember, even dormant bulbs are working hard underground, storing energy for future blooms.
Now that you’re armed with the know-how, roll up your sleeves and get gardening! 🌱 Whether you’re repotting, dividing, or simply giving your bulbs a well-deserved rest, every small effort counts. Happy gardening—and may your next spring be even more vibrant!