
Pruning
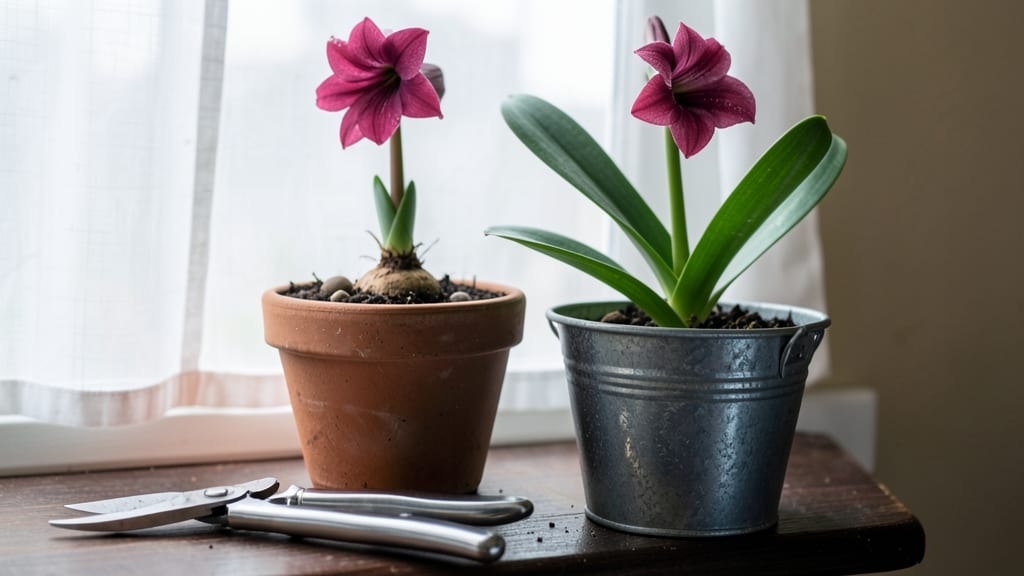
Trimming amaryllis blooms at the right time turns one-season showstoppers into multi-year stars. ✨ The secret lies in cutting stems just above the bulb—no more, no less—while the plant still has energy stored for next year’s growth.
I’ve turned my single-bloom amaryllis into a reliable rebloomer using this exact method, and the difference is night-and-day.
You’ll need only three things: sharp pruners (to avoid crushing stems), a clean cutting surface, and a little patience. The best time to trim is 2-3 weeks after blooms fade, when foliage starts yellowing but hasn’t fully collapsed.
This gives the bulb time to absorb nutrients before dormancy. Over-trimming too soon robs the plant of its energy reserves—something I learned the hard way after my first amaryllis refused to rebloom.
What you’ll get is a healthier bulb that stores more energy for next spring’s blooms, often producing 2-3 stems instead of one. The foliage stays lush longer, and the bulb grows stronger each year.
Just avoid cutting too close to the bulb (leave ½ inch) or you’ll risk rot. The key is balance—trim just enough to encourage reblooming without weakening the plant.
This method works for indoor and greenhouse amaryllis alike, though outdoor varieties may need slight adjustments for seasonal timing. Once you master it, you’ll never treat amaryllis as a one-and-done plant again—just a reliable spring (or holiday) showstopper year after year.
📚 In This Guide
- What you need
- Instructions
- Tips and common mistakes
- Wrapping up and next steps
What you need
- ● Clean, sharp pruning shears or scissors – Choose bypass pruners (for stems) or small garden scissors (for flower removal). Disinfect with rubbing alcohol before use!
- ● Rubbing alcohol (70% isopropyl) or hydrogen peroxide – 1-2 tablespoons for sterilizing tools between cuts (prevents bacterial spread).
- ○ Glove (optional but recommended) – A pair of lightweight gardening gloves to protect your hands from sap or sharp edges.
- ● Trash bag or compost bin – For disposing of trimmed blooms and foliage.
- ○ Water spray bottle (optional) – A small spray bottle with water to mist cuts if needed (helps reduce stress on the plant).
- ● Floral preservative (for cut blooms) – If you’re saving blooms in a vase, use a commercial floral preservative or DIY mix (sugar + bleach + water) to extend their life.
- ● Sharp pencil or marker – To label stems if you’re experimenting with different trimming techniques for future reference!
- ● Plant food or fertilizer (balanced, 10-10-10) – A small amount (½ tsp per gallon of water) to give your amaryllis a post-pruning boost after trimming.
- ● Newspaper or tray – Place underneath to catch fallen petals or sap for easy cleanup.
Step-by-Step instructions for trimming amaryllis blooms
Here's how to extend your amaryllis's lifespan while ensuring next season's blooms outshine this year's.
✂️ Step 1: Wait Until Flowers Fully Fade
Never trim amaryllis blooms until they've completely faded and the flower stalk begins to yellow or brown. This signals the plant has redirected nutrients from the blooms back to the bulb for storage. I check daily during peak bloom—wait until all buds have opened and the stems feel dry when touched.
Cutting too early robs the bulb of stored energy it needs for next year's growth. You'll know it's time when the entire flower stalk turns papery and brittle. Use clean, sharp pruners or scissors to avoid crushing the stem, which can introduce rot.
🌱 Step 2: Trim Stems at the Base
Make your cut about ½ inch above the bulb where the stem meets the foliage. This small stub allows the plant to heal cleanly and prevents water from pooling against the bulb during future waterings. I angle my cuts slightly to create a natural drainage path.
Remove all flower stalks completely—never leave stubs. The plant won't regrow blooms from partial stems, and leftover tissue can harbor fungal spores. After trimming, wipe the bulb's neck with a damp cloth to remove any residual sap that could attract pests.
☀️ Step 3: Adjust Light and Water for Recovery
Move your amaryllis to bright, indirect light immediately after trimming. South or west-facing windows work best, but avoid harsh midday sun that can scorch newly stressed foliage. You'll see the leaves perk up within 3-5 days as the plant focuses energy on regrowing.
Reduce watering to every 7-10 days until new growth appears. Let the top 2 inches of soil dry completely between waterings—overwatering after blooming causes bulb rot. Fertilize lightly with a balanced 10-10-10 solution diluted to half strength to support recovery without overwhelming the plant.
⏰ Step 4: Monitor Foliage for 6-8 Weeks
Let the foliage remain attached for 6-8 weeks after blooming to maximize bulb storage. You'll notice leaves yellowing naturally as the plant prepares for dormancy. Never remove healthy green leaves—they're photosynthesizing to build next year's blooms.
When about ⅓ of the leaves turn yellow, you can begin reducing water gradually. By the time all leaves brown, withhold water completely and store the bulb in a dry, dark place at 60-65°F for 8-10 weeks before restarting the cycle. This dormancy period is critical for robust regrowth.
Tips & tricks for perfect amaryllis bloom trimming
Here's what nobody tells you about maximizing your amaryllis's potential after the blooms fade.
Visual Cues for Timing: In Step 1, watch for the flower stalk to develop a papery texture—it should feel dry and brittle when you gently squeeze it. The buds should all be fully open and show no remaining color. I've learned the hard way that waiting until the stalk turns completely brown ensures the bulb stores enough energy for next year's spectacular display.
Precision Cutting Technique: When making your cut in Step 2, use a clean, sharp tool to avoid crushing the stem. The ½-inch stub above the bulb is crucial—it creates a natural drainage path while allowing the plant to heal properly. I angle my cuts slightly to prevent water from pooling against the bulb during future waterings, which could lead to rot.
Light and Water Recovery Strategy: After trimming, move your amaryllis to bright, indirect light immediately. You'll notice the leaves perk up within 3-5 days as the plant redirects its energy. The key is patience—reduce watering to every 7-10 days and let the top 2 inches of soil dry completely between waterings. Overwatering at this stage is the #1 mistake that causes bulb rot.
Foliage Monitoring Secret: During the 6-8 week recovery period in Step 4, resist the urge to remove yellowing leaves prematurely. Wait until about ⅓ of the leaves have turned yellow before gradually reducing water. The remaining green leaves are photosynthesizing to build next year's blooms—don't cut them off too soon! I've seen amaryllis plants produce twice as many blooms the following year when I follow this exact timing.
Pro Tips for Trim Amaryllis Blooms
- Here's what nobody tells you about maximizing your amaryllis's potential after the blooms fade.
- Visual Cues for Timing: In Step 1, watch for the flower stalk to develop a papery texture—it should feel dry and brittle when you gently squeeze it.
- Precision Cutting Technique: When making your cut in Step 2, use a clean, sharp tool to avoid crushing the stem.
Frequently asked questions
Got questions about trimming your amaryllis blooms? You’re not alone! Here are answers to the most common queries—so you can keep your plant thriving and blooming beautifully for years to come.
When is the best time to trim amaryllis blooms?
Trim faded blooms after they’ve fully wilted and turned brown. This usually happens 2–4 weeks after flowering. Cut the stem 1–2 inches above the bulb to redirect energy back to the bulb for next year’s growth. Avoid trimming too early—let the flower complete its natural cycle!
Should I cut the entire stem or just the faded blooms?
You have two options: partial trimming (cutting only the spent blooms) or full stem removal (cutting the entire stem at the base). Partial trimming works if you want to preserve the stem’s aesthetic, but full removal is best if you prioritize bulb strength for future blooms. Most gardeners opt for full removal for healthier regrowth.
Will trimming my amaryllis blooms affect next year’s flowers?
Yes—but in a good way! Proper trimming boosts next year’s blooms by preventing the plant from wasting energy on dead flowers. The key is timing: trim after blooms fade, not before. With the right care, your amaryllis will reward you with even bigger, brighter flowers the following season!
What if my amaryllis stem turns yellow or mushy after trimming?
Yellowing or mushiness signals rot or overwatering. If this happens, reduce watering immediately and ensure the bulb isn’t sitting in soggy soil. Let the soil dry out between waterings, and avoid trimming too close to the bulb—always leave at least 1–2 inches of stem. If rot spreads, you may need to remove the affected stem entirely.
Can I save the cut blooms for arrangements or drying?
Amaryllis blooms make stunning long-lasting cut flowers. Trim stems at an angle, place them in water, and change the water every 2–3 days. For drying, hang blooms upside down in a dark, dry place for 2–3 weeks. Just avoid trimming too late—they’ll last longer if cut when fully open but not yet wilted.
Wrapping up and next steps
Trimming your amaryllis blooms isn’t just about keeping your plant tidy—it’s the secret to longer stems and even more stunning flowers next season! 🌸 By following the right techniques, you’ll encourage stronger growth and extend the life of your blooms.
Now that you’re armed with the know-how, grab those shears and get pruning—your future floral masterpiece starts with this simple step!
Ready to level up your amaryllis care? Next, explore how to repot and fertilize for a thriving plant that keeps gifting you breathtaking blooms year after year!