
Blooming
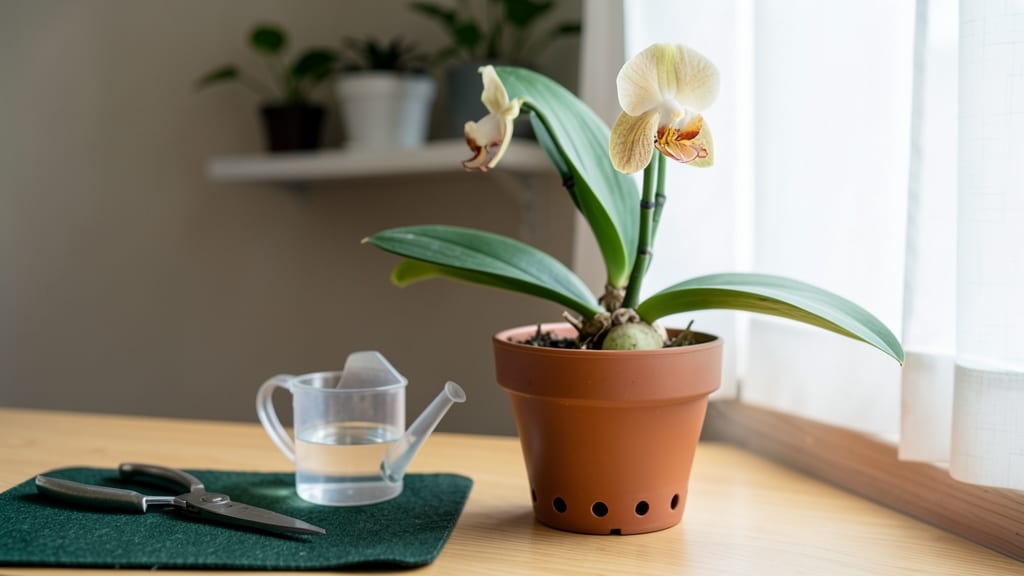
Here’s how to take care of your orchid after blooming—it’s not just about trimming the spent flowers, but giving it the right signals to rebloom. 🌸 I’ve watched my Phalaenopsis go from wilted stems to fresh buds by following these exact steps, and the secret lies in what you don’t do (like overwatering or moving it around).
The moment the last bloom wilts, stop deadheading—leave the dried stem intact. This isn’t neglect; it’s how orchids store energy for next season. Instead, focus on bright, indirect light (no direct sun) and fertilizer shifts—switch to a low-nitrogen blend every 4-6 weeks to encourage new growth, not leaves.
Within 8-12 weeks, you’ll see plump pseudobulbs and new shoots. The rebloom trigger isn’t magic—it’s consistent light, cooler nights (55-65°F), and patience. My plants now bloom twice a year, and the first sign is always a tiny green spike where the old stem met the plant.
This works for Phalaenopsis, Cattleyas, and even Dendrobiums—just adjust light and water slightly. Let’s get your orchid ready for its next showstopper display.
📚 In This Guide
- What you need
- Instructions
- Tips and common mistakes
- Wrapping up and next steps
What you need
- ● Pruning shears or clean, sharp scissors – Sterilized with rubbing alcohol (to prevent disease).
- ● Well-draining orchid potting mix – Specifically formulated for epiphytic orchids (e.g., bark, sphagnum moss, charcoal blend).
- ● New orchid pot – Slightly larger than the current one (1–2 inches wider) with drainage holes.
- ● Balanced orchid fertilizer – Diluted to half-strength (20-20-20 or 10-10-10 NPK ratio).
- ● Distilled or rainwater – Avoid tap water with high chlorine/fluoride content.
- ○ Spray bottle – For misting leaves (optional but helpful for humidity).
- ● Grow lights (LED or fluorescent) – If your orchid lacks natural sunlight (12–14 hours/day).
- ● Humidity tray or pebble tray – For maintaining 40–70% humidity.
- ● Orchid-specific repotting hook or gloves – For easier handling of roots and mix.
- ● Calcium nitrate or bloom booster – To encourage future flowering (apply every 2–3 months).
How to care for orchids after blooming to encourage reblooming
Here’s how I keep my orchids thriving year after year—no deadheading drama or guesswork.
🌱 Step 1: Let the Flower Spike Rest Before Cutting
After blooms fade, resist the urge to snip the flower spike immediately. Instead, let it rest for 4-6 weeks—this mimics natural dormancy. You’ll know it’s ready when the spike turns yellow or brown and feels dry to the touch. This pause signals the orchid to redirect energy to roots and foliage, not another bloom.
I place my orchids near a bright window (but not direct sun) during this time. The key is patience—rushing to cut too soon stresses the plant and delays reblooming. If you’re unsure, wait until 90% of the spike is brown before acting.
✂️ Step 2: Prune the Spike at the Right Spot
Once the spike is fully dormant, cut it 1 inch above a visible node (the small bump where leaves or roots grow). This node holds dormant buds that can sprout new growth. I use clean, sharp scissors to avoid tearing the plant tissue—dull blades crush stems and invite rot.
Don’t cut too close to the base or you risk damaging the orchid’s growth point. If the spike is thick, you can also trim it down to 3-4 inches from the base, leaving multiple nodes. This increases the odds of a new bloom or even a baby orchid (called a keiki) forming.
☀️ Step 3: Adjust Light and Water for Recovery
After pruning, move your orchid to bright, indirect light—think morning sun or a sheer curtain filter. Too much direct sun now can scorch new growth, while too little light delays reblooming. You’ll see healthy leaves as a sign it’s getting the right balance: deep green without yellowing or pale patches.
Reduce watering slightly during this phase. Let the top 1-2 inches of mix dry out between waterings. Overwatering now causes root rot, which kills the plant before it can rebloom. I use room-temperature water and avoid letting the pot sit in saucers—orchids hate soggy feet.
💧 Step 4: Feed and Encourage New Growth
Start fertilizing again after 4-6 weeks of rest, using a balanced orchid fertilizer (like 20-20-20) diluted to half strength. I feed every 2 weeks during active growth (spring and summer) to build strength. Look for new roots or shoots as your cue—these mean the orchid is storing energy for another bloom cycle.
If your orchid isn’t showing signs of new growth after 8 weeks, it may need more light or a stronger fertilizer. I’ve found that a monthly dose of phosphorus-heavy fertilizer (like 10-30-20) in late summer gives a big boost for fall reblooming.
⏰ Step 5: Time Temperature and Humidity for Reblooming
Orchids typically rebloom in fall or winter, so adjust care to match their natural rhythm. Keep daytime temps between 65-75°F and nights slightly cooler (55-65°F). This temperature shift mimics seasonal changes and triggers flower buds.
Maintain 50-70% humidity—a pebble tray or humidifier helps if your home is dry. Mist leaves lightly in the morning to prevent fungal issues. Watch for tiny bumps forming on the spike or at the base of the plant—these are your first signs of new blooms 3-5 months out.
Tips & tricks for orchid post-bloom care
These little details make all the difference between an orchid that fades away and one that thrives for years.
Patience Pays Off: That 4-6 week rest period in Step 1 is non-negotiable. I've seen orchids bloom again just 2 months after proper resting—skipping this step often means waiting a full year for reblooms. The key is watching for that 90% brown spike color rather than guessing by time. If you're impatient, try marking the day you notice 50% browning to track progress.
Pruning Precision: When you're ready to cut in Step 2, look for nodes that look like tiny bumps or eyes along the spike. These are your growth points—cutting 1 inch above them gives your orchid the best chance to regenerate. I've had success leaving 3-4 inches of spike when there are multiple nodes, which sometimes produces both new blooms and keiki (baby orchids) from the same cut.
Light Balance: Bright indirect light in Step 3 means placing your orchid where it gets morning sun or filtered afternoon light. I test by holding my hand near the plant—if I can feel warmth but not direct rays, it's in the right spot. Yellowing leaves mean too much sun, while pale leaves signal insufficient light. A simple trick is rotating the pot weekly so all sides get even exposure.
Fertilizer Strategy: The 2-week feeding schedule in Step 4 works best when you see new roots forming. I switch to a phosphorus-heavy fertilizer (like 10-30-20) in late summer because phosphorus specifically encourages blooming. Always dilute to half strength—orchids are sensitive to fertilizer burn, and overfeeding can actually prevent reblooming.
Pro Tips for Take Care Orchid After Blooming
- These little details make all the difference between an orchid that fades away and one that thrives for years.
- Patience Pays Off: That 4-6 week rest period in Step 1 is non-negotiable.
- Pruning Precision: When you're ready to cut in Step 2, look for nodes that look like tiny bumps or eyes along the spike.
Frequently asked questions
Got questions about post-bloom orchid care?
You’re not alone! Here are answers to the most common concerns—so you can keep your orchid thriving and ready for its next stunning show.
Do I need to cut off the spent blooms?
Not always! If the flower spike (stem) is green and healthy, leave it—it may rebloom. Only trim brown, mushy, or dried-out spikes (cut 1–2 inches above a node). This avoids stress and encourages new growth. Pro tip: Wait until the spike fully browns before cutting to avoid accidentally removing future blooms.
How long does it take for an orchid to rebloom?
Reblooming timing varies! Most orchids (like Phalaenopsis) take 3–6 months after blooming to produce new flowers, while others (e.g., Cattleyas) may rebloom in 6–12 months. Patience is key—focus on consistent care (light, water, and fertilizer) to speed up the process. Fun fact: Cooler nights (55–60°F) can trigger reblooming in some varieties!
Should I change my watering routine after blooming?
Keep your watering consistent but not excessive. Orchids still need 1–2 waterings per week (let the roots dry slightly between sessions). Avoid soggy pots—root rot is a silent killer! Watch for: Yellow leaves (overwatering) or wrinkled pseudobulbs (underwatering). Adjust based on your home’s humidity and light.
What if my orchid isn’t reblooming?
Don’t panic! Common culprits include:
- Low light: Move to bright, indirect light (east/west windows are ideal).
- Poor nutrition: Switch to a balanced orchid fertilizer (20-20-20) every 2–4 weeks.
- Temperature stress: Orchids thrive in 60–80°F days and 50–60°F nights.
- Dormancy: Some orchids (like Oncidiums) need a rest period—reduce watering and fertilizer temporarily.
Can I force an orchid to rebloom sooner?
While you can’t rush nature, you can nudge your orchid with these tricks:
- Move it to a cooler spot (55–60°F nights) for 2–4 weeks.
- Use a phosphorus-rich fertilizer (e.g., 10-30-20) to boost blooming.
- Trim old spikes just above a node—new blooms may sprout from there!
Wrapping up and next steps
Taking care of your orchid after blooming doesn’t have to be stressful—it’s all about patience, observation, and simple adjustments! 🌱 By following these steps—like trimming spent spikes, adjusting light and water, and feeding your plant—you’ll set the stage for stunning reblooms.
Remember, orchids thrive on routine, so trust the process and enjoy the journey of nurturing your green companion.
Ready to orchestrate another beautiful bloom? Start by marking your calendar for the next care check-in—your orchid’s next showstopper is just around the corner! 🌸