
Blooming
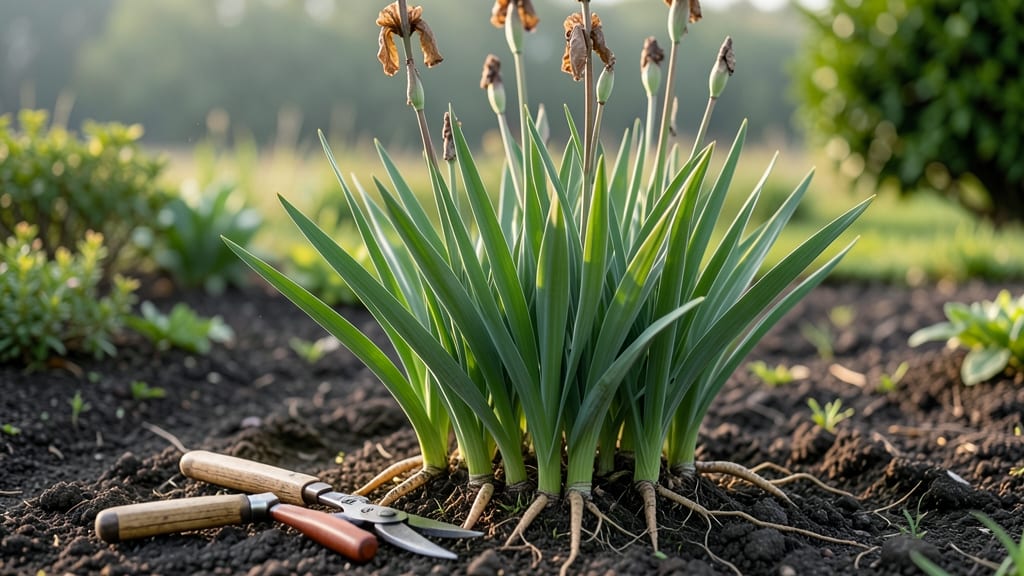
Here’s how to take care of irises after they bloom—because those stunning blooms fading is just the start of the magic: cutting back, feeding, and prepping your plants for next year’s even bigger show. 🌸 I’ve learned the hard way that skipping this step means fewer blooms and weaker rhizomes, but... the right aftercare transforms your garden from good to showstopping.
The first step is deadheading—snip off those spent flower stalks at the base, but leave the fan-shaped leaves untouched. They’re the powerhouses that feed next year’s blooms. Then, add a balanced fertilizer in late summer to give roots a boost before winter.
Most people stop here, but the real secret is watching for pests like iris borers and dividing clumps every 3–4 years to keep plants vigorous. By fall, your irises will be storing energy for spring, with stronger roots and more buds ready to burst into color.
The difference between a thriving patch and a struggling one comes down to these simple but critical steps—no fancy tools or complicated science, just timing and attention. This works for both bearded and Siberian irises, in full sun or partial shade. Let’s get those rhizomes ready for their next performance!
📚 In This Guide
- What you need
- Instructions
- Tips and common mistakes
- Wrapping up and next steps
What you need
- ● Pruning shears or sharp garden scissors – Clean, sterilized tools (1 pair) to avoid spreading disease.
- ● Gloves – Heavy-duty gardening gloves (1 pair) to protect your hands from thorns.
- ● Balanced, slow-release fertilizer – 10-10-10 or similar (1-2 lbs per 10 sq ft of garden bed).
- ● Compost or well-aged manure – 2-3 inches to enrich the soil.
- ○ Mulch (optional but helpful) – Straw, wood chips, or shredded leaves (1-2 inches) to retain moisture.
- ● Watering can or hose with a gentle spray nozzle – For deep but controlled watering.
- ● Staking material (if needed) – Bamboo stakes or twine for tall or floppy varieties.
- ● Epsom salt – 1 tablespoon per plant (for magnesium boost).
- ● Fungicide spray – Preventative treatment if your area is prone to iris borers.
- ● Soil test kit – To check pH (ideal: 6.0-7.0) before fertilizing.
- ○ Pruning paint (optional) – For sealing cuts on larger stems (not always necessary).
Step-by-Step instructions for post-bloom iris care
Here's how I keep my irises thriving year after year—no guesswork, just proven steps.
✂️ Step 1: Cut Back Faded Blooms and Seed Pods
Wait until the flower stalks turn completely brown before cutting them back. This ensures the plant has finished its energy transfer from blooms to roots. Use clean, sharp pruners to snip the stalks 1-2 inches above the ground—never pull them by hand, which can damage the rhizomes.
Remove any seed pods that form after blooming unless you're intentionally propagating. These pods drain energy that could go toward next season's growth. I like to pinch them off with my fingers when they're still small—it's a quick job that keeps my irises strong.
💧 Step 2: Water Deeply and Reduce Frequency
Give your irises a deep watering right after cutting back to help them recover. Then, reduce watering to every 2-3 weeks unless your area experiences extreme heat or drought. Irises are drought-tolerant once established, so overwatering is more dangerous than underwatering.
Check the soil 2 inches down—if it's damp, wait before watering. The goal is to encourage deep root growth rather than shallow, weak roots that depend on frequent moisture. This is where many gardeners go wrong—they keep watering like it's spring, but irises need to rest.
☀️ Step 3: Apply a Slow-Release Fertilizer
Feed your irises with a balanced, slow-release fertilizer (like 10-10-10) in early fall or late summer. Sprinkle the granules 6 inches away from the rhizomes and water lightly to activate them. This timing gives the plant time to absorb nutrients before winter dormancy.
I avoid high-nitrogen fertilizers after blooming—they promote leafy growth at the expense of next year's flowers. Instead, focus on phosphorus and potassium to strengthen roots and flower buds. A light top-dressing of compost also works well if you prefer organic options.
🌱 Step 4: Divide Crowded Clumps in Late Summer
Check your irises for overcrowding in late July or August. Dig up clumps where the rhizomes feel crowded or the center leaves turn yellow. Gently separate the rhizomes with your hands, ensuring each section has at least one fan of leaves and a healthy root system.
Replant the divisions immediately at the same depth they were growing, with the tops exposed to sunlight. Water well after replanting. This is the best time to divide because the plants are actively growing but haven't yet entered dormancy. I always mark new plantings with small stakes to remember where they are.
⏰ Step 5: Mulch and Prepare for Winter
Apply a 2-inch layer of mulch around the base of your irises in late fall, keeping it 6 inches away from the rhizomes. Use organic mulch like straw or shredded leaves—it insulates the soil while allowing moisture to penetrate. This protects the rhizomes from freezing temperatures and prevents heaving during freeze-thaw cycles.
Leave the foliage intact until it turns completely brown in early spring. The old leaves provide insulation and photosynthesize even after blooming, sending nutrients back to the rhizomes. Only cut back the dead foliage in late winter when new growth begins.
Tips & tricks for perfect post-bloom iris care
Here's what nobody tells you about keeping irises thriving after their big show—these little details make all the difference.
Timing is Everything: The moment your irises finish blooming, their energy shifts from flowers to roots. That's why waiting until flower stalks turn completely brown before cutting them back is crucial—it lets the plant complete its natural cycle. I've seen gardeners cut too early, and those plants never bounce back like they should. Mark your calendar for late July or August when dividing clumps, as this aligns perfectly with their natural growth cycle before dormancy.
The Right Tools Matter: Using clean, sharp pruners for Step 1 makes all the difference. Dull blades crush stems and can introduce disease. I keep a dedicated pair of pruners just for irises and sterilize them between uses with rubbing alcohol. For seed pods, your fingers work perfectly—just pinch them off when they're small to avoid creating wounds that attract pests. This simple habit has kept my irises healthier than ever.
Soil Check is Non-Negotiable: Before watering, always check soil moisture 2 inches down. I've made the mistake of watering when the soil was already damp, and that's when root rot starts. Irises are tough once established, but they need that rest period. Use a soil probe or just stick your finger in—the test takes seconds and prevents costly mistakes. In hot climates, you might need to water every 2 weeks instead of the standard 3-week schedule.
Fertilizer Placement Secret: When applying that balanced 10-10-10 fertilizer in Step 3, keep it 6 inches away from the rhizomes. I learned this the hard way when I fertilized too close—it burned the tender roots. The granules should be sprinkled around the perimeter of the planting area, not directly on top. This creates a nutrient zone that encourages strong root development without harming the plant.
Pro Tips for Take Care Of Irises After They Bloom
- Here's what nobody tells you about keeping irises thriving after their big show—these little details make all the difference.
- Timing is Everything: The moment your irises finish blooming, their energy shifts from flowers to roots.
- The Right Tools Matter: Using clean, sharp pruners for Step 1 makes all the difference.
Frequently asked questions
Got questions about keeping your irises thriving after their big bloom? You’re not alone! Here are some of the most common queries—and their straightforward answers—to help you master post-bloom iris care.
Do I need to cut back irises after they bloom?
Yes! Always trim spent blooms (but leave the leaves!) to redirect energy to next year’s growth. Snip the flower stalks at the base once they turn brown—this prevents seed production and keeps your irises focused on leaf development. Pro tip: Use clean, sharp shears to avoid spreading disease.
When is the best time to fertilize irises after blooming?
Wait until late summer or early fall (6–8 weeks after blooming) to fertilize. Irises need time to recover, and feeding too soon can encourage weak growth. Use a balanced, low-nitrogen fertilizer (like 5-10-10) or a phosphorus-heavy blend to boost root and bulb strength for spring. Pro tip: Avoid high-nitrogen fertilizers—they promote leafy growth at the expense of blooms!
Why are my iris leaves turning yellow after blooming?
Yellowing leaves are often normal as irises rest, but if it’s widespread or paired with wilting, check for overwatering, root rot, or pests. Troubleshoot:
- Reduce watering if soil stays soggy.
- Inspect for iris borers (tiny holes in leaves).
- Divide crowded clumps if needed—irises thrive with space!
If only the outer leaves yellow, it’s likely natural senescence. Pro tip: Never remove healthy green leaves—they feed the rhizomes!
Can I divide my irises right after they bloom?
No, wait until late summer or early fall (after leaves yellow but before frost). Dividing too soon stresses the plant. If you must act now, just trim dead blooms and monitor leaves—hold off on digging until the rhizomes have recharged. Pro tip: Mark your calendar! Irises divided in spring often fail to bloom that year.
How much water do irises need after blooming?
Irises are drought-tolerant once established—water deeply but infrequently (every 2–3 weeks unless it’s a heatwave). Overwatering leads to rot, while underwatering can stress rhizomes. Pro tip: Mulch lightly (1–2 inches) with gravel or bark to retain moisture without suffocating roots.
What’s the best way to revive irises that aren’t blooming?
Bloom failures often stem from old rhizomes, poor nutrition, or shade. Try this:
- Divide clumps every 3–4 years to rejuvenate growth.
- Ensure they get 6+ hours of sun daily.
- Feed with phosphorus-rich fertilizer in fall.
- Check for pests (like iris borers) or fungal issues.
Pro tip: Some varieties bloom later—don’t panic if your irises lag behind neighbors!
Wrapping up and next steps
Taking care of your irises after they bloom doesn’t have to be complicated—just follow a few simple steps to keep them thriving! By cutting back spent blooms, fertilizing wisely, and preparing the soil for next season, you’ll set the stage for even more stunning flowers.
With a little patience and care, your irises will reward you with vibrant blooms year after year.
Now that you’re armed with the know-how, go ahead and give your irises the love they deserve! Grab your gardening tools, roll up your sleeves, and enjoy the satisfaction of nurturing these showstopping plants. Happy gardening! 🌸✨